Description
About This Video
Transcript
Read Full Transcript
(waves splashing) Hi. Welcome. My friend Tina is here to be a model for some practices that we can do during an active back spasm. With back spasms, it's very important to be mindful that you don't wanna overdo the movement. The tendency is to not move at all.
To really guard against any movement. In most cases, in many cases, it's important to have a little bit of movement, so when we get down to the ground, some of the movements that you'll see will be very small and you can do them even smaller and even gentler. As much movement as possible without causing sharp pain. With back spasm, it's important to have some tools that you can use that aren't right in the area of the back. Sometimes, the back spasm is so intense and the pain is so sharp that doing anything in the back is too much.
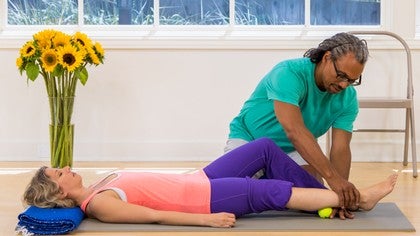
We'll do a few points on the feet and a few points in the calf that are really effective in relieving back pain. For the first part, I'm using a super ball, and you can get these at the grocery store in the little machines you put a quarter in. You can find those there or at toy stores. You can also use a tennis ball, but this, or even a golf ball, but this is gonna work really nicely. Would you straighten your right leg out?
I'm just gonna show you the area that we're gonna be placing the ball in. Just in front of the heel bone and towards the big toe side of the foot. This whole area here is associated with the low back. I'm gonna bring the ball down, and would you place your right foot, the ball right in that area? Exactly.
And then shift a little weight into the ball until you feel kind of a good achiness. Not so much sensation in the point that it makes you hold your breath or clench your jaw or use the muscles in between your eyebrows, but enough to have a good achy sensation. Then, let the ball melt into the foot, let the foot melt onto the ball. Great. With this sensation, you can stay here for about five to 10 breaths.
You can stay here quite, quite a while. While you have the pressure in the ball, you can also bring your breath into the area of your low back. That's one great thing for back pain. One movement that you can almost always do is to gift the area of pain with your breath, with your awareness, with your intention, and with the energy that comes with the breath and your intention. Then, shifting the weight off the ball, move the ball just a little tiny bit.
Get another point right in that neighborhood. It may be a little more towards the big toe side of the foot or a little bit more towards the pinky toe side of the foot. Using the ball the way you'd use a, a massage therapist's thumb. Use it as a tool for breathing, for bringing awareness and helping to relieve this stagnant, this stuck energy in the area of pain in the low back. See if you can let your foot just melt into the ball.
Yep. And releasing the foot from the ball. You could do three to five points on that foot. Let's do a couple of points on the other foot, on the left foot. Again, just in front of the heel.
Finding just the right amount of weight to sink into the ball. If the weight of your leg isn't enough, you could even come forward and rest your elbows on your knees. Yeah, mm-hmm, bringing the weight of the upper body to rest into the leg, down into the foot. But just the good achy sensation. If a little bit of pressure feels really good, the temptation is to think that a lot of pressure is gonna be great, but you can overdo it, so we just want that good achy sensation.
You check that with your breath. Is your breath moving smoothly in and out? Or are you holding your breath? Let the breath move. Let's shift the weight off the ball.
Go ahead and just move your foot a little bit to find a new spot. Since you're the one inside your body, you can probably find that spot, that best spot to apply pressure to. Lean a little weight in. Breathing. Breathing into the low back.
Softening and massaging your low back with breath. (deep breath) Good. And then shifting the weight off the ball. I'm gonna slide the ball out. You can do that on between two and five points on each foot.
The temptation is to think that more is gonna be better, so you would do this 800 times in one day. Just do it once in a day and then maybe some the next day, but not, don't spend all day with your foot on the ball. It's better to underdo it and have your body have a positive response to the pressure and the treatment than to overdo it and have to deal with a bruised foot. For the next part, we can move the chair off to the side. Would you come up to standing or, yeah, that's great, down to the floor.
Then, come onto your back and bring a comfortable head support in. For this next part, you'll also need a ball a little bit bigger than the super ball. A tennis ball works really great for this. We're going to do these points that are really helpful for low back discomfort that are in the center of the calf. Center and back of the calf.
About halfway between the knee and the ankle. I'm gonna bring the ball down to the floor and then straighten the leg out and rest the leg on the ball. So you can see the points a little bit more clearly, I'm gonna roll up the pant leg. Can you lift your leg a little bit, please? Then, bringing the ball about mid-calf.
Finding, exploring, searching for just the right point, just the right area, and letting the leg relax. Sometimes, when people do this, at first, they really focus on lifting the toes and activating, lifting the foot up this way. See if you can just relax the weight of the foot, so that the ball sinks into these points, right about the mid-calf. About five or so breaths on each point, and let's have you reposition and find a new point in that area. It may be rolling the ball towards the inner leg or rolling up or down.
When you find a good spot, let the weight of the leg rest into the ball, the foot relax, toes relax, and breathe. This area of the back of the leg is on the bladder meridian in Chinese medicine, and the bladder meridian, from the little toe, runs up the back of the leg, the back of the thigh, all the way up along the spine, up to the top of the head and then the inside corners of the eyes. This is a really common area to treat for low back pain, low back spasm. That's about five breaths. You can start to bring your right knee towards your chest and the foot flat on the floor.
To do the other side, I'm gonna just go ahead and roll this pant leg up, so you can see. Then, go ahead and straighten the left leg out and bring the ball about mid-calf. You might need to shift your weight a little forward, a little back, to find the special spot in the back of the calf where you get that good achy sensation. When you're in an active spasm, these points can be quite tender. You may use a little bit more pressure than you would use on a day when your back is feeling fantastic.
Take the breath right into the pressure of the ball. Let the breath rinse through that whole back side of your body. Softening from the inside whenever possible. Staying about four or five breaths on each spot. Let's reposition the ball a little bit.
It may be a little lower or a little higher towards the back of the knee. Some deep belly breaths. The deep belly breath also helps to massage the internal organs, which often are in a state of contracture. The muscles in the large and small intestine can get spasmed along with the back spasm, so softening the organs with the breath can help open up and ease the spasm in the low back. Let's do one more shift.
Do you want it lower or higher? Higher. Higher? You can, one way to shift the ball higher and lower is by shifting your hips towards your head to get the ball to roll down towards your feet, or shifting your hips towards your feet to roll the ball up towards your knee. Oh, and you're gonna add more pressure on this side.
That's optional to cross the leg over, cross the other leg over, stacking the ankles to add more pressure. And breathing. Softening. About five breaths. Then, if you crossed the leg over, go ahead and uncross, placing the foot on the floor.
Then, bending the left knee off the ball, off the ball, and placing the left foot on the floor. From here, the pelvic tilting movement can also be really great for releasing the low back. The movements are gonna be much smaller than you would typically do in a yoga class. You're not going for the maximal arching, the maximal tucking, but just a slight rocking of the pelvis. On your inhale, slightly tip the tailbone down.
Engaging the back muscles slightly, on the exhale, slightly engage the abs to get the tailbone to tuck a little bit. Low back will move towards the floor. Maybe very small movement. Maybe too small to even see visibly, but you can feel that gentle rocking, the gentle massaging of the low back. Doing this movement in a pain-free range of motion.
No sharp pain. With each breath, the sacrum moving in a gentle way of arching on the inhale. On the exhale, it's like, "Tuck." One more inhale. Slight arch. And on the exhale, just relax.
For the next movement, I'm gonna have you come off of the yoga mat onto the floor, and this works really great on a wooden floor or tile floor, but we're going to bring a support. Yes, you can bring your head pillow with you. Slide off the mat. And you'll need another blanket or a towel to bring underneath the pelvis. I'm gonna slide this underneath your hips and set it down.
This underneath the pelvis allows the tailbone, allows the pelvis to slide and glide. From here, you're gonna inhale. Your tailbone is pointing straight between your feet, and as you exhale, lifting the right hip just a little bit, and then inhale back to center, and as you exhale, lifting the left hip just a little bit. Now, if the blanket or towel is sliding on the floor, you'll see this very slight side-to-side movement. Again, this movement may be so small that it's not visible when you're doing it when, during an active spasm.
When it's a really active spasm, it can almost feel like you're just thinking about swinging the tailbone side to side. When you think about doing the movement, the muscles engage and then relax. Good. The next time you inhale your way back to center, exhale and stay at center. Just relax.
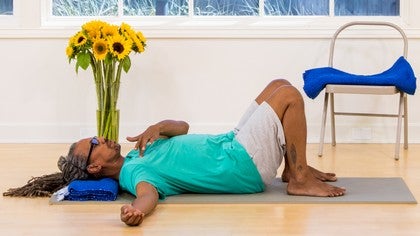
At center here, you can stay in a final relaxation. Usually, when a back is in active spasm, you'll probably feel better with the knees bent. You can even let the inner knees rest in towards each other and turn the heels out a little bit, bringing the legs into constructive rest pose. This can also relieve a lot of tension in the low back. You can stay here 10 minutes, 15 minutes.
And I'm gonna have you slowly roll onto your side. With a spasm, you wanna go really slow, really gentle. Hang out on your side for a few breaths. (deep breath) Ahh. Then, from your side, let your head stay heavy, roll a little forward, press your hands down, roll up your spine one vertebra at a time.
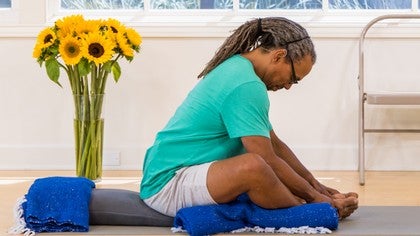
Come up to find a comfortable seated position. (deep breath) I hope that helps relieve your back pain or discomfort. Namaste.
The Happy Back Show: Low, Mid, and Upper Back Relief
Comments
You need to be a subscriber to post a comment.
Please Log In or Create an Account to start your free trial.
