Description
About This Video
Transcript
Read Full Transcript
(crashing waves) Nice to see you again, welcome back. So we'll, again, continue our exploration of twisting, this time, in this episode with a little bit more emphasis on some of the details on the upper body. I'm gonna be using two bricks, I just find them super helpful for allowing me to find more detail without trying to touch the floor, but they're of course not necessary. So we'll being with the shoulders. So squeeze your shoulders up and around the ears, and exhale, let them drop.
Do that again, squeeze your shoulders up and around the ears exhale let them drop, now just start to do that a little faster. Squeeze drop, squeeze drop, squeeze drop, squeeze drop, squeeze and drop. Nice. Reverse, back and up, squeeze and drop. Back and up, (slurping) and drop. Now faster, squeeze, squeeze, squeeze, ah it feels really good. (laughs) Ah, nice, okay, now lets get a little bit more room in the neck.
This can be a little strange so you might wanna watch, 'cause it's not so intuitive. Inhale, and as you exhale you're gonna drop your chin down into the chest. Slowly you're gonna roll your right ear over to your right shoulder. Now let both of your shoulders feel heavy and then now you're stretching on the left side of your neck you're gonna roll your left shoulder up towards your left ear and then let her roll back and down. Yes, inhale, roll that left shoulder up towards the ear and then her roll back and down. Three more like that.
Squeeze, roll her back and down, and squeeze, and roll her back and down, one more, squeeze, and then roll her back and down, let both shoulders be back and down, let the right ear get heavier towards that right ear, nice. Okay, chin into the chest, slow, let the gaze roll back towards the heart, press into the feet, let the heart open, let the throat open, let the face brighten, pause and really soak up the results in that left side of the neck. Okay, other side, chin drops down into the chest, slow roll that left ear over to the left shoulder, so you feel a stretch on the right side of your neck, let the arms be heavy, and then squeeze your right shoulder up around the right ear, and let her drop back and down, squeeze, and then let her drop back and down. Three more. Squeeze, let her drop back and down, squeeze, drop back and down, and squeeze, and drop back and down, and now really let her drop back and down, let the left ear get heavy, excellent. Slow, slow, slow, let the chin roll back into the chest, pause, gazing at the heart, and then press into the feet, let the heart lift, throat open, and face lift, and just really let yourself tune towards the results in the neck, 'cause as we start to work in, sometimes the temptation is to munch up the neck, less tempting when you know how it feels when it feels good.
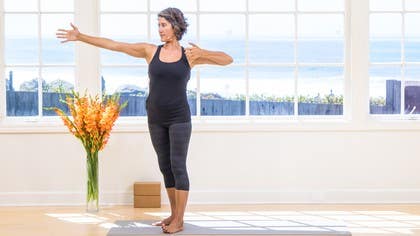
So we're gonna explore an action, that we usually end up calling bow and arrow arms. I was first introduced into this action from my dear friend and teacher Patricia Sullivan. So feet are pointing straight forward, spread the toes, bring the palms together, now the play here is to start to understand the relationship between the shoulders So as I stretch my left arm forward, my right shoulder is gonna draw back, and as I stretch my right arm forward, my left shoulder is gonna draw back. So just, without too much more detail than that, just kinda see if you can feel that as you reach your left arm forward your right arm comes back, and as you reach your right arm forward the left arm comes back, so just kind of slip slide this a few times, lets just see if you get a sense of this, just let your hips twist, we'll detail that in a moment. Next time your palms are pressing together, this time, start to extend forward with that left arm and, like you're drawing a bow back, start to pull the right arm back and see if you can feel the sense of reaching through the left arm, pulling the right arm back and just let the right hip come with you, if that's painful on your knee even turn the right foot out a little bit, so that you're in this place of pulling the bow back stretching forward through the left finger tips, okay then slow release that back to center turn that right foot forward if you turned it out, and then other side, so you're stretching forward with the right arm, and you're pulling the bow back, and again if that's too much in the knee joint, you just kinda let the hip turn, just turn the left foot out a little bit.
So you're reaching through that right arm and you're pulling the arrow back, just get a sense of this, nice. Get a sense of really stretching back though the elbow and out through the fingertips. Okay, slow release that back to center, and to give yourself a little break as we explore this, turn the palms forward and go up through the arms, wiggle wiggle wiggle, inhale here, exhale, release the arms wide, rotate the shoulders forward, interlace behind if that works out, bend the knees, chest finds the thighs, head drops, stretch the arms over the top of your head and then bend the knees, let the hands come back to the legs slow, chin into the chest, roll in on back up, feel the belly, the heart, the throat, and the face. Let's explore that in a little bit more detail. So bring the arms in front of you, palms pressed together, spread the toes wide, now start to really stretch through the left arm as you pull these right fingertips back again, just let your hip go with you, pulling the right hip back, turning your foot out, as it helps, pulling that bow back, now, the request is keep stretching forward through the fingers, release that arrow and let the right arm come behind you, soften the elbow so the shoulders can relax back and down, and reach.
I'm still gazing at my left hand, maybe start to play with drawing your gaze over your heart, if you can maintain that ease in your neck, gaze neck at the right fingertips, beautiful. Inhale here, exhale slowly, with the hip, as the hip turns back, let the arm follow, palms pressed together, other side. Stretch forward with the right hand, pull the bow back, I'm just letting the left tip go with me, turn the foot if it feels appropriate, keep lengthening, lengthening, and the as you're ready you let this back arm, left arm release, soften the elbow, shoulders roll back and down, again, you might keep your gaze out towards those right finger tips, it'll probably feel good to let the gaze come over the heart or maybe even back towards the left hand. Lengthen, beautiful, inhale here, exhale, lead with the hip, let the hip bring you back, arm will follow, and then interlace the fingers weird knuckle on top, turn the palms forward, go up, wide, rotate the shoulders forward, hands come behind you, (slurping) bend the knees, chest finds the thighs, head drops, release the hands back to the hips, hands find the legs, chin into the chest, and roll on back up, feel the belly, feel the heart, feel the throat, then feel the face, super nice. We're gonna check that in one more time, just to play with the hips, so you have that detail, so one more time, bring the hands in front of you, palms pressed together, stretch forward through the left arm pull the right hand back, like feel that bow, now let the right hip open with you, and now make a decision to press into the ball of the big right toe and roll the right hips forward, so you're not letting the hip go with you, feel the difference.
Lift up though the heart, nice, release that right arm back, soften the elbows, shoulders roll back and down, beautiful, inhale here, exhale, right hand comes back, inhale here, exhale, pull the bow back, so let the left hand open to begin with so you kind know what you're doing, and then press into the ball of the big left toe and square the hips, so you're rolling that left hip back forward everything changes, release that left arm back, soften the elbow, shoulders fall back and down, we're lengthening, opening that neck, yeah. Inhale here, exhale, release that hand back, interlace the fingers, turn the palms forward, go up, wiggle, nice, exhale, this time just forward, fold, no need to interlace the hands, this time forward, fold, bend the knees, chin into the chest, slow, let yourself roll on back up, belly, heart, throat, and face, beautiful. If you're gonna be using your two bricks, place your two bricks on either side of you to make the floor taller, and we'll make our way into a simple flowing pattern, finding this towards revolving triangle, beautiful. Interlace the fingers again, turn the palms up, yes, inhale here, exhale, release the arms wide, rotate the shoulders forward, hands come behind you, interlaced. Wiggle back and down, inhale, exhale, bend the knees, chest finds the thighs, head drops.
Bend the knees, release the hands to the bricks, inhale, half arch, exhale, right foot steps back, shape of the lunge, curl the sit bone under as you drop this right knee down to the earth, top of the foot to the floor, curl that sit bone under, feel welcome to keep your hands on the bricks, if the balance is available, interlace the fingers, turn the palms up, come out of the intensity a little bit, like pull back out of that left hip, maintain this extension now as you press through the top of that right foot, press through that left foot, and sink in. Beautiful, inhale here, exhale, release the hands back to the brick, tuck the back toes under and draw the this left leg long, dig into the heel a little bit as you pull that left hip back, do you remember from that earlier episode, pull that left hip back, beautiful. Inhale, take a look up, exhale, bend that left knee, shape of the lunge, lift up through the back of the right leg, and then again, pull that left leg towards string, move through the ball of that big left toe, feel that rotation in that left hip, let that right heel get heavy, gorgeous. Inhale, life up, exhale, let the left knee bend, step forward, half arch, exhale, other side, bend the right knee, step the left foot back, let the right knee bend, wiggle back though here, curl the sit bone under, let that knee find the earth, top of the left foot to the floor, curling that heart up, now please feel welcome to keep it low, otherwise interlace the fingers, turn the palms forward, and go up. Wiggle up out of there, come out of the intensity a little bit, and then press through the top of that back of that top foot, press through that front foot, curl the sit bones under, and sink in.
Beautiful, inhale here, exhale, release the hands back to the bricks, draw that right leg towards straight, walking the bricks back will help for most of you, dig that heel into the earth, lengthen, and remember the thumb in the hip action, pull that hip down and back, yes. Beautiful, inhale here, exhale, back towards the lunge, knee bends, tuck the back toes under, lift up through the back left leg, then draw that right leg towards straight, pressing as you lengthen, (slurping) rolling that right hip down, as you let that left heel get heavy, beautiful. Inhale, take a look up, exhale, bend that front right knee, step forward, half arch, exhale, forward fold, soften the knees, inhale, circle the arms, all the way back, exhale, hands back to the center at the heart, super nice. Keep your left book about where she is, step your right foot back, so we're goin' in there, into the revolving triangle. So as you choose your stance, generally a shorter stance is more stable, generally a narrower, longer stance is less stable, hands on the waist, press into the ball of the big left toe, feel your left hip draw back, and orient your right foot so that it feels good in your right knee, okay do you remember your bow and arrow arms?
Press into the feet, extend out through your arms, now start to stretch forward with your right arm as you pull the bow back, as you pull the bow back let your left hip draw back with you, press into the feet and bloom, press into the feet and bloom. Now you have a choice here, for some of you, in fact let's do this first one like this, bring your left hand to your waist, feel the shoulder and the right arm soften so you can let the elbow bend a little bit and lift, now maintain this, soften the neck as you begin to hinge forward, press into the feet and lengthen and begin to hinge forward, the more slow you go the more interesting it is. Press into the feet, begin to hinge forward, now this right hand is eventually gonna find her way maybe it's the left leg, for most of us it's gonna be the brick, but if the leg a little higher is better, leg. Press into the feet and bloom, and begin to spiral the heart up, last few beats, nicely done. Inhale there, exhale, release, both hands down on the bricks over that left leg, forward fold, bend the left knee, step the right foot forward, inhale, half arch, exhale, forward fold, soften the knees, inhale, circle the arms all the way up, exhale, hands back to the heart, beautiful, nicely done.
Keep the right foot forward, step the left foot back. So same idea, and you're organizing your stance start with the hands the waist, and just kinda help make sure that you're rooting and drawing the right hip back a little bit, pulling that left inner thigh in, bow and arrow arms, press the hands together, stretch forward through that left arm, start to pull the right hand back, feel that opportunity as you soften the shoulders back and down, lengthen, now from here the suggestion on this first one is right hand on the right waist, press into the feet and lift and now begin to hinge, as you begin to hinge, if you go slow, it will be more interesting, (laughing) press into the feet and hinge, lifting up though that heart feeling that left arm reach, now this left hand is gonna find for some of you the right leg, for some of you it's the brick, press into the feet, bloom up through the heart, soften the shoulder back and down, yeah, nicely done. Inhale here, exhale, release, both hands on the brick, fold over, pyramid variation, inhale, take a look up, exhale, bend that front right knee, step forward, half arch, exhale, forward fold, soften the knees, inhale, circle the arms all the way up, then exhale, hands back to the heart. Kay, let's explore that again, releasing the arms fully as you are ready, step you right foot back, find your stance, press into the feet, feel your heart bloom, reach your arms out in front of you, and really get a sense of this, I mean the warrior, particularly the archer is a classic image in yoga, so as you stretch forward with that right arm and you pull the bow back, feel that left tip roll down, remember your thumb and your hip crease, remember that. Okay now again, if it's better for you and your shoulder, you're gonna bring this hand to the waist, if it would feel okay, potentially release that arm, soften that elbow, let the shoulder's roll back and down, and really reach, yes, and then only as you're ready, start to hinge forward, and if you wanna change how that arm is you change it, you bring that left hand back let this right hand find where she belongs, maybe it's the leg, maybe it's the brick on the inside of the foot, press into the feet, bloom, and then, once you're ready, maybe you release that left arm beautiful, gorgeous, inhale there, exhale, release, both hands on the bricks, let yourself fold over that left leg, let the left knee bend a little bit, give yourself a bit of a break, come up onto the ball of the right foot, step forward, inhale, half arch, exhale, forward fold, soften the knees, inhale, circle up, exhale, hands to the heart, beautiful, one more, other side, keep the right foot where she is step the left foot back, find the stance that works for you, reach your arms forward, stretch through that left arm, pull this right arm back, feel what's being asked of you in the hip. Now, again, so of you are gonna immediately bring the right hand to the hip, so of you are going to experiment with releasing it, soften the elbow, shoulder roll back down, soften the throat, inhale here, exhale, begin to hinge, as you begin to hinge, this left hand is gonna find her way toward the right leg, maybe toward the brick, root, bloom, if you brought that hand to your waist, and it feels like time to release it now, you might release it towards the sky, gorgeous.
So nicely done, inhale there, exhale, release both hands on either brick, fold over, pyramid, and now take a look up, exhale, bend that right knee up on the ball of the foot, step forward, half arch, exhale, forward fold, and from that forward fold let's make our way into a squat, widen the feet a little bit bend the knees, and come down into a squat. If you're quite close to the ground and you can simply bring your hand behind and come to sitting, go ahead and do that, if that doesn't work out then roll forward, move the bricks out of the way, and come down onto your left side, I'm gonna face away form you so you can see what my back is doing, come down onto your left side, reclining Buddha, left hand either supports the head or arm is straight, knees are slightly bent, right arm gracefully drapes down the right side, big delivered inhale here, and exhale and if if you're ready, reach the right arm up, soften the right elbow, rotate that right shoulder forward, bend the right elbow, bring the hand behind you, palm facing away from you, down by your sacrum, and then maybe snuggle her up a little bit higher. Once you have that hand high enough for you, gently roll onto your back, okay. I like to bend my knees, soles of the feet to the floor, and shift the hips a little left, and here big delivered inhale, exhale, let it happen, and just soften, the play here is to let that right shoulder blade melt a little bit toward the earth, beautiful, we'll only be here about a minute or so, so kinden the eyes, easy in the jaw, yeah. Gorgeous.
Last handful of beats. And the way to get out of here is roll just enough to the left to free that arm, and then rest on your back, palms turned up, and just allow your arm and hand to feel sort of a cool breeze, is often the result, you might have different results. Okay, once you've gotten that, roll onto your side, reclining Buddha other side. Again, right hand might just be underneath the head or the arm might be straight, knees slightly bent, left arm gracefully draped down the left side, soften, and then as your ready, left arms reaches up, soften the elbow, rotate that shoulder forward, bend the elbow, bring the hand behind you, the palm is gonna be facing away form you, and the only as it's right, kinda snuggle that arm up as much as it feels correct, once you feel like you have that hand in the right spot, roll onto your back, gently pinning her underneath, shift hips left, feet on the earth, delivered inhale, and exhale everything, most likely this side is totally different, always one of the opportunities, is to allow for what is, kinden the eyes. Again we're only holding these about a minute, "They" used to think it took ten minutes to effect the connective tissue, now they know it happens much faster.
Okay, shoulders wide, soften the eyes. Yes. Last few moments. Okay, as you feel ready, roll to the right, enough to free that left arm, palms are turning up, beautiful, with the heels in close, we'll find a bridge, inhale here, exhale, press into the feet, draw your sit bones under, lift up through the hips, if this feels like enough for you, stay here otherwise inhale again, exhale, press into the feet, lift up a little bit more, begin to wiggle the arms underneath you, now we've done a lot of interlacing so, this may or may not be available, press into the hands, reach through the wrists, reach through the feet, soften the eyes, gorgeous, up on the balls of the feet, release your arms up toward the sky, roll on back down, upper back, mid back, low back, hips land, heels land, pretty. Right ankle up on top of the left thigh, roll the right hip away, let the left thigh draw in, this might be enough, but most of you it'll feel pretty good to thread the right arm through the triangle, catch around the back of the left thigh, or up on top of the left shin, wobble, beautiful, find a spot that you can hang out in still for a handful of moments, soften the face, let the hips get heavy, yeah, beautiful, now, release the grip around the left foot and if it's okay for you, we're gonna make our way into eagle wrap spinal twist, so you're wrapping your right leg over the left, hooking that foot back and around behind, if this is gonna be too much torque, just keep your knees together, arms come out from the shoulders, inhale here, exhale, roll on over to the left, knees to the left, right palm on top of that left palm, organized, and then circle this right arm back over to the right, let the elbow bend, so the shoulder is soft, beautiful, to get out of here, unwrap the leg, right knee on top of left, lead with the right leg, and bring her toward the face and come back into the center, wobble, eye of the needle other side, left ankle up on top of right thigh, draw the right thigh in, catch around the back of the right thigh or top of the right shin for more support and more opportunity, wobble it a little, side to side, and eventually find a still spot where you can kind of like (exhales) gorgeous, and as you're ready, release the grip around that right thigh, eagle wrap, or the alternative of knees together, you're wrapping that left thigh over the right thigh, arms out from the shoulders, bring everything over to the right, organized, okay, once you're organized circle that left arm back over to the left, let that elbow bend, kinden the eyes, to get out of here, you're gonna unwrap the legs, left knee on top of right, lead with the top leg left leg, let yourself come back, hug the knees into the chest, and wobble, beautiful, let the feet come down in line with the sit bone, soles of the feet on the floor, arms down along your side, pause here with the knees bent, delivered inhale, and exhale everything, let your sacrum settle, soft in the floor of the pelvis, soft in the jaw, and for some of you it will feel superior to rest with your knees bent, it's often more supportive in your lower back, okay, only if it feels quite comfortable, let one leg straighten, and relax, and then let the other leg straighten and relax, let the shoulder blades draw under slightly under, and as the palms turn up, and allow your palms to be more sensitive, base of the skull wider, upper palate open, eyes soft or closed, let yourself open to the parts of you that are now available the you that's been here the whole time, but is obscured and some of you, very wisely, if you have the luxury, of lying here longer, just click off and stay, and if it's appropriate to come out of shavasana, let the legs gently find their way towards each other, maybe interlace the fingers as you stretch your arms over the top of your head, lengthening, exhale, release, bending the knees, roll to a side, and pause, and then use the hand on the earth to help press you back up find a comfortable seat, big delivered inhale, exhale everything.
Thank you for your practice, thank you for being here. Namaste.
Welcome to Yoga: Just Start
Comments
I do have a question about pinning our hands under our backs. My wrist and hand sort of panic in that position; there's a little fear and pain there. Does this just mean I've tried to "snoogle" my hand too high?
 You made a comment about feeling a breeze after coming out of the shoulder opening. Looking forward to experiencing that in the future. Enjoy your holiday weekend—if you celebrate one or both or none… Does Yoga have holidays?
You need to be a subscriber to post a comment.
Please Log In or Create an Account to start your free trial.
