Description
About This Video
Transcript
Read Full Transcript
(water lapping) In this tutorial, we're gonna be looking at a few of the arm balances that you encounter in the Ashtanga Primary Series. And before we really get into it, let's just kind of chat for a moment about what an arm balance is and why we do them in this practice. If you've been practicing with me previously in some of the other sessions, you'll probably know that I'm more focused on keeping the rhythm and the integrity of the breath, and when I approach the arm balances, I'm the same way. I'm more concerned with the quality of my breath than I am with the actual arm balance itself. I'm not the strongest person in the world.
I'm, to be honest, not really that strong, but what I've learned throughout my practice is how to redistribute my weight, which is so, so helpful when you're doing an arm balance. The first arm balance that you come across in this practice is Bhujapidasana, which is a shoulder press, and in my opinion it's kind of unfair. The first arm balance you have to do in this practice involves not just balancing on your arms but a lot of core, hips, and hamstring flexibility, so there's a lot happening at one time. So we're gonna try to break it down piece by piece and make it accessible for someone who's either a beginner or just working with some injuries or maybe just general inflexibility, or maybe you're just feeling tired and you'd like to have some other options. I don't know, so we're gonna kind of layer it a little bit, and then we're gonna approach and maybe deal a little bit with Titibasana and a little bit with Bakasana, so we'll have the legs out, and then we'll try to bring them back in so that the knees are above the elbows for Crow.
There are many ways to practice all of these postures. You can jump into them. You can flow through it like you would in a traditional class without stopping to use any props, but because we have the time right now, we're gonna use props so that we can bring the floor a little closer and just to kind of play around with different angles and different feelings. So what happens first is I'm gonna come into Downward Facing Dog, and I'm gonna jump into my shoulder press, so I'm gonna jump my feet around my hands, and then I'll work through the whole posture so you see what you're going to do. And then we'll come back to the floor, and I'll walk you through it step by step.
Before we do that, though, they call this yoga practice for a reason. It's not a performance. It's a practice. It's okay if you fall. It's okay if you end up rolling around.
It's okay if you just prefer to sit and watch. That's also fine. I don't want you to worry about how high your butt gets up off the floor, how straight your legs are in the air. I don't want you to worry at all. This is a practice.
We're here to practice together and to learn together, so let yourself relax into it, and we'll just see what happens. So I'm gonna move these out of the way for now because I'm not going to use them just yet. I'm going to come into my Downward Facing Dog. And I know I'm gonna put my feet around my hands, so I'm gonna look up at my hands so I can see where they're gonna go and jump up, and then I sit back onto my elbows, walk the feet in, point the toes in opposite ways, and bring them behind my elbows as I lower my chin towards the floor. Inhaling, push back up, draw in with the belly, separate the feet, lift the gaze, and then push into the shoulders, take the legs back into your Crow.
Okay (laughs)? Do that, see how that goes. Probably we're gonna need to do a little bit of workshopping. So the first thing that happens in Bhujapi, Bhujapidasana, is the feet around the hands, so what you can do, and I'll wait while you do it, is jump from Dog back and forth, so you look like this. And it might look more like this.
That's okay, start again. It doesn't have to be perfect every time. At some point, you will wrap your feet in the air without ever touching the ground, but today may not be that day. Jumping up, and then you're here in your big squat. I'm gonna come back this way so that you can see the squat.
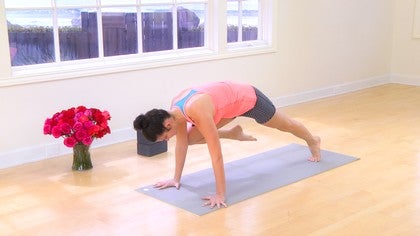
For a lot of people, this is enough. You just stay here, and you breathe. (inhaling and exhaling) And then you jump back or step back into your Chaturanga, and you move on to the next posture. For other people, you might be ready to do something else. The elbows are a little shelf for the backs of the legs.
The palms are pressing evenly into the floor. My elbows are essentially in a Chaturanga, If you can do a Chaturanga, you can do 90% of all arm balances. Theoretically. Walk the feet in and put them on top of your hands. Pause.
Notice the breath. (exhales) You can stay here, or maybe you start to squeeze the knees in around the shoulders, walk the feet in, touch the toes together, keep them on the floor, and move your chin towards the mat. Bhujapi. Inhale back up. Pause.
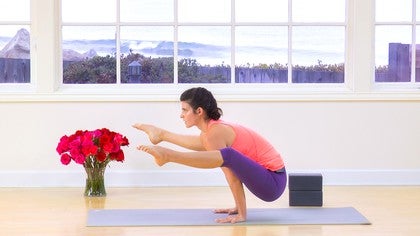
Squeeze the knees in. Take your feet out in front of you, separate. Titibasana. Hips to the floor. (exhales) That's one way.
Let's say that doesn't work. Props. Traditionally, you don't use any props in ashtanga, but since we have this time together, we're gonna use them to just make a little bit more space. So now I have all this height. The blocks go in the same line as my feet, as my heels.
My hands come on to the blocks, and I sit back. I'm already halfway to Titibasana right here. Shoulders pull back, feet crossed, toes go in opposite ways, chin moves towards the floor, but don't take it all the way to the floor because you're way too high now, and then squeeze the knees in. (exhales) Titibasana. Push up into your shoulders, one leg back, then the other.
You will feel your core. When you are doing an arm balance, and we might use those again in a moment, but before we do that, when you're doing arm balancing, you're using your arms, right? Lots of work here. Lots of work here. More work here.
So if you imagine, as you're in your arm balance, that you want to take your lower belly to your spine and at the same time pull your pelvic floor muscles up, so you're using Uddiyana Bandha (slurps) here, and you're using Mula Bandha, so you're essentially using your deep abdominal muscles like a net to support your posture. So much of your power is gonna come from your belly. That's not to say that it's just your core. You have to use your core muscles at the same time you're using your triceps, your lats, your hips, and your hamstrings. You just have to figure out the balance of work.
So some days you might stay in your squat just like this, and work on squeezing the knees in, pulling the shoulders back, drawing the belly towards the spine, and at the same time breathing evenly through your nose. (exhales) Other days, because your body is different from day to day, you might cross the feet. You might just stay here, pointing the toes in opposite ways. If you let the feet relax, it's game over. You're gonna fall.
This is a big part of redistributing your weight, so you have to really keep the feet active. Other days you might sit like this. While all your neighbors in your class are jumping around and wrapping your feet around their arms, you're (inhaling and exhaling) staying connected to your breath. That's also fine. However, arm balancing is pretty fun, and I do encourage you to try as much as you can or as much as you're able but working within your limit.
So today my hamstrings feel a little tight, so maybe my legs don't go as straight as they normally would. That's fine. We're gonna come back into our squat and take a look at titibasana. Titibasana is Dragonfly or Firefly. Oops.
So I'm using my hands like little kitten paws. They're kind of kneading the mat. That helps me know where a lot of my power is coming from and lifting up into the shoulders, drawing in with the belly and the pelvic floor so I know that my foundation is strong. And then I'm gonna squeeze my knees in, point my toes, and lift my legs. I can keep my elbows quite bent so I go forward, or I can try to straighten, whoops, my legs.
If you end up like that, that's fine. You can always start again, which is what we're going to do now. Your wrists are not designed to bear a lot of weight, so feel free to give them a little roll, a little love when you need to. But you shouldn't feel that you are putting all your weight in your wrists. If that is the case, you need to start over and come back into the belly, come back into the shoulders.
From here, pushing up away from the floor, one leg back, then the other. From here, let's take the feet to the floor and come into a squat. My weight is in my feet now. I want my weight to go into my hands. Coming up and just moving the elbows in.
Knees above the elbows, kind of nestled into the tricep. Look forward, lean forward, pull up with the belly, take your feet towards your bum. Come back down. How did it go? Maybe you fell.
Maybe you're needing a little bit more support, so we're taking that block and boosting our Crow a bit. So from here, I'm this much higher, and I want to be looking forward. If I'm looking down, I'm gonna go down, and I want to go out. So from here, my heels are up, leaning in, and then I can put my toes on my block and pause. So when you're on your pedestal here on your block, you can really experience the shape of the posture and really start to tone in your belly, so you lean in, draw in with the belly, and you want to pull into your lower back with your abdominal muscles, so here I'm kind of flattening.
My ribs are splaying towards my elbows, and I want to pull everything in as I draw my shoulders back. That's a good way to set up for your Bakasana, and you can stay there as long as you feel comfortable until you're ready to take off. So we're not gonna use the blocks for a moment, so I'll put them back there. What you can do is lie down on the floor, knees into the elbows, pull the shoulders back, look past your fingers, and pause. Draw in with the belly, connect with your breath.
(exhales) That is also a Crow. It's a great way to experiment with the shape and the sensation of the breath and feeling the bandhas without having to bear the weight. I don't recommend doing that in a class unless you have the permission of your teacher, but it's a really great way to practice at home. So just to refresh, we've looked at Bhujapi, we've looked at Titibasana, and we've looked at Bakasana. I'm going to show you one more way to do each posture so that you have a full range of options when you're in your class or when you're practicing at home.
And, again, bear in mind that these postures are all very difficult. They require a lot of coordination not just with the muscles but also with your brain. You have to really know which part of your body to signal and which part to engage. So I'm gonna start from standing or from a low squat, and this is for folks who maybe are dealing with a little bit less flexibility, need a little more space. So I just come down.
My hands are a little wider, and I stay here, take the feet in, and lift them towards my face, and then move my butt away from the floor, and then see if I can just use my chin to look forward. That's another way to do a Bhujapi. The shoulder press and the lock of the feet will come later. We'll start the same way for Titibasana. Walking in, but this time I'm gonna kind of shimmy underneath my calves, and your calves are kind of pliable.
You can move the muscle out of the way if you need to so that your shoulders come as close to your knees as possible, and then you're in a vice made by your legs. If I straighten my legs, I'm getting closer to my Titibasana shape. Hands on the floor, keep squeezing as you sit back, keep squeezing, squeezing, squeezing, squeezing. Lift. Titibasana.
Toes point when they're in the air, a Barbie foot. Pushing through the ball of the foot will help you have a little more control of your legs. Push into the shoulders, and then to move back, lift up, lift up, lift up, lift up. Put your feet on the floor and sit down. That's a nice workout for your core.
You don't have to do that last part, but you can try. That's another way for Titibasana. Whew (laughs). And I'll show you one last option for Bakasana. You may have noticed when I was practicing in my transitions my knees were a little bit outside of my shoulders or outside of my elbows.
Totally fine. In fact, that way when you're learning the transition, it's probably going to be easier for you than pulling the knees in like this. More compact you are, the more work you're doing in your core. So I'm gonna show you that version of Bakasana without the knees in the triceps. So you start more or less the same like this.
Leaning in, but then let the knees kind of move out a little bit and squeeze them in towards you. Whoops (laughs). Sometimes you need to wipe the sweat away from your arms. If you're wearing shorts, you can put a towel over your legs. But you're essentially doing that same squeezing that you were doing in Titibasana like that.
So those are just a couple of ways to practice this. You can mix and match. You can experiment with different shapes and forms, but the flavor of your practice is going to be most influenced by the integrity of your breath. So if you're moving through these postures and you feel like you're going (labored breathing) like that, take a step back. Work from the basics, feet on the floor, hands on the floor, cross the feet, toes stay on the mat, shoulders back, (inhales) breathe.
(exhales) Thank you for practicing with me. I hope that you have some fun trying your arm balancing and see you soon.
The Ashtanga Practice: Sarah Lowe
Comments
You need to be a subscriber to post a comment.
Please Log In or Create an Account to start your free trial.
