Description
About This Video
Transcript
Read Full Transcript
So, hi, y'all. Welcome back. I'm glad you're here, and I know that your bodies are glad that you're here. So, this is Julia. I want to introduce you to Julia first off. She's going to be my student today. I'm very glad she's here to work with me. And what we're going to really work on today are the arches of the feet and a little bit of, like, pelvic stability. And I have a teacher, Paul Gurley, who doesn't really love pelvic stability. He thinks the pelvis, that kind of freaks him out a little bit. I'm not trying to get your pelvis so stable that it doesn't move. I'm just trying to teach you how to stabilize your pelvis so that you can use that when you need it. But then, at other times, you're going to let your pelvis move, obviously, when you walk and move about your day. So, one of the things I want to explain to Julia and also explain to y'all is that something that I think is very important in this series to go into this series knowing is that the joints of the body, and this is something I got from more of, like, a Tai Chi background, but the joints of the body are, in Tai Chi, are considered like gates. At least, that's where I heard it from, is from my Tai Chi teacher. And so, if you, you have these joints, you know, these gates in your body, and you don't ever want to lock the gate. So, you can have the gate shut, but not locked. So, I'm not going to, you can have your leg as straight as you want it to be or your ankle as, you know, as straight as it can get, but I'm not going to, I'm going to ask you to just constantly be checking in with the joints and unlocking the joints, okay? So, you ready? All right, great. So, I'm going to get Julia to just come to a comfortable standing position, and I might even just say, close your eyes if you don't mind, just so that she gets a moment to come inside and just starts to maybe find her own spine, and I hope you can perhaps find your own spine in this moment. If you're like, I'm not finding my spine at all, that's okay. But just starting to turn inward, settle down, relax, come towards your center. So, something that oftentimes helps me find my center, and we'll do just a little bit of breathing here, is just to inhale and expand in all directions. It's like you take a 360-degree breath, and then as you exhale, you draw everything into the midline. Think like rings around a tree. You hug everything into the midline of the spine. And so, inhale, expand, and exhale, hug into the spine. And you actually might feel as you do this a couple more times, you might actually feel it as you exhale. The exhale's important. The exhale's like bringing you into the spine. You might almost feel as you exhale that you're squeezing yourself like a tube of toothpaste, and so you get a little taller through the crown of the head. It kind of picks you up that exhale. Softness in the knees. Remember to think of the joints beneath your pelvis, knees, ankles. Even relax the joints of the foot. Good. Beautiful. So, when you're ready, you can open the eyes, and you might pick a place to focus on, and then just go ahead and float your arms up over your head. So, as you bring your arms up, I don't mind if your arms are slightly in front of your torso, so your arms can be slightly in front of the torso, if that allows your shoulder blades to drop more down your back. And then the other thing is, I think in yoga, we've been taught a lot to just bring our arms straight up. Your arms can be more wide like a V, if that feels more comfortable. So, just basically bring your arms up in a place where you feel like you can keep your shoulder blades, your collar bones down your back, but you feel like you've got some openness in the back. And then what I'm going to ask Julia to do, and you to do as well, is see if you can feel a sensation of the upper arm bones dropping down into the joint. So, the opposite of that, and I'll ask Julia to demonstrate, is to go ahead and lift your elbows, shoulders up. Yep, exactly. So, the shoulders lift up, her shoulder blades are coming up by her ears, now I'm going to ask her to drop them back down. So, you might even just try that once, and just really feel your shoulder blades drop down your back. Now, you notice as she's dropped her shoulder blades down her back, though, a lot of times we lose a connection in the front of the body. So, we usually have to think in pairs. So, you draw the shoulder blades down the back, and then you pull the front ribs in. Almost a sensation, I like the cue of knitting my front ribs together, but some people that confuses you. But if you can feel that sensation of the front ribs kind of knitting together. So, now she's starting to get a sense of maybe the front spine, the front body, and the back body, I hope. Alright, and so, I'm more concerned, and I don't want to hold her here too long, but I'm most concerned with her upper arm bones. So, I don't care where your palms are facing, I want her upper arm bones to feel like they're dropping down into the joint, and then I want her to feel like her fingertips are reaching high up to the sky. So, there's an opposition of upper arm bone anchoring down, and fingertips rising up. Alright, so now I'm just going to ask her, simply unlock the joints again, soften the knees a little bit, and your knees don't have to be bent, y'all, just soft, right? You feel the energy come up like an updraft, up through the crown of the head, and then just start to slowly come up onto the balls of the feet, if you would. Good. So, it doesn't matter how high you go, and you might notice, and maybe you don't, but she's kind of rolling to the outer edge. So, find your big toe, press into your big toe, and see if that gives you your inner thigh a little bit. Good. It looks great, Julia. And then slowly lower yourself down. Good. Land with a little bounce in the knees. So, soften the knees, yep, and then draw your hands to prayer position. So, you draw your hands down, and as you draw your hands down, you feel the shoulder blades come down the back, and actually use the muscles of your back to draw the shoulder blades down the back. But when I do that, you can even see it in me, I'm using the muscles, but I'm flaring the front ribs. So, pull the front ribs back into the spine as you draw the shoulder blades down the back. It's like you're marrying the front spine to the back spine. Looks great, Julia. Beautiful. Alright, so now, we'll see what this does for us here. If you'll just give a little press into your big toe. So, you press down into your big toe, and see if that helps you find your inner thigh. Does that help you, Julia, at all? Do you feel like you can find your inner thigh when you press into your big toe? You would probably lie to me anyways, but thank you. Okay. And then when you press into your pinky toe, a lot of times, you can feel your outer leg.
You can feel like your glutes, your butt more. So, pressing into the big toe, you kind of find the inner leg. We want to draw everything into the center. So, I'm trying to, I'm going to cue her big toe a lot on this next one, because I want her to feel it all draw into the center. I don't want her to fall out laterally. I want her to pull in, okay? So, little softness in the knees. Can you feel the updraft through the arches of the feet? An updraft, basically, it feels like the arches of the feet become buoyant, and you start to pick yourself up. So, this time, see if you can just, instead of rocking forward, because there's a tendency to rock forward when we come up, see if, imagine you're in an elevator shaft, and see if you can just pick yourself up onto the balls of the feet. Find the big toe, find the inner thigh. Soften the knees a little bit, and see if that relaxes the low back for some of you. And then, see if you can find the lower belly here. So, just beneath the navel. Just beneath the navel. Good. Little softness in the knees again. Good. I know, this is harder than you think, y'all. And then, slowly lower yourself back down. Good. So, relax at the bottom, relax the joints of the feet, relax the knees. Really nice. So, I do this when I'm pumping gas. I just go up and down. Not with my arms up, because that makes me look like a weirdo, but I just do it when I'm pumping gas. Okay. So, now, extend your arms up overhead. All right. So, same thing. Arms can be in front of you. It doesn't really matter where the arms are in space. What we're trying to feel is the upper arm bone anchoring down. So, this is kind of an interesting cue. Some of my students love it. Don't think I'm weird. My husband thinks I'm weird when I use this cue. But, so, you imagine there's a little person in your navel, and that person holds the kite strings of your upper arm bones. Yes, still with me? So, you, this little person in your lower belly holds the kite strings of your upper arm bones, and they're pulling down. Nice. I see her ribs change. They're pulling down on the kite strings of the upper arms. So, then, you have an opposition to reach the fingertips up towards the sky, but you feel like the upper arm bones are anchored. Aha. The upper arm bones are anchored by this little person down in the lower belly. Yeah.
Looks beautiful, Julia. Okay. So, again, you're not going to rock forward, right? And this is an even harder cue, and some of you might like it, and if you don't, then just you can drop it. But see if you can pick yourself up with your pelvis. So, don't push down into the balls of the feet. Don't rock forward. Just pick yourself up with your pelvis. So, she rocked forward a little bit. It's okay. It's okay, though. Good. Find the big toe. She's looking for it, which is great. Little softness in the knees. Really nice. See if you can stay up there, and then just drop your arms down by your sides. It's okay if you fall, Julia. It's okay if you fall, y'all. Beautiful. That was really nice. The most advanced thing you can do here is relax, and then find your arches. Your arches of your feet are like spines. They're like the spines of your feet. Whoo. Find that big toe. I'm losing it, too. And then slowly lower yourself down. Good. Land with a little bounce in the knees. So, always allow the pelvis to relax when you get down. Relax the low back a little bit. Perfect. That was gorgeous. So, that takes a lot of focus, believe it or not, and we did it a little slower than I might do in a normal class. So, I want you to relax now. So, you can kind of shake it out. Usually, my students shake it out after that. And then we're going to bend down and just start to bring your hands to your thighs, and it's like you're listening in on a huddle. You can let your shoulders come up by your ears. You can really just kind of like, ugh. You're leaning into your bones is the way I put it. And then just start to rock. So, you rock your ankles. You rock your feet. I even turn my knees out, turn my toes out. That feels good to me. But just any kind of movement you want, just to get a little movement in the ankles, a little movement in the feet. I think there's like 30 joints in the feet. So, it's like you're just moving the feet around. And I rock quite a bit. And I'm from the south, so I think of rocking chairs. Like this is total, you know, you're just sitting in a rocking chair, but you are the rocking chair. And then eventually just kind of slow the rocking down and find your feet on the mat. So, there are, you could say there are four corners to the feet or three corners.
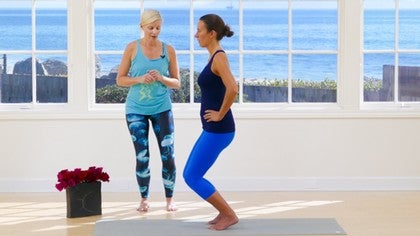
I'm going to say three corners today. You can say four corners if you want. That's cool. I'm not, this is not an argument. It's just like, let's think of three corners. So, big toe, pinky toe heel. Can you find the big toe, pinky toe heel of both feet? And as you do that, do you feel that it gives you a little bit of your butt? Sweet. It gives you your butt a little bit. It gives you like stability in the pelvis. Alright, so now you're going to stay there and bring your hands to your prayer position. Alright, beautiful. So, this looks great. And then maybe you don't do ukutasana like this all the time. Ukutasana just means chair pose. Maybe you don't do it like this all the time. But she's got this little wrap of the sit bones. So, the opposite would be to duck butt and just stick your butt out. So, I don't, yeah, that's a duck butt. So, we don't want duck butt. We want her to wrap her sit bones. And y'all, so you start to get these smile muscles. Both butt cheeks has a smile. So, you get these smile muscles turning on. And it's like she's got hanging baskets underneath her butt, right? And it's like we pulled the chain link up on her hanging baskets. Alright, so this is hard. So, we're going to let her come up. So, now push down through your heels. Slowly come up. Don't lock your knees. Feed it up through your spine as you come up. Don't lock the knees. Feed it up. Good. Beautiful. Nice. Release the arms down. You can give it a little shake. So, we'll do one more thing here just to work with the pelvis. And so, again, this takes some, you know, deep thought, some focus. So, hands come to the hips. And when you're ready, you're going to bend the knees. So, y'all, when you bend your knees, a lot of times you want to just stick your butt out, right? And do the duck butt again. So, let's imagine that you're going to tuck your sit bones in just a little bit. Tuck your sit bones into your body and sit down. So, again, it's that elevator shaft concept. It doesn't matter how low you go. It's more about just sinking down. You might feel a healthy compression in your ankles, which is nice, you know. And then just bring your hands to your hips if you don't mind, Julia. So, hands are on the hips. Can you find still here big toe, pinky toe heel? It's harder for me to find when my knees are bent sometimes and I'm not leaning forward. But just connect with the feet again, I guess is what I'm saying. And then hands are on the hips and you're going to start to float your right knee forward and come onto the ball of the right foot. The pelvis is going to want to do crazy stuff now. So, try to keep the pelvis really stable as you float your right knee forward. Good, beautiful. Julia is doing a fabulous job of making it look easy. And then release the heel down, keep the pelvis level, and try the opposite side. So, the pelvis stays level, the left knee floats forward and that picks up the heel. Beautiful. Find it in your lower belly, and then slowly put the foot back down. Nice. Find both feet on the mat, stay low, and now press into the heels and slowly come back up. Let's give you a little rest. Good. Don't lock the knees, feed it up through the spine.
Yes, beautiful. See, she's picking herself up with her spine. It's beautiful. Okay, so let's do this one more time and we're going to kind of combine the two movements we just did. So, the heel raises with this heel lift. All right, so hands come to the hips and again you're going to bend the knees. So, without duck butting you kind of wrap the sit bones in and knees reach forward. So, keep the heels down. There's a sensation that the knees reach forward. Now, some of you might be a little tight in the ankle joint and have kind of a, you know, an interesting skeletal variation going on in your ankles. It doesn't matter how low you go. It doesn't have to look as beautiful as Julia's. I'm sure yours looks gorgeous, I promise. So, this time we're going to try to float both knees forward and lift the heels up. So, you reach the knees forward to the front of the room, uh-huh, and lift the heels up. This is hard, y'all. She's doing great. Find it in your lower belly and then keep reaching the knees forward as you lower the heels down. Good. Two more times on your own if you would. So, you see her working in the ankles, working in the arches, really strengthening the ankles and the arches of the feet. Just one more. Find it in your lower belly. The lower belly is the quarterback. So, it's calling the shots, hopefully. Nice. Good. Stay low on this last one. She wants to come out, but we're going to keep her there for just a little bit longer. Find it even in both legs. Feel the compression in the ankles and now push into the heels and see if you can turn on your glutes, your butt, to bring you back up. Good. Relax when you get to the top. Uh-huh. Good. Relax the arms down and just notice some of you will feel a sensation in the thighs, especially around the knees, which is good, kind of starting to build the muscle around the knees. Feel okay? Mm-hmm. Good. Namaste.
Get a Backbone
Comments
You need to be a subscriber to post a comment.
Please Log In or Create an Account to start your free trial.


