Description
Transcript
Read Full Transcript
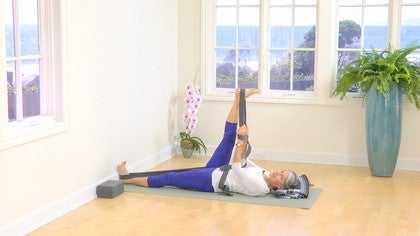
So, we're going to do Supta Padangusthasana today. Supta Sanskrit is the same, comes from the same root as our word supine, it's lying on the back. Padangusthasana, that's a lot of syllables, basically that means grabbing the big toe with the thumb, but we'll use a strap. This is a traction way of doing it, so you'll need two belts, and I've actually buckled the belts and set them to the size that will work for this. Once you've done it a time or two, you'll know what to do with your belts.
I mark my belts, so I can use them for other things. You'll also use a block, perhaps, not everyone will want the block, and some of you will want a blanket. So here we have all our props waiting for us, and the pose begins on the back, and we open the belts. That's going to be my hand belt, this is going to be my leg belt. How we get the traction is to connect the heel, this is much more effective on this one to have the heel pushing into the block than it is the ball of the foot, because the ball of the foot may want to move off the wall, and you're going to inchworm yourself into the wall so that your leg doesn't quite super easily straighten, but it's not a struggle either.
It just sort of helps to wedge everything down, and actually that also helps my back to get elongated on the floor by starting with that little bit of a wedge. So this belt, if it's too loose, it won't give me the traction, so you have to play with it a little bit. So here I go, I'm bringing this leg into my chest. Now for years I just used to go straight into this part of the stretch, and recently I discovered that if I just come here, Pavan Muktasana, and just stretch like this, I can tell pretty much here whether this is taut enough or whether it needs tugging on and tightening. So I've got the belt here so that I can tighten it very easily.
And then as I lie here, for three or four breaths it doesn't take long. Everything in this hip starts to release from this firm but not harsh tugging. And then it seems pretty natural and easy to start straightening this leg up. Now the thigh angle may not remain the same for you, the thigh angle may need to come back a bit. And that's where you might want to reach up, but if you can't lie down again, it's better to use a belt.
So this is why we have two belts. And I've noticed in my classes that some people, when they reach up to the foot, they're like this, just because the hamstring is tight and the other part of the body has to compensate. So first of all, that's happening for you. Do the best you can to lengthen your neck and then if it doesn't quite feel comfortable, you can just place the blanket under your head. So I like to reach around, start a little bit away, get the traction pull and gradually pull deeper into this pose.
You can play sometimes part of the time with, ah, see now it's nice to have it on the ball foot up here, because you can get extra stretch here. But if that immediately bends your knee, you're better off on the heel. So this is shape, props, time and breath, okay, time and breath. Time allows all the little pre-wired organisms in your, ah, connections in your muscles to realize that it's safe to be here. And it can feel nice, I like to hold the leg to sit up into it for a little bit of time.
And I find it also very helpful now, I'm going to move the belt, the blanket for this part. So now we've got a diagonal stretch along the spine with that leg and this arm reaching. And then we're going to start to come across, coming across. And you can see if you look at my foot on the wall that I'm not letting it turn. So this helps the back of my sacrum and pelvis to widen and it's quite yummy.
And it helps, yes I'm getting stretch on the outside of this soft tissue here, but I'm also getting a stretch in this right leg hip. So over I go and sometimes it can be very nice to bend this knee and you can kind of let go of the belt here, it's not far away, you can get back to it. And then again this stretch here. You can see I still haven't really let this foot completely turn because I'm more interested at first in the traction, the incredible length that you can get coming out of the pelvis while you're coming over to the side like this. And then when that feels like it's enough, you can stretch your arm out in the other direction and let your foot turn and enjoy the revolved stretch as well.
Breathing and lengthening and feeling how the belt helps all this length. Then I bend the knee to come back up, center, remove the belt, the foot belt, and then taking this other belt off, just hug the knee again and notice the difference in your hip and your spine, it's quite different, quite spacious. And then when you take all the pressure off of the hip and the leg, it's really, really nice. Okay, so put this back, second side. So you've still got that belt on your foot, you can just slip the other foot into the belt and take it across.
So you've got both legs up, this can be tricky. So you've got the belt on the foot all just all by itself. You bring that leg down and on the way down, you slip the circle of the belt over your other leg, snug it in. And then pull it up, wedge into the wall and just rest here. And here, it's not only a chance to let the hip release, it's also a chance to ascertain oh, that's too much pressure, slightly loosen, you know, oh, it's not tight enough, well, tug it down a little.
And then take a breath or two here, something starts to release, so then it's time, it's time to take your leg up. So this is the traditional way of holding the foot, you're really hooking your first, second, index finger and third finger over and the thumb and like that. But it's not necessary to be that flexible to get the benefit from the pose, in fact, flexibility is often overrated. I'm going to put the belt around the toes, hook my arms in, let the leg stretch and let this lower leg do its work. Lower back is getting stretched, hip is getting stretched, leg is stretching.
Both thighs, the top of this thigh and the top of this thigh are pressing into the ground. This one towards the wall and now we're going to take it over, you can see that I'm not turning my foot at the wall, just going a little ways, getting used to that, breathing with it. Now I'm going to turn the foot a little bit to allow myself to go further, so you're getting, you're going to feel this all along through here, the hip, but you're also getting length along, all along the back here, the lower back, it's getting tugged down towards the wall. And then to make the stretch come all the way up, you can stretch the arm overhead and bending this knee takes some pressure off the hip and allows the widening of the pelvis to increase and the length of the spine. So three to five breaths here, lengthening into the wall, breathing, and then back up, prepare yourself, hold the leg, and remove the belts, hug the knee in again briefly, and then release, and I often just rest in this pose for 30 seconds or something before coming up.
It's funny, we didn't even open the, we didn't even open the leg out this way, and yet to sit in that pose it feels, to lie in that pose feels quite easy and relaxed, so, and it's especially nice to get up and walk after that. Great way to start if you're going to be doing some standing poses or sun salutations. Namaste.
Practice with Patricia
Comments
You need to be a subscriber to post a comment.
Please Log In or Create an Account to start your free trial.


