Description
About This Video
Transcript
Read Full Transcript
Hi, welcome back. It's so nice to be with you again. This is a restore and repair type class. Kind of a yin inspired, or a long hold practice, for you to unwind and get a nice, deep stretch, from all the activities that you do. And we're gonna start out with a really relaxed breathing.
So, I'm gonna roll onto my back, and you can join me. Plant your feet, and if it's uncomfortable, you can take your feet a little bit wide, and let your knees fall together, just so that you have a nice depth through the front of your hips. And place your hands on your belly, below your ribs. Let your shoulders relax. If they're up around your ears, take them down a little bit.
Relax your jaw. If it's comfortable for you, close your eyes, and start to drop the breath down, or the feeling of the expansion of the breath, into the belly. So it might be helpful to encourage a little bit of a longer exhale, which is calming for the nervous system. And as athletes, it's so important that we rest, because the strength that we gain, is really in the resting period. It's really, the healing of our tissue, is where we get stronger.
So, you can feel, even if you feel you're not doing very much in this practice, you can feel like you're doing a lot, for yourself. So here with the rise and fall of the belly breath, just find a place, like, below your belly button, more towards the center of your belly, your, the two above your core. And from that center point, imagine that you're expanding evenly, on all sides. So, I like to call this radiant breathing. So, from the center, and just like the rays of the sun reach out in all directions, you're releasing muscle tissue with your breath expansion.
And some of the more active practices, we breath in a certain way to strengthen the core of the body. Here we just want to, for the whole practice, you can do this easy radiant breath. And maybe you can even feel the breath in your back, the bobbing of the back muscles opening on your inhale, and then, softening back to center on your exhale. And once you feel like you have dropped a little bit, and arrived here on your mat, you can roll over onto one side, and we're gonna slowly make our way up to standing. But get comfortable seated.
You might want a bolster, and also a couple of blocks for this practice. It may be not totally necessary, but will be really useful. I'm gonna sit on the edge of the bolster here, just so that my hips are a little bit higher than my knees, or at least on plane. And take my fingertips out to the sides, maybe for you they don't reach, but just reach them towards the floor on a diagonal, and then let your chin fall down towards your chest, and slide your right ear over your right shoulder. And you can gently reach through your fingertips, and just breath in to all that tissue, in the left side of your neck.
And with the breath and the movement, you're also opening up the tissue just by breathing into it. So there's this natural bob of the body, with the breath, and it's also, helpful to open up the tissue with the movement from the breath. So if it feels okay, you can keep your ear over to that side, take your hand, maybe find some skin, underneath your collarbone and pull down on the skin a little bit, and maybe get a little bit more in there, over to the side. So you're stretching all those tight superficial neck muscles. And then when you release the hand, gently roll through center, over to the other side, and take a few breaths into that side of the neck.
Sometimes it's nice to focus on the exhale because it's the more calming part of the breath. You can take the, the hand on the skin of the chest, and stretch the skin in the opposite direction of the pull of the neck, and you might even find it interesting to reach your chin up, rotate your head up, just do these little movements that can get in there. And release, and then really slowly ease up that stretch, as you come back to center. And now we're gonna come up to standing, so you can push your prop out of the way, and it'll be a short visit to standing, in case you feel like lying around for this whole practice. So we'll place the feet down, and this is the part where you might want to have your blocks on either side of your mat.
And we're gonna come on up to standing. Widen your feet, so that they're a little bit wider than your pelvis. And then bend your knees a little bit, and tip your pelvis forward, so like, if you were at one o'clock, tip forward so it's like about two or three o'clock, and then let your arms totally rag doll. And we're gonna stretch the spine, in a little bit of flexion. So, start to round a little bit, with the support of your lower belly.
Exhale and draw it back, and start to round through your lower spine. Let you arms relax, round to your upper spine, and round to your neck. And it's not a collapse, it's not really a forward fold, it's just really rounding with the support of the belly through the spine. Press into your feet, bend your knees a little bit, and then we're gonna stack the vertebrae as we come up. So, as you come up, keep your behind behind you, don't tuck it under, and then let the lower back curve present itself, and come all the way up.
And that should feel pretty good, because a lot of us are super tight in the back line. So now we're gonna rotate a little bit to the right leg. Tip a bit, so you will feel, try not to roll your knee out too much. Tip a little bit, let your arms rag doll. So there's a depth here in the front of the hips.
And then we're gonna roll down and we're gonna stretch a little bit more lateral of the spine, so you can roll down and really let your arms relax. Then hang the head, and it's not totally a forward fold, like this, hinging through the hips, or folding at the hips, but it's a rounding, it's almost like you're over one of those big exercise balls. And then press into your feet, and stack and, you're kind of spinning back to center, and we're gonna go to the other side. So bend, twist, start to tip the pelvis forwards, and then round through the back. Hang for a moment.
Feel that nice gentle, global sensation of pull through your whole back, and then we'll come all the way back up. And if you need a little counter pose for that, just open up your chest a little bit, and a mini-back bend exhale. Here, take your right foot forward, and swing your left foot behind, and bend you knees a little bit. Place your hands on the top of your thighs, and we're gonna slide down, kind of sticking your butt out, to find the blocks. Some people find the shins, if you don't have blocks, or the floor, no problem.
But the blocks do help to rotate the pelvis forwards. So, stick the bum out gently, press into your big toes, and rotate the pelvis over the top of the femur heads. So you're folding more at the hips in this one. And the back stays relatively long, instead of rounded. At the bottom of your fold, you can curl in a little bit, but mostly what you're probably feeling is the outer line of the legs.
So the IT bands, maybe the outer calfs. I call this the crisscross, applesauce forward fault. I really love this way of getting into the outer hip. So, if you're on the blocks, come up enough that you can uncross your feet. Or you might want to come up fully.
And then we'll have our left foot in front, and our right leg behind, bend the knees a little bit, hands at the top of the thigh, and slide down to find the blocks or the shins, if you like. Stick out through the bum, a bit. And then, start to fold, and this one, it's a little bit less about the rounding, and more about the pelvis, kind of lifting and turning over the hip joints. Press into your big toes. This is a lovely way to get into the outer hips.
A lot of athletes are really tight in the IT bands, and then the knees start to really, the outer knees start to get a little bit cranky. Press down into the feet. And unwind your legs. And then we're gonna come down into a squat, so for a lot of people, you can turn your feet out, quite a bit, in the squat, and it is helpful, especially if you have tender knees, not to push your knees too far forwards, but pull your hips back, as you lower down. For many people this is gonna look like, heels off the floor.
So if your heels are way off the floor, a nice trick to do is roll your mat up, come on down onto that, so you still have something to rest on. Your feet might be turned out. Play with, if you can do feet turned out, turning your feet more parallel, forward. It's gonna give you a little bit more length through your lower back. And you can have your elbows on your knees, or you can have your arms on the inside of your inner legs, if your legs are a bit more turned out.
And just take a few breaths to feel this release through the lower spine and this deep flexion of your hip joints. It might feel good to wobble a little bit, side to side. If squatting is not part of your regular movement repertoire, it's a nice one to add in, because a lot of countries that where the people squat a lot or sit on the floor, they have much less back problems than we do in the west. In western cultures that we sit in chairs right from the start. So, let's tip it forwards, release those knees.
It might feel good to pulse out to your knees a little bit, if that deep knee flexion doesn't always feel the greatest when you're coming out. And then hands under the shoulders, knees under the hips relatively. And inhale and arch your spine, and then exhale and round your spine, using the belly to support the rounding, inhale, and arch. And exhale, and round. And this time you might start with your pelvis, start with lifting your tailbone in ripples through your spine, into an arch, and the head is the last thing to come up.
And then start with your pelvis, head is the last thing to follow, ripple, articulate, all the vertebrae and head is the last thing, to come in. Beautiful. Walk your knees back a bit more. So that, maybe you're on your mat, walk your hands to the width of your mat. Feel that your hips are relatively on top of your knees, and then let your chest fall through your inner arms, letting your forehead come down, pressing into your hands, so that your armpits are a tiny bit lifted and buoyant, like there's little helium balloons under your armpits.
And you can let your chest, just start to relax and come out of that kyphotic curve for a few moments, of letting the center of your rib cage, drop towards the floor, melting. Dripping. And then we're gonna come up just enough to walk our hands in, and thread the right arm under the left. Maybe you feel like you can get your temple down to the floor. And this is a really nice way to get into the fascia around your ribs, and into the outer shoulders.
So you can take a couple of deep breaths, and relax your neck. And then we'll press into our left hand, switch sides, right arm fairly awake, so you're not buckling too much at the elbow. Slide your left arm through. Adjust your right arm to where you can press into the hand, into the finger pads, and reach your hips back. And you can relax the upper back and the neck.
And shoot your hips back away from your front hand. And then we'll use our hands to press us back up, walk your legs out, and come down onto your belly. And here, I really love having, rolling up my mat, and if you have a really thin mat, you can roll it until it's a good size to place right underneath your lower ribs. So there's a nice pressure into the organs, and it also gives you a little bit of support at the top of the hip flexors. The deeper hip flexor is the psoas, so it opens it up a bit there, and gives a bit of support for your lower back.
So this is a nice way to do this cobra pose. And the more your elbows are underneath your shoulders, the sharper the bend is gonna be, and then the farther they are away, the less, so you can find your space that feels the best, and just really let your upper spine melt into the rib cage. You can almost feel like you're pulling the floor towards you, with your hands and your elbows, dragging forward to bring that upper chest through. I like to look forwards in this one. Some people feel like it's a lot nicer to let the head go down, and maybe even get into the neck, by rolling side to side.
It's up to you. But with my, looking forwards I feel like I get a a little bit more back bend that's welcome through the cervical spine, through the lower spine that, feels therapeutic for being on a computer a lot, or doing activities where you're curled forwards, like biking, or climbing. So some people might actually take your hands wide and press your arms a bit more straight, and really let the upper spine come in. But make sure that there's not too much jamming in the back, here. So we'll take a nice deep breath, and then start to roll down.
And if this is uncomfortable for you, just roll it out. I like the feeling of it. I'm gonna stack my hands and place my forehead there, on my hands. Take a few radiant belly breaths. And then, I'm gonna bend my right leg.
Maybe draw the left arm a little bit closer. Look back over my right shoulder gently, and see if I can hook the foot. And then I'm gonna slide back out and take my forehead back down on my forearm, and just as much as I can, draw the foot towards the outer part of your bum. And some people might be able to reach the top of the foot, with the palm, and draw down, it'll give you a little bit more push with your hand. Here, think about stretching your hips away from your skull.
We're gonna release that side, and switch, to look over my shoulder, take a hold of the foot, draw it in. Maybe come down a bit more, heel to the outside of the bum, and stretch your hips away from your skull. This is a nice way to open the quadricep gently without putting the weight of the body down on the quadricep, like in a lunge. And then we'll release that and, I'm gonna roll over onto my side, and if you have this mat roll, then keep it, maybe roll it a little tighter. And then I'm gonna place my outer hip on top of that mat roll, and come down onto my forearm.
And I'm just gonna roll back and forth, on the IT band tissue, so the big band of musculature that comes from the top of the hip into the knee. I'm just gonna roll, and rock my body, back and forth onto this. And it might be a little bit more flavorful, down lower. So I'm gonna support myself, and kind of just do a little bit of rolling here. If it's too much pressure to stack like this, then you can put one leg behind, and monitor how much weight you want to put down.
Oh it's really nice like, six inches above the knee. I'm finding a lot that if you roll more towards your belly, there's a lot more stickiness in the tissue, than if you're rolling towards your back. So play with doing that all the way over on the other side. So maybe starting high, and then going a little bit lower. And it will help, if your roll is pretty tight, so that there's just a little bit more firmness to it.
But it's still softer than like a wooden dowel. Sometimes they use a wooden dowel for this kind of work. So we'll roll that open. Spread your hands, tuck your toes, slowly press back into your dog pose, pedal out your feet. Let's play with this as taking your left foot, and turning it out on about a 45 degree angle, and then pressing back into both of your hips evenly.
Maybe you need to bend that knee, but again we're getting a nice stretch into the lateral part of the leg. You can come up onto your toe pads and do it, but see if the heels can really root down, and switch sides, turning that foot out on an angle, and pressing out, into the outer line of the leg. Let the head go. Getting deep into those outer hips. Parallel your feet, and then come high up onto your toe pads, and reach your right leg back behind you.
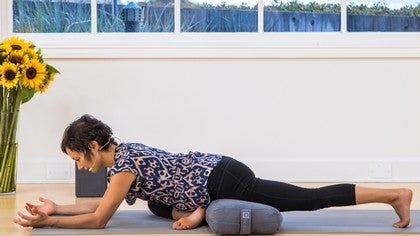
And then exhale, draw the knee in towards your right wrist. And then, here walk your foot, your left foot back, so that your hips are sinking back. For some people this angle is gonna be pretty tight, so the heel close to the groin. And for some people, it's gonna open up a little bit with some activity in the feet. And then we're gonna settle our hands forwards, and our elbows forwards to our favorite posture, pigeon pose.
So I like to sway to get into this a little bit, and I should add, if your hips are really high, and you feel like you can't really relax down, maybe you have a prop, like a bolster, that you can stick right underneath your hips, so that the top of your backside rests there. Just make sure your knee is happy, in the outer knee, so we did some work on opening up through the IT bands to warm up for this posture. And you can take a few breaths here, sometimes a little wobbling side to side is nice. Some people can stack their hands, or maybe even use a block to place your forehead down on. And just use that, come back to that belly breathing, that starts from the center of the tube of your torso, and reaches out to your back, to your sides, maybe even down into the bowl of your pelvis.
Lately, I've been tucking my toes under in this posture, just so that I have, I'm not totally just slopping into it. There's a little bit of activity in the back leg. And if I gently reach out through the back leg, then I can feel my hip flexor on this leg, just easing open a bit. Soften your jaw, soften your eyes, soften your face, and sink your outer hips down, letting your outer hips get super heavy. It might feel nice to actually walk your hands over to the side, to your left side, away from your right leg.
And then root down your right hip. If you're a pretty active athlete, running, and using your legs a lot, this is a really nice posture, to open up the back of the hip, the purformas. And then we're gonna come up a little bit. If you have something there, take it out. And come back into either a child's pose, or a downward dog, so it might feel good, to simply sit back down onto your heels.
We're eventually gonna come into downward dog, so if you want to wiggle out into your dog, you can do that. And then let's all come up. Tuck the toes, reach back, walk out your feet, downward dog. Let's do that lateral leg opening again, where we turn the foot out, and press back into both hips evenly. It doesn't matter which, what you're going towards, turn the other foot out, and press back into the hips evenly, maybe a little bend in the knees stops from too much sensation in the outer knees.
And then feet together, come high up onto the toe pads, lift your left leg up and back, and then exhale, knee towards the wrist, and settle your hips back. So pull your hips away from the front of the mat. Start to come forwards onto your forearms, or maybe it feels really nice to stay upright, as well. There's a little activity in both of your feet, which pulls the fascia nice and even around your knee, so your knee joint can be boxed in the center of all that soft tissue. And I like to wobble to get into this first.
No matter how long you practice, these shapes, this posture, will probably never get boring for you. Maybe reach a little bit through the back leg, getting a feeling of the hip joint just expanding, soft in the jaw, relaxed in the face. Propping yourself up if you need to. Let's take three more radiant belly breaths. And as you move through these shapes, maybe you increasingly feel a little bit more grounded, so as the nervous system starts to relax, we start to feel like our feet are really planted, on the Earth.
Last deep breath. Nice, and then we're gonna walk back up, supporting, pull back. Either take a child's pose, or maybe it feels good to wiggle out into a dog pose, pedaling out the feet, shifting a little bit, side-to-side, reaching back, bending the knees, straightening the legs. And then we're gonna come on down, and turn on to our back. So you can shift it over to the side, roll down onto your back, and just check that you have space to take your arms out to the sides.
Bring the knees in towards the chest, and plant the hands down in a T position, and here just think about your upper back, really grounded, so that in between your shoulder blades, there's a really heavy weight, like one of those old medicine balls we used to use in school, on your chest. So then you can roll your knees over to one side, and then roll them, like drawing a smile in the air, over to the other side. And just oscillate through that a little bit, so you're massaging all the nerve endings of the back of the pelvis, and also the lower back fascia and musculature is getting this really gentle opening, and loosening. If it feels good you can even, when you go over to one side, you can like reach the legs out a little bit, and it's just gonna add a little bit more pull. And then we're gonna come into center.
And with my knees in, I'm making this little pop of my pelvis up and over to the left. And I like doing the little pop, if it feels good to press your feet down and lift your pelvis and plop it down, then you can do that too. Bring your knees in, and let your knees fall to the right. So if you have any instability in the back of the pelvis, or it just feels like it's pulling a little bit too much in the back of the pelvis, if you have a bolster or one of those thick blocks, you can place it in between your legs, and this is just really restful and gives you a little bit more forgiveness in the back of the pelvis. And it feels really good for me right now, so I'm gonna like, sit there.
And open up through your arms, and then lift your chin a little bit, and let your head roll all the way over, and I just really don't love twisting when your chin is stuck down into your chest. It feels really nice for me like a chiropractic adjustment, where you get length, and then you rotate over, so see if it feels okay. If the left chest is not on the floor here, it might be too much to turn your head, so then you can look straight up, and breath, and press your hips again, away from your head. You're getting a little bit of length, but mostly you're just luxuriating in the twist, where you're getting a nice ringing action through your spine, and the deeper hip flexors that are attached to your spine, are getting a wonderful release and pull. Let's be here for a few more radiant breaths, and you'll feel that the belly is a little bit constricted maybe.
It's a nice opportunity to breathe into your back. And then, just switch sides. I'm gonna take this prop out. Roll back over. Maybe do that little pelvis pop, so my pelvis is a little bit over to the right, and then I'm gonna let my knees fall to the left.
And just because it feels so good and supportive, I'm gonna place the bolster in between my knees. Let the arms come out to the side, nice and heavy through the upper back like there's a big weight there. Maybe I like to rotate my head if my right chest feels really heavy. And just enjoy this feeling. Just by being in this shape you're giving a lot more length into those deeper hip flexors, probably a nice release into the back.
Sometimes it's nice to have something underneath your head, as well. If you feel some strain in your neck you can put a blanket underneath your head. And even if you're quite flexible, and you have a lot of mobility in a lot of these postures, it's really useful, to go at about 70% effort with your yoga practice, if you're an athlete, because you might work at 100% a lot, especially if you're working towards improving. So in your yoga practice, you can really take this time to nurture and repair, and have reserves, and build reserves. So I often practice yoga at a 70% effort, endeavor.
And then it leaves me feeling really energized, and not depleted, for everything else that is your life. So then you can slowly come out. I'm gonna move my pelvis so that my pelvis is now in line with my head. And I'm gonna do this, little exercise that I learned from a cranial sacral therapist, that can like set your sincrum into alignment, maybe. I like to think that it might.
So we lift up the pelvis a little bit, like two to three inches off the floor. Relax the pelvis, and the muscles around the pelvis, the hips and the bum. And then, just plop it back down, like, plop. Lift up, and then, plop, and do it a couple of times. And so if there's a little asymmetry in the back of the pelvis, this is rumored to like just set it into place.
I just like to think it does, and it feels really good, as well. And so from there, from this relaxed belly, let's slide our legs out. And if this really pulls on your lower spine, feel free to stay here in this more constructive rest position. But today it feels really good to let my legs fall out. And I'm actually gonna stretch my heels, catch my heels, and then relax, especially if you can catch your heels on a sticky mat, it gives you like, maybe even, an inch more length of pulling your legs out of your pelvis, so if there's a lot of congestion in there, there can be a bit of a release.
You can even do these little heel rocks, just to feel that your whole torso is relaxed, you can maybe feel this rebounding up into your neck and your head, just to give you that feedback of, you're letting go. Huge breath in, and nice long gorgeous exhale. Let your eyes close. And come back to that radiant breath, that drops you down, a little bit lower. I even feel like breathing a little bit lower, it gets me out of my head.
So the more I embody my belly, my legs, my pelvis, the less I feel stuck, in my head, in large systems of thought. Really let the belly go, and feel the belly rise, and fall. Soften the palms of your hands and the soles of your feet. Neck muscles, back muscles. And know that in this non-productive, seemingly non-productive time, you are making space to hold and heal yourself, from all of the things that you do, making space for the new.
So it might feel good to stay here for a while longer, especially if you've managed to do the work of relaxing yourself, and you might want to linger there for a while. But if you feel ready, then just flicker your toes and your fingers, and stretch out through your periphery, maybe reach your arms over your head, gently arch, and point your toes, and then, release. You can draw your knees in to your chest. And roll over to one of your sides, and come up. Taking a few breaths and seated, to just, experience gratitude, for this heart, mind, and body, and time to practice.
Thank you. Namaste.
Yoga for Athletes: Recovery Practices
Comments
So glad to hear you're taking care of yourself and noticing things in your body. Thanks so much for your comment.
You need to be a subscriber to post a comment.
Please Log In or Create an Account to start your free trial.
