Description
About This Video
Transcript
Read Full Transcript
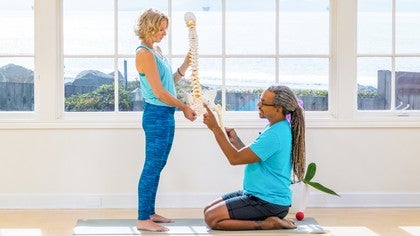
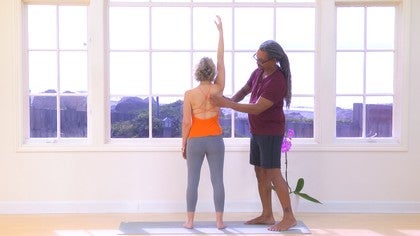
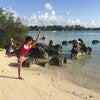
Hi, it's Arturo and my friend Tina, and we're gonna look at the anatomy of the booty, the hip. So first let's go over the bones of what we got in the hip. We have the pelvis bones, the three bones that make the pelvis, the ileum, the ischium, and the pubis in front. If you put your hands on your hips, you're putting your hands on the ileic crests here, up on the crest of the ileum, and then the pelvis meets the spine. We have the spine in between the two sides of the pelvis, and the main bone that's articulating, that's meeting up with the pelvic bones, is the sacrum. This joint between the sacrum and the ileum is called the sacroiliac joint, or the SI joint. This joint, when we were talking about joints earlier that balance between mobility and stability, the SI joint is a joint that we want to have pretty stable, and we start to see problems when people open up their SI joint through cranking on the legs and twisting, etc. So we want a lot of stability here, not a lot of mobility in the SI joint. We also have the femur, and the femur, or the thigh bone, goes right into the side of the pelvis in the acetabulum. So this is the actual hip joint right here, and come back forward, and the hip joint, it's the same type of joint as the shoulder, a ball and socket joint, but it's got a really deep socket, and there's a lot of ligaments surrounding and stabilizing this joint. So it does have a fair amount of freedom of movement in terms of doing lots of different planes of movement, but it's much more stable than the shoulder joint. You can jump up and down on your hips for, you know, five, ten, fifteen minutes, but if you try to do that in handstand, jumping up and down, your shoulder joints would come apart. So the hips are much more stable, and thereby much less mobile, typically. So we're going to go through and find how to locate these structures on a real human body. Tina's real human body. Let's set these down, and can you face the ocean please? So in order to see what we're doing more clearly, I'm going to have Tina pull her top shirt off here so we can see a little better. Thank you. So I'm going to find the iliac crest, the top part of the pelvic bone, again using the circles. I don't want to use fingertips here. People are often very sensitive and ticklish here. So to prevent ticklishness, I'm going to use a broad pressure, firm amount of pressure, and then slow movement. Slow movement with firm pressure helps keep it from being ticklish. And there's the top of her ilium. I can follow it back, and then right here I'm going to drop off the ilium, and I can feel the sacrum, the edge of the sacrum, right here. Triangular shaped bone at the bottom of the spine, and the tailbone is going to be right about here. So here's the edge of the sacrum. And the next bone I want to feel is the greater trochanter. When we're looking at the femur, the greater trochanter is this bump that sticks out to the side, and that's the easiest thing to feel in terms of getting close to the actual hip socket. You won't be able to palpate the hip socket itself, but I'm going to come and feel right down here, again with circles, on the side of her body, and there's the trochanter right here. And I can check and see if it's the trochanter by having her, can you rotate, yeah, and there it goes, and back in. When she turns her toes out, this rotates, but her pelvis stays pretty still. And back to the center. Now one of the more famous muscles in this hip area is the piriformis muscle. Pira means pear, and formis means shaped. So it's a pear shaped muscle that goes from the sacrum, the side of the sacrum, actually on the front side of the sacrum, and goes out to attach on the greater trochanter. So I'm going to keep one finger on the greater trochanter and come back with my slow circles to find the edge of the sacrum. There it is, and that's the line of the piriformis. A little wider over here at the sacrum, and then it comes down a little narrower into the trochanter. In the books, you'll hear it say that the piriformis externally rotates the femur, so that's the motion of turning the toes out toward the side and rotating the whole leg. What it also does is, with walking, every time you take a step, every time the heel strikes the ground, this is going to contract a little bit. With every step it contracts to help stabilize the movement of the knee. So you can imagine how many reps your piriformis is doing every day if you walk a lot, or if you're a runner and it's doing it that much more as you run, you know, five to ten miles a day. It's quite a lot of work in the piriformis and doesn't get stretched enough. The next muscle group we're going to look at are two of the gluteus muscles. There's three total, I might as well say the the biggest one, the first one is the gluteus maximus, which is attaching all along the edge of the sacrum and the ileum, and coming down on a diagonal like this, it's over the piriformis and the other deep hip rotators. But then, can you turn and face this way please? And then, let's have you keep this arm a little out of the way on your belly, maybe like that, that's good. And then I'm going to find that trochanter again, using my slow circles, firm pressure, there it is, finding the iliac crest again, there it is right there, and coming just below the iliac crest right into here. Right in here, you'll feel a group of muscles that feels almost like bone in most people. Yeah? It's muscle, but it's muscle that is so overworked and underpaid, under loved, that it really gets very rocky. This is the gluteus medius, and the gluteus medius really helps to stabilize the pelvis in standing and in sitting, and really gets tight and worked quite a bit. In the hip release episode, one of the releases we did with the ball was to bring the ball into this zone, between the trochanter and the iliac crest, and to lay on the side on the ball. This area is under massaged, usually it's a great place if you find a massage therapist who's got skills of going into this gluteus medius. They're a gem, so you should go see them often. Janet Trevell, who is the high priestess of trigger point therapy, called the gluteus medius the hidden prankster of low back pain. It's very common for the tight points and the radiating tender points, the trigger points, to be very involved with causing low back pain. And especially with all the sitting that we're doing, these gluteus medius are often very short and understretched. It's a challenging area to stretch, that's why I really like working with the ball here. Okay, can you face back towards this again? One other structure that we want to look at in the area of the piriformis is the sciatic nerve. So remember the piriformis is coming right at a diagonal like this, out to the greater trochanter. Right in the middle, coming out from the front of the sacrum, is the sciatic nerve, coming out from right below the piriformis. In most people it's below the piriformis, but in some people part or all of the sciatic nerve will come right through the belly of the muscle. And remember that that muscle is contracting every time the heel strikes the ground. So as you can imagine, that can be a real pain in the piriformis. And the sciatic nerve is the largest external nerve, largest peripheral nerve in the body, comes down the back of the leg and then splits about mid thigh and goes down and innervates the foot. When the sciatic nerve is irritated, it's often called sciatica. And two common causes of sciatica, one is when the bones or the discs impinge the sciatic nerve up higher, and another is when the piriformis is compressing the nerve. And that one is really common, that you get a muscular compression sciatica, muscular compression neuritis or inflammation of the nerve. So when the person is lying down, it can feel confusing to find those same things that we just were looking at standing up. So the crest of the ilium, again using that broad flat pressure and slow movement, there's the crest of the ilium and the greater trochanter, right there, and the sacrum. And there's the edge of the sacrum. So right here is where the piriformis is, right in the middle of that is the sciatic nerve coming down the back through the hip and down the back of the leg. And then over on the side we have the gluteus medius, just above the greater trochanter here. So when doing, we're gonna do some pin and stretch work here, and in doing that the one thing you want to avoid pressing on is that sciatic nerve. So right in the middle is the one area I won't press. Let's start with the piriformis. I'm gonna come to the trochanter and come just inside, and I think I found the spot, judging by Tina's response. It's usually pretty tender, especially in people who are very active walkers or dancers. It's really common for dancers to have a very locked down piriformis. One of my ballet dancers called it booty lock. And then to do the stretch, I'm going to bend her knee so that I can stretch her piriformis. The piriformis, when it contracts, is going to do this movement. So to lengthen it, I'm going to do the opposite movement. Coming just inside, a little tender right there. Okay, and then is that a comfortable amount of pressure? And then I'm going to slowly lengthen it, stretching it. Does that feel good? Now I'm doing this across the body, which is not the best body mechanics. I'm kind of far away from my center. When I'm doing this for real on a person, I will do it on the same side of the body that I'm sitting on. I'm doing it across the body so you can see it a little better. There's the trochanter. There's the piriformis. Yep, I have very good piriformis radar. And slow stretch. And I can feel it stretching here. And I'll find a few points in this area. Find a point, pin it, and then slowly stretch it. Find the point, pin it, and slowly stretch it. Pressure is still good? Okay, I can do several points right around this end of the trochanter. With the piriformis and the gluteus medius, you want to do about the same amount of time on each side. If you do just one hip, when the person stands up and starts to walk, they'll probably walk with a limp. They'll probably start to walk in a circle because you've released one hip and the leg length is probably longer on that side that got released. And if you just do one side and leave them like that, they can end up with some low back pain. So definitely release both sides. To work into the gluteus medius now, I'm going to have Tina roll up onto her side. I have a head pillow for you here. And bring your knees up towards your chest a little bit more. Great. So again, a new position means I have to find everything before I start. Palm pressure, slow movement. There's the iliac crest. And then there is the greater trochanter. So I'm going to go just below the iliac crest into this area on the very side of the hip, usually right along where the seam is on a pair of tights. In the episode where we're doing the hip release with the ball, this is the zone that you want to have the ball in, but on the underneath side so you can let your body weight rest into the ball. And then I'm going to come and get up above her, lining my bones up so my arm bone, my finger bone, my thumb bone, so that I can just lean body weight in here. Now this area is really rocky. So if your thumbs aren't strong enough, you can use a knuckle. Does that feel good? I'm going to shift my position a little more so I can use my body weight as much as possible. If I'm too far away and try to do this with just arm strength, I'm not going to have enough strength. Body weight is going to make it much easier. Is that good? Ow? Too much? Good? Good ow? Okay. Same thing with the points that we were doing before. The most pressure you want to use is where you have that good achiness.
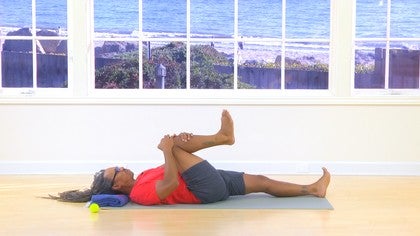
And now it's going to be hard for me to lift her leg to do any movement. So what I'd like you to do, Tina, is to keep your knees together and slowly lift your left ankle so the sole of the foot goes towards the ceiling. You're going to go a little knock need. That's right. Is that okay? And back down. And find a new special point right there is a good one. Same thing. Slowly. And back down. And one more. I always like to do at least three. So at least three. And same thing with the earlier episode on the shoulder. I wouldn't want to do this every day but every other day. And even with the self-treatment with the ball, you don't want to do that every day but giving a little break time in between. This is an area that is rarely massaged so that when it does get massaged it can be sore whether you're doing it yourself with the ball or you're coming in as the teacher to give a little bit of hip freedom here. And it can be a little bit sore afterwards. So next we're going to do some variations for self-stretchiness on these areas. So Tina, would you roll onto your back please? Would you like the pillow or do you like to get rid of it? It's up to you. You like the pillow? Okay. Pillow skin. So we're going to still work on her left side so I'd like you to keep this right foot planted where it was and then draw your left knee in towards your chest and cross the ankle over it. That's right. So we're basically going to do thread the needle but with some slight variations. So now you can reach this hand through the triangle of your legs and take a hold of either the shin or the back of the thigh. She's very flexible. For many of my students at the Yoga Dojo they have to grab the back of the thigh or even use a strap one hand on each side of the strap so they can start to draw the knee towards the chest. I'd like you to keep the left toes slightly lifted and active this whole time. Oh you feel how that already gets a little more action in the hip? Okay. So right now she's just drawing this knee straight towards her chest and this is the reclining version of pigeon basically, often used to get into the piriformis muscle. But now what I'd like you to do is to explore this angle. So instead of going straight towards the chest, try taking this right knee towards the outside of your right shoulder. Go slow. As she changes the angle of where this knee is going, it's going to get into different layers of this outer left hip. Feel good? Finding some specialness in there? Especially finding some stretch in the areas that we were just massaged, that were just massaged. She can also start to take the knee towards the opposite shoulder, the right knee towards the left shoulder, and anywhere in between she can start to explore and find the lines that get into her personal tight booty because everybody has different flavors of booty lock. All the time keeping the toes slightly active, the ankle slightly dorsiflexed or the foot slightly lifting. That directs a little bit more of the stretch into the outer hip. Good, and then come back to the center, and you can slowly release the right foot down, and then slowly uncross. And yeah, extend both legs out, and you might notice some difference side to side. Feel a little different in your left hip and your right hip? Yeah, well, and it is longer. The leg length has gotten longer on that left side. As I said, if she got up now and started walking, she would probably walk with a limp, which would be funny for a while, but I really want to do the same thing on the other side so that her low back stays happy. Thanks so much for watching!
Anatomy for Yogis: Arturo Peal
Comments
You need to be a subscriber to post a comment.
Please Log In or Create an Account to start your free trial.
