Description
Transcript
Read Full Transcript
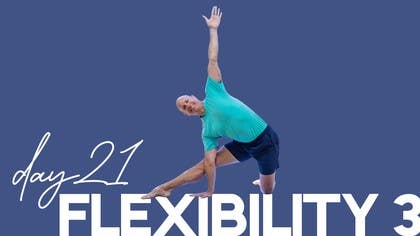
Welcome to day 21 of our 30-day challenge. Can you believe it? We are in the final third of this amazing challenge. And let me just say, I wish, wish, wish I could just get right through that camera and come in and see you in person to see how you're doing, what you're feeling, how you're enjoying the poses or any challenges you're having. But for the time being, the best way we can do is with any comments that you leave. So please, if you have time, help me connect with you better by just leaving a comment. And I look forward to hearing from you.
We're going to be moving a little bit further into our flexibility theme, day three here. We'll be starting in child's pose, but just want to mention we'll have a block, a blanket and a strap to help us with our props. Let's start in child's pose, wide legs, feet together. We'll reach forward with the hands about shoulder width or a little wider. And let's start just halfway into the pose so that we can begin to engage the arms and gently settle the sits bones down on the heels.
This would be a great time if you need a little support, a rolled blanket between your hips and the heels. That'll help with the knees if they're a little stiff. And then keeping that energy in the arms, sits bones headed down, you can release your head to the floor or a support block or blanket if you need it. Take a few breaths here and draw your attention inward. As we're diving deeper into the flexibility practice, it's more of an inward reflection when you've done all the supportive work and strengthening.
And now we can use that support to really dive in, to get a better picture on the inside, physically, mentally. And then from here, come up onto all fours. Let's move the spine a little, up and down, cat and cow. Exhale, spine goes up. Inhale, spine goes down.
Feel from your tailbone all the way to the top of the head. Look for any spots that are a little stiff or a little reluctant to move. Start to introduce a little bit of movement there. Each round we do. Exhaling, spine goes up.
Inhaling, spine goes down. Not about a little side to side movement. Opening left and right. You find a rhythm of breathing that works for you. And if there are any other directions that you feel intuitively need to happen, please, you explore those.
That's part of that inward reflection. Feeling what needs to happen for you. And then from here, downward facing dog. Let's lift the knees, little pedaling of the legs. Opening up the calves, heels, hips.
Press the hands well into the floor, into your yoga mat. So you feel all five fingers and the palms well in contact with the floor. This helps us to lift and support the shoulders and extend the spine. Allow the heels to settle into the ground. Let's take a moment here.
And if we go way back to the beginning of our challenge, remember that you could always use bent knees in downward dog if you need it. And from here, let's bring the feet together. Start by lifting the left leg high. Raise your right heel. We'll turn the hips open to the left side.
Bend the left leg as though to reach the toes toward the ground. Elongate the left knee further and further from the hands. Couple deep breaths here. Then square the hips, big step forward with the left foot. We're in a lunge.
We'll start by gaining the support of the lunge using the back leg. Right leg, firm the thigh, lift the knee, lift the hip joint a little. That way we're not resting on the ligaments in that right hip. It's so important when we're going with flexibility that we're not trying to just press, press, press further, further, further and not recognizing the limitation of our joint or the end range of the joint. Then keeping that stability in the right leg, we'll keep the right hand down.
Turn it open into your twist. Raise the left arm into the sky. Re-check the support of your right leg and then spread your awareness across both arms through both legs into the trunk so that you spread not only physically, but you feel the awareness going all the way through your body. Release the hand down. Step back to dog pose.
Take a moment here. Notice right side, left side. Feet together. Right leg up, left heel high. Turn and open the hips to the right side.
My smooth breath. Bend that right leg and elongate your right knee further and further from the hands. Then level the hips. Big step forward, right foot. Let's start with the support.
Left thigh, firm, kneecap lifting. Left hip nice and strong. So that you feel that support all the way up here. Use your awareness to scan. Then from that supportive position, turning and opening right side.
Right arm up into the air. Torso close to the right leg. And then spread the awareness through each limb. As you do that, you notice, is there some part that's overworking, underworking? Too much tension, too little tension.
And then release the hand down. We'll take dog pose. And then inhale, raise your heels, look forward. Step to the front of your mat. Half Uttanasana, hands on shins, long spine.
Watch the backs of the knees so we're not hyperextending there. And then let the trunk hang down. You can grab the elbows. Strong legs, firm thighs. Now hands on hips.
Inhale, come all the way up. Let's turn so that we're on the long portion of the mat. We'll start with feet a little wider than hips. Stretch down to the floor. Get that nice foundation and the inner lift through your body.
We'll raise the arms up. Right hand captures left wrist. Big breath in. Exhale, press down to the feet. Side bend.
Take a few breaths here. You have to reconnect the legs into the ground. Almost each and every breath so you feel very supported. And come out and release the hands. Take a breath.
And other side. This time left hand captures right wrist. Big lift, press the legs to the floor. And side bending to the left. As we're starting these standing poses, we're learning to lift and open the chest.
From a lateral perspective. And come out. Release the arms. Feet together this time. If you felt a little unsteady in that last version, you can stay with the legs wide, as this is a bit more challenging.
We'll take the arms up. Right hand. Grab left wrist. And exhaling into your side bend. Here, try to squeeze the head with the arms and roll the chest more toward the sky.
So both sides of the chest equally face forward. And then come out. Take a recovery breath. Arms up. Breath in.
And other side. And you may notice distinct differences from side to side as you scan with your awareness. We could even say awareness is a muscle that we're building. That ability to feel and sense oneself through the reflection of yoga. And come out.
Take a recovery pause. Our next pose is goddess pose. We've explored this a little before, but now from the perspective of support, we'll take a look again. Wide legs, toes turned out a little. Come down into your pose.
And we'll start by pressing the feet into the floor, hunting for the feeling that the hamstrings, the underside of the legs are supporting the thighs up. Press down almost as though you're about to stand up and see if you can feel that under leg support of the hamstrings. We'll just hold this for a breath. And then press up and out. Let's do it again. Come on down.
Press the legs in the floor almost like you're going to stand up until you feel that under leg support. We'll stretch the arms. So the awareness, like a meditation, we hook it into that feeling like a mantra almost of the support of the legs. And then release. And then one more time, coming down.
Press the feet into the floor. Under leg support is that mantra, the physical mantra, and then arms up. Eventually, as you practice this, my goal for you is to feel that the legs are supported, but it also feels like it supports up and out here, all the way up to the head, and it creates an inner calmness, even though the powerful work is happening. And then release. Bring the feet in. Relax the legs.
It's a great opportunity to grab a block for our next pose, triangle pose, wide legs out. And we're going to continue exploring the support of the underside of the legs, in this case, the underside of the back leg. Let's take the hands to the hips for a minute and work on pressing the outside edge of the left foot into the floor so that when you press there, you feel that there's a lift, almost like somebody had ropes there helping you to lift that left hip. You can just see my body is already starting to spill over toward the right, which is exactly what I'm looking for here. So they have the support and lift of the left leg, and now that is my new mantra, if we can call it that, that physical mantra, pushing down into that outer left foot, lifting the left groin.
And then bring the block, inhale, come up. Turn the feet other side, right toes a little in, left leg out 90 degrees. Hands on hips, bring your awareness to the outside edge of your right foot, press down and get that feeling of lift. And my hope is you start to feel that by lifting here at the right leg, you feel the pelvis is asked to turn. We're going to need this in our deeper flexibility poses coming up.
Right arm to the sky. Keep working that feeling, that awareness of right hip lifting, turns the pelvis over to the left side. Then bring the block, come up. Let's heel-toe the feet all the way together. We'll take just a moment in Tadasana and then open again.
Wide legs, we'll put the block to the outside of the right heel. Left toes in, right leg out. Parsvakonasana. Stretch the arms, so that's an added thing for us to feel and observe. Outside edge, left foot, lifting, left groin.
Bend the right knee, take the hand of the block. Adjust the block to whatever setting you need. And here we are in the pose. Outer left foot pushes down on the mat. Left groin lifts.
And then turning the arm, can you connect from outer left foot to the fingertips of the left hand? Keep lifting that left groin up. And then inhale to come up. Bringing the block, second side, right toes in. Left leg out, we'll place the block however you need it.
Stretch the arms. Outer right foot down, lift that groin up as you bend the knee and take the hand down. We'll start with the right arm right up. Turn the palm, and from the outer right foot, then we reach. Parsvakonasana.
Keep that lift, right groin. A few breaths here, and you're steadying your awareness in the action we're talking about. Lift of the hip. And then inhale, come up. And we'll heel-toe the feet together.
We can put the block away. And let's stand in mountain pose. Just feel the two sides of the body. Okay, let's grab a blanket for a little extra support in the knees for the next one. And we'll unfold it and set it down lengthwise on the mat.
Like this. We'll come down to knees for a pose known as gate pose. Parigrasana. I'm going to shift a little over here to the left. We'll go to the right side first.
Right leg out. We've worked on this before from a 90-degree perspective. Now we're going more for the full pose. And I'll recommend you turn your right toes a little inward. It helps sometimes if there's a pinch in the back of the ankle.
Left leg straight up and down with that same lift over to the left side we've practiced in triangle and side angle. Stretch the arms and extend over to the right side, hand to the floor. I'm lifting, pressing out, and under here like goddess pose, I have the support of the right hamstring. Inhale, come up. Knees together, second side.
Right leg vertical. Left leg out, toes in. Stretch the arms and extend. Again, lifting, moving out that right hip. I try to keep my right leg vertical.
And then inhale, come up. Knees together. And our next pose, we'll be moving into frog pose. Take the legs wide, wide, wide. We'll start here and feet directly behind the knees.
Now we love this blanket here, a lot more padding for us. And coming down onto your forearms. For the time being, we'll just take a few breaths at this depth, helping to open up the inner leg muscles for the poses to come. And then if you feel you have a little bit more space, we'll widen the knees out, keeping the feet out that wide. In this pose, I push down the knees so I feel that under leg support that I've been working on so far in this sequence.
And then bringing the toes together, sit the hips closer and closer to the heels. You have to feel into your body to what is the right depth. We'll aim to set the hips down onto the floor, but each body is different, frog pose. And then use your hands to help press up and out of the pose. Bring the knees together.
And we'll do a few cat and cow to come out of this pose. Exhale, spine goes up, inhale, spine goes down. And then to dog pose, just to get a little length into the spine, and then lower the knees down. Let's put the blanket off to the side, and we'll be pulling the block back into play. We'll take a seat on the block, legs extended forward.
This is a version of Janu Sarshasana. We'll take the left leg first, out to the side, and I'm going to try to bring the top of the left foot onto the floor. This is different from just doing on the floor or blanket because of where it points this knee, the front of the tibia, mostly down. This allows us to really come forward from the left hip. So I reach with my left hand, grab hold of the right foot, and begin to elongate that left side trunk.
If you can catch with the right hand, please do. And then slowly up. Extend the left leg, and now the right leg. We'll draw the right leg out. Same idea with that right knee pointing down, and I should mention the left leg, the straight leg.
We need to make sure the top of the thigh is pointing up. That ensures the hip is going to help us move deeper into the pose. Right arm reaches forward for that left foot, elongating from that right hip, coming into your pose, possibly grabbing the feet with both hands. And then coming up. We'll extend both legs for just a moment, and a version of Dandasana.
And then bend the knees, come down off your block. We'll put the block away and grab our strap for the next pose. Wide legs. We'll start with the strap around the bottom of the left foot. I'll keep a little bend in that knee and take the strap behind my body.
Right hand comes around to capture the strap. Left hand in front. Then I push through that left leg and it creates a twist. This is going to help us move into what is known as Parjva Janu Sushasana next, learning to turn. I can pull on the strap now and begin to lean my left side trunk toward the left leg.
And then inhale, come up. And we'll release the strap from the left leg. The strap comes around the right foot. We'll keep a little bend in that leg. Left leg out long.
Take the strap behind the right leg and body. Left hand comes around to capture. Then I push out through the right leg to induce that twist in the body. Try to face my trunk over the left leg toward the right at the left foot. And then I can gently pull on that strap to help coach the body into a side bend over the right leg.
And then coming out easy, we'll release the strap. And put that off to the side. Next, we'll grab the block one more time for Parjva Janu Sushasana. The block will come underneath the hips, like you see me placing it here. And we'll start with the right leg tucked under, very similar to the last Janu Sushasana.
Left leg out long. We'll start this version of Janu Sushasana by doing the twist we just learned. Turning toward the right knee. Press the right knee and right shin firmly down. And we'll start to lean the body toward the left leg.
It's important here that as we lean, that the right buttock and right hip bone should start to lift away from the block. That allows me to lean without overstretching the spine. So you're going to go where you feel is your end point range of motion. Feeling into your body. Go on lifting that right hip.
This is what we learned in Triangle Pose in Parjva Janu Sushasana. We can attempt to grab the foot with left hand. You can take the right hand up, or possibly reaching over the head to catch the foot. Left elbow presses into the ground, right elbow reaches to the ceiling. And we're turning.
Deep Pose opens up the whole right flank of the body, right abdomen. Tons and tons of space there. Right arm comes up, breathe in, exhale your way out of the pose. Extend the right leg. Left leg in.
All right, we'll start by turning to the left side, aiming the trunk over the left knee. Push down the left knee and left shin to start to get that lift. Remember in Triangle Pose, Parjva Janu Sushasana, that lift of the back leg, if we're calling this the back leg. It allows me to turn the trunk, or rather to release the trunk over the right leg. I'll with my right hand capture that right foot, left hand straight up.
We'll pause here, see how you're feeling. Is more depth available? Go on pushing that left knee into the ground. Maybe you can capture the right foot with both hands. If not today, maybe tomorrow.
So check in with yourself. Are you trying to go too far? Are you going just right? Or you may be underdoing just a little. Only you will know.
And then raise the left hand. Come out easy. We'll fold in both legs for just a moment. Inversion of Siddhasana. While we're in the Recovery Pose, gently pushing down the sitting bones to create that inner lift.
I've talked a lot about foundation, pressing into the floor to get lift, but there's also the lateral extension that we're really tapping into in this sequence today. The lift brings space. Extension brings quietness. And then we'll come up off the block. We'll still use the block.
Lie down. Knees bent. And we prepared the body for a nice lifted supported bridge. I'm going to recommend trying to get the block under at its highest setting today, but you'll place it as you need with the thin way underneath the sacrum. Tuck the shoulders under, support the chest.
Feet are connected well to the mat and thighs parallel. So we don't want them to fall open. Thighs parallel. Press the feet lightly into the floor, almost like you're going to try to lift off the block a millimeter. Nothing intense, but just so that there's a little muscular support.
Press the shoulder bones down into your yoga mat to also create that lift inside the body. And then with that support in place, can you begin to broaden, from your center line out to the sides, right side to the right, left side to the left. Do that in your front body. Do that in your back body. And see if you can notice the quietness that I'm speaking of with lateral extension.
And then keeping that concept of the lateral extension in your mind will lift up off the block. Let's take it out from underneath and put it off to the side. Grab that blanket again. We'll place it underneath the back of the head and neck. Let's lengthen out the legs one at a time.
If you need to shift the hips a little to lengthen your lumbar. Pausing there and then slowly lengthening the legs out. Just a little tuck of the shoulders and allow the legs to slowly release all tension. Sense that imaginary midline of your body, that which splits the body right side and left side. And from the pelvis, slowly up to the belly button, relax away from that midline.
Belly button to sternum. Lowest ribs to the highest ribs. Right side throat, left side throat. Right side face, left side face. See how far you can release away from that midline and settle into the quietness that emerges.
You're welcome to stay as long as you like in that quietness. If you'd like to come out, rest your hands on your tummy and bend your knees one at a time. Turn softly to your right side and just rest there for a breath or two. And cross your way up to sitting. Nice, easy, comfortable sitting position.
I'd love to hear how you did with that quietening effect we were looking for in Shavasana. Let me know. Were you able to find it? Was it difficult to find? Really looking forward to seeing you in our next flexibility sequence. Have a fantastic day. Namaste.
Align with Freedom: 30-Day Yoga Challenge
Comments
You need to be a subscriber to post a comment.
Please Log In or Create an Account to start your free trial.


