Description
About This Video
Transcript
Read Full Transcript
(waves crashing) Hello again, and welcome back. So, in this section, I want to break down some of the seated postures in the primary series. Show you some alternatives and modifications, and how might use some props, if needed. OK, so starting with Ardha Baddha Padma Paschimottanasana. So, you'll come through to sit, extend the left leg and then draw the right foot up into Half Lotus.
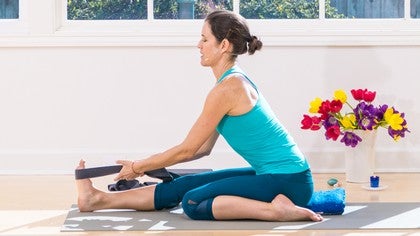
This can already pose a problem for some people. If there are issues with the knee or the ankle, you are more than welcome to just take the right foot down to the earth, Janu Sirsasana style. If you can get here, but it's pretty challenging to keep the foot there and reach back for the bind, you can grab a strap. All right, you so don't necessarily need to do the full loop. Just fold it in half and reach that right arm back.
Hold the strap wherever you can. And over time, you'll be able to walk the hand a little closer to the foot, little-by-little-by-little until you find the big toe. But, no rush, just take it where you can. And then, for the fold, if you can't quite reach the foot, you can just let this hand land wherever it reaches. Or you can grab your other strap.
Same thing, you don't need to do the full bind. Just loop the strap around the ball of the foot. Take hold of both ends with that left hand. Come back for the right foot and hold here. All right, this might be your posture.
You might be able to take it forward just a few inches. Maybe after a few breaths, you can take it a little deeper. But again, there's no rush. The idea is just to meet the edge and breathe into it. (deep breath) OK.
Then, releasing that we'll move into Tiryam-Mukha Eka-Pada Paschimottanasana, and traditionally the right leg bends back first. So it's a little easier to view, I'll take the left leg back. So, you bend the left knee and fold the left leg back. I find it really helpful to use that left hand to roll the calf muscle out, so there's a little more space for the leg. And then, you might pick up the seat.
Make a little adjustment, so ideally both sit bones are equally rooted into the earth. If not, you can grab a block or a blanket. And then, just slide it at whatever height you feel you need underneath the other sit bone. So, if getting this knee back, and getting the foot, the top of the foot on the earth is really challenging, prop up the other side with a blanket. And then, for the fold, same premise as before.
If coming forward all the way to the foot is too intense, you can simply hold onto the leg or you can grab one of your straps, loop it around the ball of the foot. Better not to put pressure right on the arch of the foot. Keep it around the ball. Take hold with both hands. Get a big inhale, (deep breath), and exhale, fold.
All right, and the beauty of a blanket as opposed to a bolster is, as you find over time, you're a little deeper into the pose and you can ease a little closer to the earth. You can simply unfold the blanket and take it a little lower down. So, it's just the right amount of support, not too high, not too low. All right? Moving onto Janu Sirsasana.
So, typically A is not so challenging. It's simply the sole of the foot to that inner thigh. And as much as possible, we want this knee to drop back, so there's kind of a 90-degree angle with the legs. But, of course, with all these forward folds, the strap is an option, OK? What seems to pose a little bit more trouble are B and C.
So, for B, you're going to draw the foot in, and as much as possible, kind of roll it open so the sole of the foot is facing the sky. And then, pick up the sit bones. Scoot yourself forward and you actually literally do a sit right down on the heel. Not necessarily supremely comfortable at first, but over time, you kind of find the sweet spot and it becomes more sustainable. If this, in and of itself, is really challenging, you can stay here.
Just use the hands, use the arms for support. Get a little accustomed to that sensation and breathe into what you've got. If you feel that's sustainable, you can begin to ease forward into the fold. All right again, holding wherever you can. Maybe grabbing the foot.
Maybe again using the strap. And to come out of it, pick your seat up and just ease back. For C, you want to be really, really mindful of the knee and the ankle. If you have near ankle issues, maybe not the best pose. If it's moderate and just challenging, then you'll work with what you can.
I find that drawing the foot in towards the body and holding the heel with opposite hand is really supportive and grounding. Then, coming under the calf muscle with that left arm to curl the toes back sets you up really nicely to get the foot in place. So then, we're aiming to get the ball of the foot right down onto the earth inside of that opposite thigh. Then, the sole of the foot fits so perfectly right along the inner thigh and the heel is moving up. Eventually this knee is coming down.
No forcing, let that happen organically. If that's just too much, then draw the foot in as far as you can. If the whole ball of the foot isn't making contact with the earth, that's fine. Just do as much as possible. Maybe you're just on the ball of the pinky and the fourth toe, and that's as far as it goes.
No pain in the knee or the ankle. There'll definitely be sensation, but no pain. And again, find the edge that you can sustain. Really commit to the pose. If you need to stay upright, feel free.
If you can fold gently forward with the foot as is, feel free, with or without the strap. And give it five breaths, OK? Marichyasana, A through D. Let's shake that off for a moment, and then let's bend the right knee. Plant the foot on the earth.
Again, give yourself a little space between that foot and thigh, about a fist distance. And then, easing forward, this is often where the challenge starts for some people. There's just no getting into the full bind, so grab the strap and take hold wherever you can. And then, easing into the fold, if you find you're here for a few breaths and then there's a little bit more space capacity, you walk the hands a little closer together and then breathe. Walk them a little closer together.
Breathe, just letting the pose gradually open. No forcing. All right, for Marichyasana in a B, this foot in Full Half Lotus is really, really challenging for many people for a long time. Getting it there, and then getting this in place, able to come forward can be just too intense. If that's the case, if you have really tight hips and you're working on that opening, this is a really nice variation.
Just cross the left ankle over the right knee. Keep this foot flexed like you would in Double Pigeon maybe to protect this left knee. When the foot is flexed, the leg muscles are engaged and the knee is supported so this foot doesn't fall asleep. Keep it awake. Then, bend that right knee.
Begin to walk the foot in, hands back for support, and just take it to your edge. All right, this can be really, really intense for a lot of bodies. Just stay here, feel that outer hip opening or any other sensation. Steady gaze, steady breath. (deep breath) And little-by-little, over time, you might find you're able to walk this foot in a little closer, deepening the hip stretch.
You might find you're able to draw the foot a little closer into Half Lotus. Just work it in very slow, subtle stages and eventually you'll be in the full pose. OK, for Marichyasana C, I'll take this side planting the left foot and then twisting to the left. If the thoracic spine, mid and upper back are really tight, this can be challenging. So, use that left hand behind you for support and maybe start with just wrapping the right arm around that left leg.
And work on lengthening the spine and gently shifting the gaze back. (deep breath) If that's doable, sustainable, you can take the right elbow outside of that left knee. Keep the palm up gently pressing in with the elbow. Gently pressing out with the knee to create a little resistance and then twisting back over that left shoulder. Don't even worry about the full bind. Just work on opening into the twist here.
(deep breath) If over time you're able to take it a little bit further, but into the full pose, you can absolutely use the strap. So, just lay it across the body. Get that right shoulder as far across the knee as possible, then reach it back. Grab the strap wherever you can. Grab the strap with that left hand and twist from there.
And the same premise, little-by-little over time, you'll be able to walk the hands a little closer together until you're in the full pose. (deep breath) And then, release. And the grand finale, Marichyasana D. So, same premise as B. If it's too challenging to get that foot all the way up into Half Lotus, an alternative for D is to simply keep the foot on the earth, then bend the opposite knee.
So, more important in this posture to work the twist than it is to have the foot exactly where you need it. So, just let the foot be on the earth, find the twist as deep as possible. Use the same principles as Marichyasana C with or without the strap. Take what you can. (deep breath) Give it your breath and your attention and release. All right, so again, first and foremost with any challenging pose, do what you can.
There's this kind of instinctual response that I often see in my own practice. "I can't do this. "I'm just not going to do this. "I'll skip this pose or I'll do it tomorrow." (chuckles) But, what happens is we build a kind of barrier to it. We never approach it and we think, "Well, I can't do the full expression of the pose, "so I can't do it at all." And what I really, really recommend is breaking it down.
Do as much as you can and really be present for it rather than like, "Ah, a couple breaths, "a strap here, a block there. "OK, now I'm done." Get into the full pose as far you can with all of your props. Steady your gaze. Steady your breath. Give it your full attention for five breaths and then move on.
Hope that helps, namaste.


You need to be a subscriber to post a comment.
Please Log In or Create an Account to start your free trial.