Description
About This Video
Transcript
Read Full Transcript
Nava Stay. Welcome to practice. This will be our comma reflection practice, and comma means pleasure. So we'll be moving through some breath work. A couple of restorative to open up the hips and open up the heart.
And just let this feel good. Let it be replenishing and nourishing practice. Let's get started. Rub your palms together. Taking your hands right to your heart.
You're welcome to close your eyes or keep them open with a soft gaze. We'll chant the sound of all breathing in. And starting off with breath of joy throw your arms open real wide, spread your fingers, lift your chest, And on the exhale, wrap your arms around yourself. Give yourself a hug and let your spine around. Feel more like that inhaling and opening.
And exhaling and rounding. And you can keep eyes open or closed for this part of the practice as well. In heel open. X. I'll pull back in. Give yourself a hug.
And you can change the crossing of your arms every time, inhale open. An exhale pull back in. Just a few more in hailing and opening. Exhale at the spine round, chin in towards the chest, wrap your arms around yourself. Inhale.
And exhale. We'll take 2 more, and he'll open. Excel close. Just get the broth moving. Last time inhale open. And exhale pulling in.
And then this last time, inhale open and just stay there. Just give yourself a couple breaths with your arms wide and open and receptive. And then once again, fold the hands in. Give yourself a hug. Let everything round in.
If you want to take a little bit of the sway from side to side, you can do that very, pass find for the nervous system that rocking sensation. And release your hands down onto your thighs push down into your hands. Roll yourself up. And let's set up for our first shape. So if you're sitting on a blanket, you can come off of that.
We'll need our two blocks for this. So the prop list here will be two blankets, one bolster, and 2 blocks. You'll take your blocks and place 1 horizontally on the second height it's about a foot away from the front of my space and second block, low wide setting, about 2 fists in between those blocks, maybe, a scooch more than that. From there, you'll take your bolster. And if it does have a handle, you can move the handle to the front and lay your bolster over the top of the blocks.
And notice that there isn't too much overhang in either direction, a little bit of overhang on either side, but not too much. I take one blanket, And I fold it non fringe to non fringe. Placing that at the top of my bolster with the smooth end towards the bottom. 2nd blanket, You can roll that up from the fringe side into a nice roll. And that I'm gonna place right in between my legs as I slide into this one.
So we're gonna come into a restorative twist. So nice to have a blanket in between your legs here, just like this. So that the hips remain a little bit more even. And then I'm sliding up, and I'm starting with my right hip right up against the bolster. I'll take my hands on either side of the bolster and turn the chest towards the bolster.
And then to come into it, extend the chest forward. Keep your spine as long as possible as you start to come forward. And you might need to slide your blanket a little closer to you so that it comes right underneath your head and your neck, but not underneath your shoulders. My head is turning to the left. My elbows can come down. Legs can go soft.
And there you are in your restorative twist. And, Jusprit, then we'll be here for a few minutes. So you can let the eyes close. The breath will get more subtle and shallow. Let yourself rest.
And take your hands underneath your shoulders. Closing into your hands. Press yourself up to set. Our transition is super simple. Just turn so that your back is towards your bolster setup.
And then flip yourself over to the other side. So I'm taking my left tip up against the bolster. My hands come on either side of the bolster, and I reach the chest forward to lay down head turns towards the right and can rest. And there we are. And let your next breath come in a little bigger.
Walking your hands back underneath your shoulders, push into the hands to come on up And, again, you can turn your back to your bolster and just give yourself a breath sitting there upright You can sit. However, it's most comfortable for you. Just a couple breaths in between. And then the blanket that was in between your legs can move off to the side. You'll spin around again to face your setup, your bolster setup. And you don't really need to change much here.
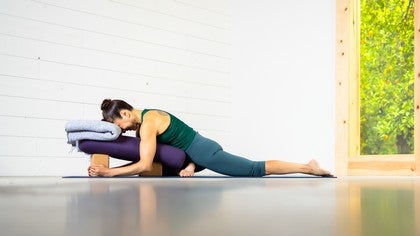
We're gonna slide the right shin right underneath the bolster and take the left leg back behind in a pigeon pose. And then same thing here, reaching the chest forward. I like to slide the blanket forward a little bit more so it rests more underneath my forehead. And that gives you the room to breathe there. The nose can be right below the line of the blanket And I like to frame the first block, the higher block with my hands here.
And stretching the left leg back, and then you just breathe there. Working into the area of the hips. Real helpful here to make sure that you've brought yourself close enough into your bolster that the bolster supports your belly. Your hips can be behind it, but you want your torso to feel well supported. Start to walk your hands back.
Again, taking them underneath your shoulders, press into the hands, Come on up. And then we'll switch sides so you can lean into your right hip. Bring your left leg around. Slide it underneath your bolster. Leftion goes right underneath the edge of the bolster.
Right leg back behind you. Scooch yourself in close enough that your belly is supported. Hands can clasp your your block. And head will drop. And keep in mind that one side could feel very different than the other. So if that's the case for you, and you need to adjust your props a bit.
You'll do that. One of my restorative teachers, Great teacher by the name of Margie Young, she used to say, when you set yourself up for a restorative, you should be very princess in the pee about it. Meaning that if something is slightly off, take the time to fix it. Trust trust your body's intelligence that it knows when there's imbalance. And some of the setups can get quite tricky.
So even if it takes you a little bit more time to get into it. Set yourself up well. And then if you are able to stay a bit longer, then you'll stay a bit longer. And then walk your hands back underneath your shoulders. Press your hands down and roll your way back up.
And you can bring the right leg around to meet the left. And once again, just sitting comfortably for a breath or 2. Noticing any little shifts. And then we're gonna come into supta baddha Kanasana. So you can keep your blanket on top of your bolster.
Just move that off to the side for a moment. And slide your low block to meet your first block. So you've got one block on the medium height one block on the low height and they're touching. And then you'll find your bolster again and place it right back over the top. And again, not too much overhang here, very little overhang on the front end, end of the bolster resting on the ground. You'll take your second blanket.
Open it up. So it looks like this and roll it up from the messy end. Into a long little roll here. Smooth it out. And then I'm placing my bum right up against my bolster.
I bring feet into baddha Kannasana Find my blanket roll, place it in front of the ankles, slide the ends right underneath me. And then this is the tricky part. Right? Hands come up and inside to hold the ends of the blanket and pull them back as I lower myself down. And then once you're all the way down, you can release the blanket. Now If you know you're super loose in your lower back and your hips, this might feel like a a bit too much of a lumbar curve for your lower back. If that's the case, and you know that, press into the backs of your hands, lift your bum up, tuck it under and then release it back down, and that will pull you out of too deep of a lumbar curve.
Blanket behind the head should be behind the head and the neck but not behind the shoulders so that your shoulders can spill off to the sides and your chest can stay open. Arms are down about 45 degrees away from the body. Palms turn up. Eyes can close. And breathe in your goddess pose such a nourishing and replenishing pose.
It's great for your digestive system. Helps to support respiratory function. Allow your breath to just fall in here. And let your next breath come in a bit more deeply. Exhale it away.
Reach down with your hands. Catch the outsides of your thighs. Draw your knees in towards each other. Feet can come a little wider knees together. And let's come back down to the ground, swing your knees a bit from side to side.
Carefully rolling towards your right side. Careful as you come off your bolster, press into your hands, come on up, to set. And then we'll deconstruct our setup to set up for Shavasana. So you can take your blocks. They'll go on the lowest widest setting end to end right up against each other about a foot or so, maybe 20 centimeters from the front of your space.
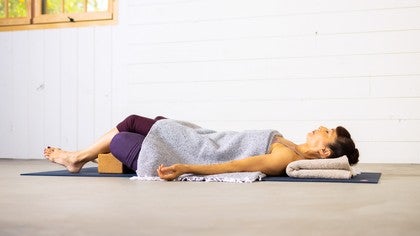
You can take your bolster and place it over your blocks on a forty five degree angle. Your blanket pillow folded non fringe to non fringe. Will go towards the end of your space. And to come into this one, you'll keep your second blanket close by. Scooch up a little close to your bolster, swing your legs over the top, and the bolster should fill up the backs of the knees.
And then you can take your second blanket and tuck yourself in. Gotta tuck yourself in. That's a good part. Get nice and toasty. Laying dumb.
Restortives are so good. Tuck yourself in. Take your arms, 45 degrees away from your body. Turn the palms up. Such an important part of our practice, especially For those of us who love to move, have to remember to take the time to also be still Let go.
And there you are in your Shivasana. Enjoy it. No. And and just to say it loud for some of us, poses like Shavasana, restorative poses are actually quite quite challenging. So if that is you and the mind is going a mile a minute or the body feels restless, See if you can just stay and trust the process of undoing. That's why we stay in these poses a bit longer.
Gives them the opportunity to land. Let yourself land. Feels good to land. And begin to breathe a little bit more deeply. It makes some little movements with your fingers, with your toes.
Stepping your feet onto your bolster. And draw the knees in towards your chest. A gentle squeeze. A bit of a rock from side to side. As you're ready, rolling on to your right side.
Give yourself a breath there. Rolling a little more towards your belly. Press into your hands. Come on up to sit. Find your way back into your seat.
Take your hands to your heart. Allow a little gratitude to come through for showing up for your self care today. It'll take one soft home to close, breathing in. Oh, Thank you for sharing your practice. Namaste.
Yoga and Ayurveda: The Four Goals of Life
Comments
You need to be a subscriber to post a comment.
Please Log In or Create an Account to start your free trial.
