Description
About This Video
Transcript
Read Full Transcript
(waves crashing) Hey, how ya doing? This is Robert, welcome back to Yoga Anytime. This is a roughly 20 minute video. It's a set of postures and movements that are great to do in the morning, afternoon, or evening. Pretty much anytime.
So, keep in mind though, toward the end we'll be doing a shoulder stand, I'll show you two different versions, and a head stand, so these are inversions. If you feel uncomfortable practicing them for whatever reason, back away, you don't need to do them. What will be done up to that point will be sufficient. So, go ahead and start to lie on your back, and we'll get started. Find a comfortable place on your back.
Let's do this, take your arms, reach really long overhead, press your toes forward, like flex your feet forward and back, spread your hands wide, roll your wrists, take a deep breath in. Good. And big exhale out, and let's draw the right knee into the body. Hug on toward your, either your hamstring or your shin, and I encourage you to move the knee. Move the knee from side to side, so maybe even with one hand, your right hand, you can move the knee way out to the right, pull it up, roll the right ankle.
Begin to focus on your breath, bringing your attention and your awareness to the breath and body as it is now. Let's take reclined pigeon from here. So you got this nice, deep knee to chest pose, simply bend your left leg and place your right ankle on your left thigh. Point your right toes up, gently guide your right knee away from you. See how that feels.
And lift your left foot up, use a little bit of your core to draw the legs in toward you don't even use your hands yet. Reach the right hand underneath your right calf, towards your hamstring or your shin. Interlace all 10 fingers around the spot of your choice. Before you come into the deep stretch, take a big breath in, and a nice long exhale out as you pull the legs toward you use a little bit of your muscle here to pull the legs, deepen the stretch. Now I've got my right glutes, IT band, my hip, feeling it big time.
If you have sciatica, this, apparently, I personally, knock on wood, have not experienced sciatica, but I do hear that this pose helps, so hopefully, you do not have sciatica, but if you do, give this pose a shot, see if it helps. Okay, good release. You can simply take that right leg, release and keep holding on to the left leg now. Switch it out. So for me, right, this is an evening practice, but for me this is something that I practice quite a bit in the morning.
I roll out of bed, I even do some of the poses as I'm lying in bed. So I roll out of bed, roll out my mat, and simply just begin to, all right listen, I'll be honest, maybe I brew a little coffee beforehand, it's kinda nice. Get your coffee, your tea, whatever your beverage is, get it next to you, and just begin your day with some simple stretching, some breathing, take the left ankle over the right thigh. Reclined pigeon on this side, gently guide that thigh away from you, deepen it as it's appropriate. So I'm giving you plenty of options here.
If the foot, right foot down, hip open, you feel like that is perfect, stay there for a little bit, use a little bit more effort in your core to draw the legs toward you, and then find your hold, if you're interested in that. Now you want to protect the left knee, point the left toes up, up, up. This will engage the muscles and tendons and ligaments around your knee and protect it. Use a little muscle to pull the legs toward you safely, deepening the stretch. Try this little move here.
Move away from the intensity, okay? So once you do that, you'll have a little more wiggle room now to press your left elbow into your left thigh, kind of right near your hamstring. Now, push that hip open even more, creating a little more space. Breathe in (inhales) and exhale pulling the knees in. Pull the legs in. (exhales) Good, bring it on down.
And as I suggest, from time to time, when you exit a pose like that, or any pose that brings up deep stretch, it's nice to pause afterward, to feel the actual release, or feel whatever sensations came up during the pose. That'll give you some valuable feedback as well, as how the pose benefited you at that moment. Take the feet about as wide as the mat, and windshield wiper your legs from side to side. This may release some tension in your low back, bring a little love into the hip region. It's like you're entering the day, I know I keep saying it's evening and morning, but I do prefer this in the morning, taking great care of your body, saying all right, body, we've got a long day ahead, I'm gonna give you a little love, we're gonna move around a little bit, and I'm going to respect you, right?
Have some gratitude and appreciation for this machine that you've been given. All right, enough of that, bring the knees like so, and let the knees drop over to the right for a casual twist. Pull the knees up into your chest as much as you can to roll over to the other side. Do that again. And again.
Of course, if you know any or have any other twists of your choice at this moment, please, go for it. Come back out, situate yourself at the center of the mat. Take your arms up overhead. We're gonna enter plow pose, and I find, for me, when I reach my arms up overhead, it really makes plow pose much more accommodating, so give it a shot. And before we even enter plow pose, and shoulder stand, these poses are coming up right now, if you have any neck issues, you may want to check in with your physical therapist, or doctor, do the homework first before you start to go deep into these postures.
All right, so, arms up overhead, maybe even swing your legs back behind you. So I think so many times, we are so determined, right, in this pose it may seem to you that it's not complete until your feet touch. It really doesn't matter. You just want a safe feeling in the upper cervical part of your spine, right how your shoulders feel, it's actually a good practice too, because now what's happened is your body is kinda compressing in, and the breath is a little more difficult to find. Can you breathe fully?
Don't turn your head side to side, please. Good. Let's slowly roll out. The way I like to roll out is to keep the arms long, bring the entire back down, and slowly, without arching your back at all, bring the legs down, like a low reversed leg lift, good. Okay so now that we've lowered down, why don't you come on up.
Let's use a little core while doing this. Take a deep breath in, reach long, pull the belly in, and (exhales sharply). Yeah, awesome. So we're gonna use this blanket here. This is going to help reduce any neck tension you may have coming into plow and shoulder stand.
So the idea here is, when I roll back down, the tips of my shoulders are going to come to the edge here so that my neck and head are free, a little bit more free than they would be grounded on the mat, okay? So, I'll show you this way, and then I'll come into plow, shoulder stand, and then I'll exit, come down, and show you the option with the block. How about that, all right. So, set it up, just where the tips of your shoulders there, you'll notice a little bit more freedom in the neck and head, and what you gotta do with these poses is especially with a pose like this, and the next one which will be head stand, is to ask yourself along the way, well how does this feel? Most of the time it's not going to get any better, so if it's way too challenging in one spot, it's probably not going to feel better or get easier, okay?
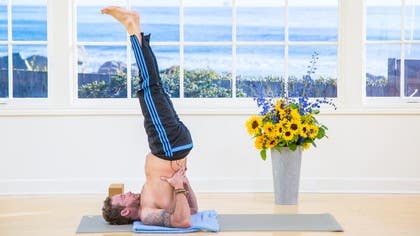
So I'll try to talk you through the best way I know how. So up to now we've had some mellow relaxing poses, and now once you've become a little bit more skilled, you just flow right into plow and shoulder stand, okay? Press the palms down, fingertips, whatever you need to do, bend the knees in, until, I'm going to adjust, I'm going to get my shoulders on the tip, and bring, let my hands kind of rest, or support your lower back. Your feet don't touch, support your low back. Don't look side to side, and for now, like I don't need to force my feet down, so I'm gonna let them hover, I'll support my low back, adjust my breath because of the compression here.
Ask myself, does this feel okay? How's my neck feel, how's my breath? I feel good, so I'm going to continue. Support the back, walk the elbows in, kind of creating a little shelf with the shoulders and shoulder blades, right? Okay, support the back, make sure the neck feels okay, and then lengthen up.
For now, let it be just as it is. If you feel like you're gonna topple over, we'll adjust in a second. And, one. So bend your knees, a nice way to adjust, it's hard to adjust with all this weight up here, so bend knees toward the ears, see if you can even walk the shoulders up underneath you a little bit more, sometimes it doesn't look or feel that awesome as far as making it happen, but get it done, and then you might feel a little bit more upright. And close your eyes, find some deep breaths, relax your legs.
For me, this is a very calming pose, even though it requires a lot of effort to hold myself up in the arms, I do feel calm and relaxed. The exit, knees toward the ears, you can stay a bit longer if you'd like, feet back behind you for a moment. If you fee okay, you got some core strength, you wanna exit out using your core, release the hands down, slowly, slowly, slowly. Tighten up the belly. Take a deep breath here, and then exhale. (exhales) When you land, legs can be straight or bent, but definitely take a little mini final relaxation, a little shivasana here.
If you've tried this posture before, or you've just tried it just now and it just doesn't seem to suit you, that's totally fine. The other option I may offer right now, that I will offer, may be a nice alternative. So if you've got your block, grab the block. Situate yourself once again. I don't think you can really hurt to have yourself set up again on the blanket, shoulders on the tip there.
Come up and do a little relaxed bridge pose, and place that block on a sturdy flat surface, I kind of have it on the blanket a little bit. Let's just pull that one just a little bit. So you have the low back, that flat area, the sacrum, make sure the clothing isn't bunching up, make sure it's nice and comfortable, arms out, and go ahead and just bring those legs right up. Now, right away I feel like I can make an adjustment, so I'm going to adjust, I'm not going to suffer through this, I'm going to pull this block a little farther forward, and see how that feels, no. Right there, yes.
Totally supported, hanging free, my neck is completely relaxed, and I'm getting, I believe, the benefits of shoulder stand. And what I take away from shoulder stand, because what I try to take from these postures, these yoga postures, these movements, this practice, is like what I can actually articulate, and what I actually feel, and what I feel from shoulder stand is relaxed. I feel connected, I feel calm and relaxed. I know that there are a lot of other things going on, but what I can articulate clearly is that. You may articulate something completely different.
(exhales) You can read, right? You can read, you can bring your feet down if you like, keep them up. There are amazing books on yoga, amazing teachers around the world, there are books, there are videos, I'm giving you one right now. But really where you're gonna find the knowledge or the understanding is through your own practice, and that's what you're doing now. So keep trusting in that, and that's where the magic is, that's all I can say.
But do tune in to those amazing teachers out there, and read those amazing books. I don't disregard that at all, it's amazing, but the practice, your own practice. So anyway, if you're up here, go ahead and come on down, let the bottoms of your feet come together, now you're in like a supported bridge. (exhales) All right, so there's your shoulder stand, and over time it'll be less mechanical, less setup, and you can just flow right into it, and integrate it into your morning or evening practice. Now roll on up.
Check in, right now it's inversion number two, we've got head stand. Now if you're like, I'm good here, I don't really need to explore any farther, stay here, and next time, leave shoulder stand out and go right on to head stand, but I'll give you the tutorial on head stand right now. I'm a big fan of it. Let's move this out of the way. So what I'll say before we even start head stand is you've gotta enter this with like such clear focus and understanding of what you're doing.
You're putting a lot of pressure up on your head and your neck, okay. It's not to be taught, I'm not teaching this with fear. It's just like super clear, clear, clear understanding of what you're doing as you're coming in and out of this pose, okay. Let's start it. I would suggest starting in child's pose.
Take your knees kind of wide. Drop your set back. This'll help kind of begin the blood rushing down to the head. Okay, so it's not such a shock. So, from child's pose a breath or two, or five or 10 whatever you choose.
And, I come up into table top. Forearms down. Inner lace your fingers but maybe even before you inner lace your fingers, you want to get the alignment. You don't want your elbows too far out, right. So, take the right hand on your left bicep, left hand on your right bicep.
This will give you a sense of stable structure. You can see how my elbows below my shoulder, okay. I don't want them out because now I'm putting my shoulder at risk. Foundation, think about building a house. You gotta have this foundation.
It's gotta be strong, it's gotta be firm, it's gotta be set, okay. So here we go, head stand. Right here, has does this feel? Okay, the next phase. See the top of my head, right here the crown, not my forehead and not the back of my head, the top of my head is going straight down onto the mat.
So, try that. My hands are going to cradle. It'll look a little something like this. Not this here but down on the mat. Alright, so.
And right here I want to ask yourself, how does this feel? Press into your forearms and elbows a little bit to relieve some of the pressure in the head and neck. Now, if you feel okay here, curl your toes. Lift your knees. Put a little more pressure on the top of your head.
How does that feel? This could be exactly where you stay today for a few breaths and you move on the next day. Or, the next day. Or, we continue to walk our feet forward. Bending one leg, bending the other.
Maybe eventually, bending one. Pressed firmly into your elbows and forearms, this'll help engage the core, right, so here we go. Press, squeeze the core, and up. Keep the knees bent but pointing straight up for now. You know how that feels.
Ask yourself how your neck feels. Be honest with yourself, right. There's no need to work through any major pain. If you feel okay here, stretch the legs up high. Steady gaze, focus, breathe.
Spiral the inner thighs in toward one another. Engage your legs, this may help with some stability. Press into the forearms and elbows to relieve any tension you may feel in your neck. So, you're not a 100% weight on your head. The exit is exactly how you came in.
Bent knees, core strong. One foot down, then the next. Then, the knees, don't come up right away. Right into child's pose, but do this first, right. If you're here, you're almost in child's pose.
Take a deep breath in. And, a big exhale kind of finishes it off in the child's pose. Any kind of mellow, relaxed, movement in the neck to help release any tension that may have occurred in the head stand might be good. Forward and back. (heavy breathing) So, after you've practiced head stand, if you did, keep in mind, that if you're new to this and you're just learning these inversions, it's a lot to take on.
So, give plenty of time in between the poses. A little fine and relaxation. Check in, how do you feel afterward? Yeah, yeah, it's a lot. It's a lot to put your body through if it's a new movement.
Give yourself a break. I use this as a morning relaxation, kind of start your day or even the evening. That's because I've been doing it for a long time, and I can kind of flow in and flow out pretty easily. Now for you just getting it, it might not feel that relaxing. You're probably gonna feel really tense and even frustrated because you couldn't get up today or whatever.
I just can't express it enough, please practice. You will benefit greatly and give yourself a big thank you, like thank yourself for giving it a shot. It can be a lot of fun. That's it, that can be done in the morning, afternoon, evening. I personally love this one in the morning to start the day.
Alright, so, wherever you are have a beautiful, awesome day. I'm with you, I'm with you. Tune into me anytime, I'll be right here. Peace, namaste.
Keepin' it Real
Comments
You need to be a subscriber to post a comment.
Please Log In or Create an Account to start your free trial.
