Description
About This Video
Transcript
Read Full Transcript
Hi, we're here with Betsy and Nulana, and this practice is going to be a practice that uses the imagination, as we've done in the past, and what I'm going to ask our two practitioners to do is to figuratively empty out their torsos, so that their torso feels like an empty container. This has a long precedent in Hatha Yoga, in some forms of the Hatha Yoga, the body is called the Kumbha, K-U-M-B-H-A, which means the pot. In other forms of yoga, it's called the Gata, G-H-A-T-A, which also means the pot. And I believe this is a relic of the influence of Indian alchemy on Hatha Yoga. The torso was then being visualized as sort of an alchemical retort, where the transformation took place from the mundane to the spiritual.
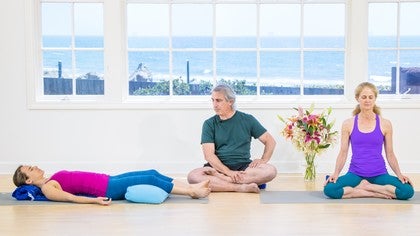
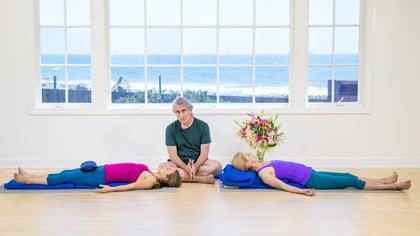
So we're going to ask Betsy to continue to sit, and we'll have Nulana lie down on the support. This is the broad support that we made previously. And again, remember, she's going to sit up against the firm end of the support. And we'll have her turn the end of the blanket underneath itself to support her neck and head. Oh, and she's going to use a bolster to support her knees.
Now this is a very useful thing to do, whether it's a bolster or a blanket. What this does is help the heads of the femur bones, the thigh bones, drop back into the pelvis, and that softens the groins and helps the breath to move down deep into the pelvis, figuratively speaking, of course. Remember that if you turn the end of the blanket under, turn it under itself rather than over itself. And that provides a much smoother support for the back of the neck and head. So let's begin, please.
You are sitting and you are reclining, and you can have your arms off to the sides. And let's start just by watching the breath as we usually do for our breathing practice and get in tune with the breath for today. And at some point, after you've been breathing for a bit, imagine that you can empty out the inside of your torso. So you take out the heart and the lungs and the diaphragm and the intestines and the liver and the stomach and all the other stuff that's in there, so that what you end up with at the end is an empty container, akumba or agata, which means that, imaginatively speaking, you can breathe down into your groins and up into the top of your chest and shoulders. We did a little bit of this before, observing the inhalations moving into an empty space inside the torso.
And what we found, generally speaking, is that the breath moves mostly in the front of the torso, very little in the back, and mostly between the line of the nipples across the chest and the belly button. And so we have areas in the torso that feel relatively un-breathed, that is the area at the top of the chest, the bottom of the pelvis, and much of the back of the torso. And so we become aware of those areas that are not being happily breathed. Now what I'm going to ask you to do next is establish two imaginary points inside the torso. The first one is down deep in the pelvis, as far down as you can go, preferably down to the groins, but if it's not possible for you to contact that area that deep in the pelvis, then go as far down as you can.
The second point will be at the top of the chest, and again, if it's not possible for you to find that area in your imagination, then just establish that point at the highest points you can find. So you'll have two, again, imaginary points inside the empty torso. And now I'm going to ask you to do something, again, that's imaginary, and that is to initiate the inhalation from the lowest point, and then draw the breath up through the torso to the highest point. You'll have to then coordinate the movement of the breath so that the breath comes to an end right when it figuratively reaches the top point. So let's both take an exhalation, and then on the next inhalation, can you then establish the breath in the base of the pelvis or wherever you can find, and slowly bring the breath up through the torso toward the top point, wherever that happens to be.
And then on the exhalation, that's reversed, and you let the breath descend from the upper point to the lower. And as always, when you reach that spot, you stop, wait, give yourself a rest. And then when you're ready, again, you can, again, start that breath at the base of the pelvis. Now, we are aware that this is an imaginary breath, but it's a useful thing to practice in order to get some handle on your breathing. So again, it is inhale up from below to above, and exhale down from above to below.
Now, this is one way of doing it, and you should then be aware that there are other ways, other types of yoga do just the opposite, for example. They may breathe down on the inhalation and up on the exhalation, or it's also possible to establish a long line through the core of your torso, and on the inhalation, breathe out from there in a circular way, and then let that circle contract back in toward the center for the exhalation. So this is the way I like to do it, because it reinforces the circuit of the spine up the front and down the back. But there are other ways to do it, which are perfectly acceptable. One more time, there are two imaginary points inside the torso, one as low down as you can find and one as high up as you can find, and you initiate the breath from the lowest point and pull it up to the highest.
Now, it's possible to do this exercise for 5 or 10 or even 12 or 15 minutes, and again, when you do a practice like this, you want to have some way to time it, and a lot of phones nowadays or watches have countdown timers that you can use to do that. And when your time has come to end, take an exhalation, remember always you begin a breathing practice on an inhalation and you end the practice with an exhalation. Take the exhalation and come back to everyday breathing. By that I mean step back from the breath and just let the breath come and go as it will. The idea here being that you are being breathed by an outside force.
Watch the breath, again be sure that you're not in a big hurry to get out of the position. And then at some point you can start to wiggle the hands and feet. You can shrug the shoulders a little bit if you're sitting, very good. And if you're reclining, you want to be sure to turn over to the side. Anytime you turn off a support, you want to use the bottom arm, the arm you're turning onto to support the side of the head.
Roll over to the side and then wait, as always, let the head be heavy. And then as you're ready you can push your hand against the floor and with an inhalation lift up. Very good. And that is the imaginary breath, breathing between the low point in the pelvis and the high point in the top of the chest. Thank you.
Pranayama & Meditation: Diving In
Comments
You need to be a subscriber to post a comment.
Please Log In or Create an Account to start your free trial.


