Description
About This Video
Transcript
Read Full Transcript
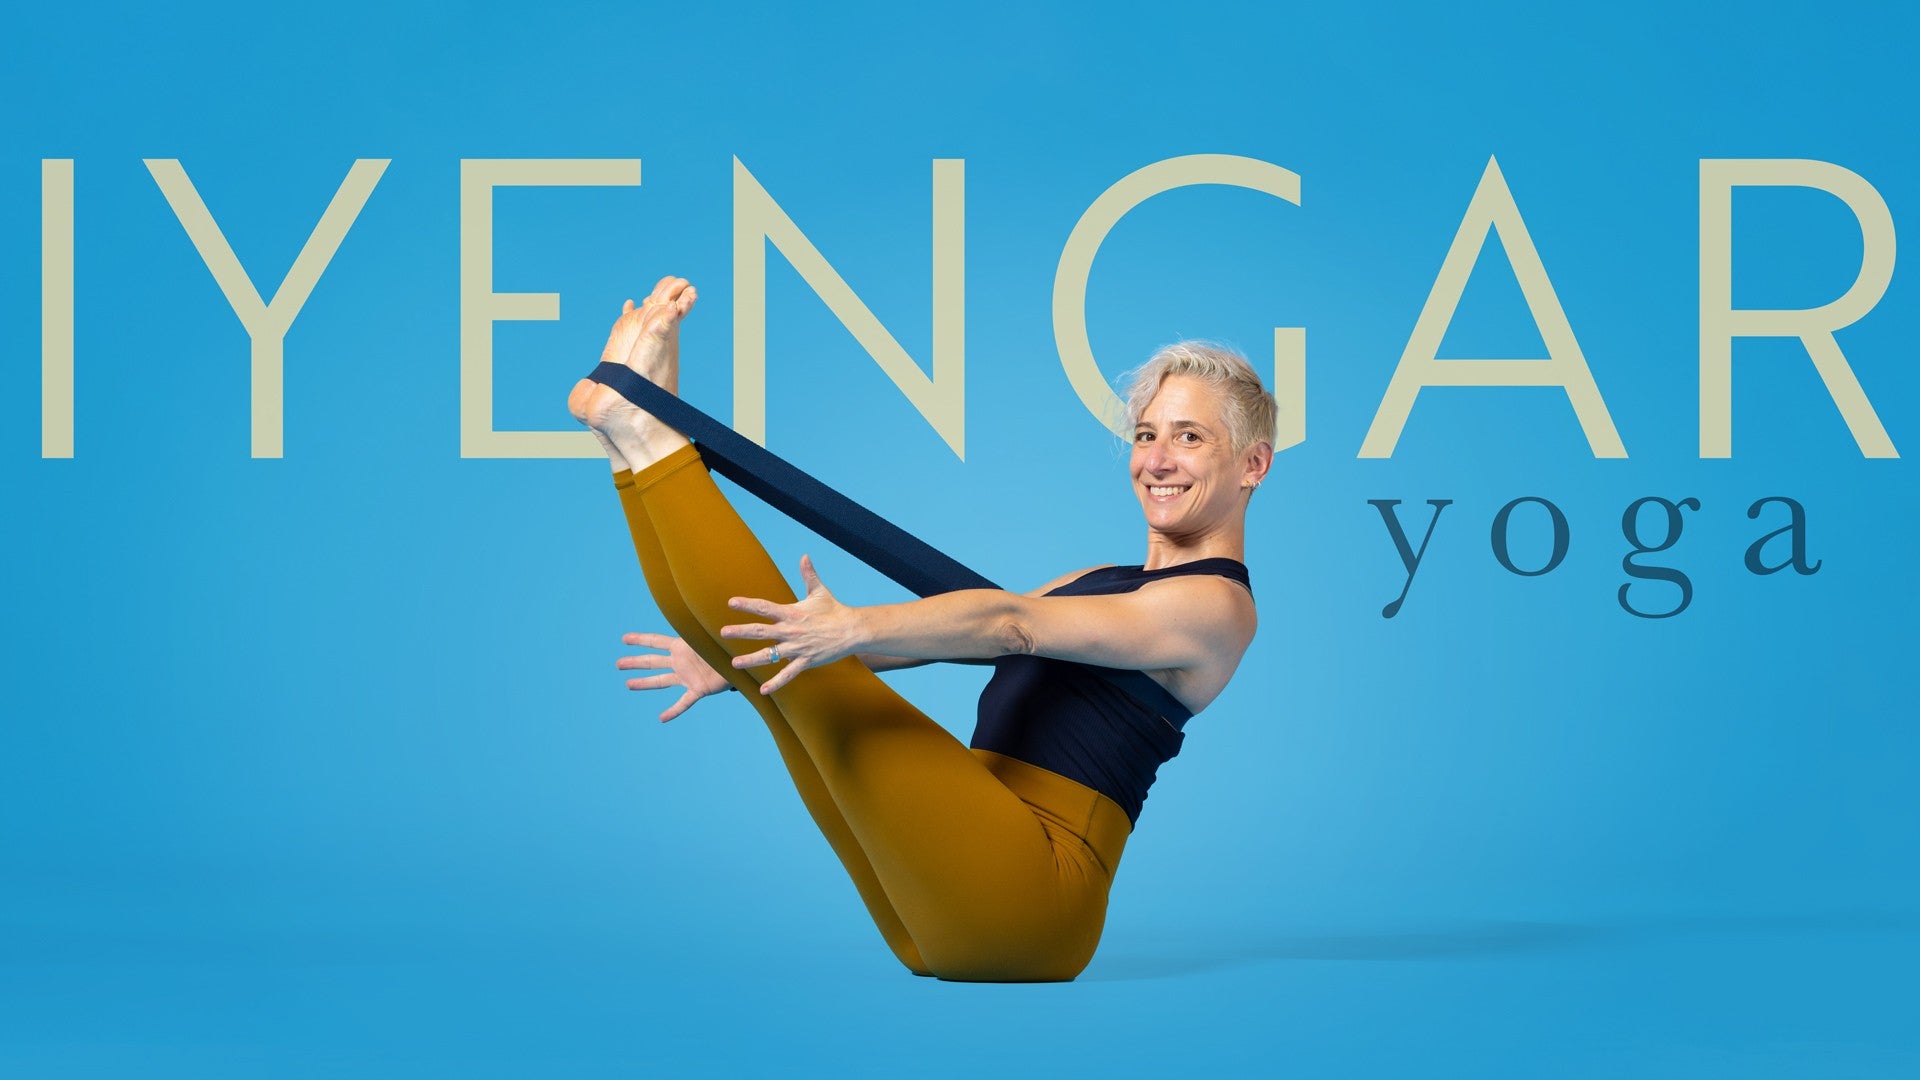
Hello, everyone. Welcome. So in today's session, we are going to focus on legs, legs, legs, We're gonna look at some key actions, fundamental actions in Ayangarioga, super, super important. Okay. So what you will need for today's session. I've got my collection of props back here. We won't need everything right away, but you can collect for yourself a bolster, 1 or 2 bricks, a blanket, and a chair.
Okay? Don't worry if you don't have everything, I'll show some modifications. But to begin with, have a seat. If you can sit on the floor, then sit on the floor. If you prefer to sit on a chair, that's absolutely fine. But we're gonna start with the feet. And so the most important thing here is that you can reach your feet.
You need to be able to touch your feet. Okay? So cross one leg over the other and play with your foot. Okay? We're gonna take here your one hand, and it's nice to use opposite hand with foot, and you're gonna start taking your fingers between your toes. So literally work each finger in between the toes there and work it right down to the webbing. Right down to the webbing there and go like this back and forth. Back and forth. And you just wanna get a little bit of movement into the joint. Okay. One thing to understand is that this is not an ankle exercise.
So if you can see here, I've I've stabilized the ankle, and I'm just moving into the toe joints. So go ahead forward and back and just keep moving. I'm gonna remove my hand from my foot, but you keep at it. And while you're doing this, I'm just gonna point out a couple of points on the foot that I want you to be aware of. Okay? So go forward and back and then actually also do a few circles. Again, remembering that it's not an ankle exercise, but that you're trying to get into the toe joints.
Okay. So, yeah, a map of the foot here, We've got the toes. And then right here, these are the toe mounts. Okay? And this area is is important. You'll you'll notice that I reference it quite a bit in my teaching, and you'll also notice that there are three points on the foot, which I like to brands. And these three points are really, really key.
Okay. So one point is the big toe mound right here. Second point is right here on the inner heel. So we've got two points. And then the 3rd point is the center point on the outer edge of the foot. These three points here. Okay.
And we'll come back to those momentarily. Okay. So you've done circles to the right, do some circles to the left with your fingers, And then after you've done that, just as like a last hurrah, you can spread your fingers between your toes. And then release. Okay. Take your fingers out from your foot and then extend your leg to straight And before you switch to the other side here, just keep your heels on the ground and spread your toes. Really spread your toes.
And look, look to see having worked only on that one foot if there's a difference right side and left. Right? Is one foot responding a little bit more clearly? Is there more space between the toes? Does one toe maybe not listen as well as the other toes, so just observe that and not only visually observe, but also feel. You may feel that that one foot is maybe just a little more alert or a little more clear. There's clarity there.
There's awareness. So check for that. See if that resonates with you. Okay. And then release and go for the second side. Okay. So same idea here.
Cross the leg over. Take your fingers, work them between your toes, get it right down to the webbing, and then forward and back. Forward and back, forward and back. And this is really, great exercise to do. Okay. You can do it anytime anywhere watching Netflix or movies.
Play with your feet, and then you can feel really productive. Alright. Forward and back, do some circles, circles to the right, circles to the left. Okay. Keep going. And I should say too that for some people getting their fingers between the toes is no problem. But for others, it can be intense.
It really can. So please, respect that. Be mindful of that. But whether it it hurts a little, whether it's hard or not hard, it's a good thing to do. Okay. And then for your final hurrah, spread your fingers between your toes. Get that nice width across your toenmounds and then release and once again spread and open through the soles of your feet.
Okay. Now just, again, observe. Notice what's happening. And then take your mind to the bottoms of your feet. And envision those three points that I mentioned. Big toe mount, inner heel, and then that outer edge, that center point on the outside edge of your foot.
And is if you can extend those three points further than the rest of your foot, really reach there, reach there. Okay. And then release. Let go. Alright. One more almost like business thing here before we, stand up. I wanna talk about the kneecap, the knee. Okay.
So if you can look at your knees or maybe look at my knees here, I'm gonna take my hand and two fingers here, and just on the side of my kneecap here, I'm just gonna shift around. I'm gonna just shift the kneecap from side to side, and you can try this on your own kneecap here. Essentially, I just wanna prove to you that the kneecap moves. Okay? It can it can jiggle a little bit. And then after you've moved your kneecap right and left, you can also move it up and down. So, you know, I'm not taking the kneecap and doing like this.
It's just it's almost just under the skin, right, up and down. It also moves. Okay? Now I'm gonna apply gentle pressure. I'm just gonna put my thumb at the top of my kneecap here. And I'm doing this mainly so you can see better. Okay? So the kneecap is here. I keep my heel, my heel on the floor. I push gently down with my thumb.
And if you watch this kneecap here, watch what happens, I suck it up. Okay? So this is a very common instruction. Lift your kneecaps or suck your kneecaps up, something like this. It'll come up as we're doing the practice. And so I want you to under and what that instruction is. Okay.
So you can try it for yourself, gentle pressure here. Keep the heel on the ground, and then lift your kneecap up. K. It's like you embed the kneecap up into the thigh muscle. K. Thigh muscle tightens, kneecap lifts, and then release. Okay. Do it maybe 2, 3 times.
Meek up. Let it go. Meek up. Let it go. Alright. And then release.
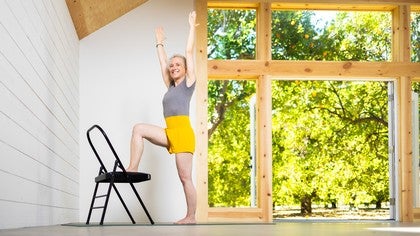
Okay. Let's stand ourselves up now. And for this next Asana, we're gonna work on Mustita, Pasta Pirangustasana 1. And you will need a chair. Okay. So collect that for yourself. And then stand in front of your chair like so. You're gonna stand on your left leg and place your right foot up on the chair.
Okay? And see if you can work out the alignment such that your knees over your ankle. And on the standing leg here, can you adjust yourself so that the toes are pointing towards the wall. The heel kind of did you see what I just did? Just kick it out slightly. Okay? Now here, what we worked on before, three points of the foot on both sides, right foot, left foot, press the three points of the feet down into the surface, floor and chair, lift your left kneecap up, lift your left thigh up, and suck your hip into the body. Now pressurize the three points of your right foot into the chair.
And descend the corner of your right hip down. K. You can just reach your arms down, lift your chest up, drop your shoulders, This is, 1, the bent leg variation. Okay. Release lower the foot down. Okay. This is the basic shape of the pose. Now I'm gonna show you a nuance here, something that you can focus on. To, really level the pelvis when you're working on it.
Just another kind of adds a different dimension or another level of nuance to the pose. So I'm coming to where we left off here. Like this. And as you can see, when I take that right leg up, one hip is significantly lower or higher than the other. Okay? So everything we do in Ayang or yoga, it's like cause and effect. Okay? So what we're gonna do here is lift the left kneecap up, left thigh up, and suck the hip in. I suck it in. So as soon as I sucked it in, now this hip now is much higher. Okay? So again, cause and effect, action and reaction. Left hip in, right hip lifts up.
So now as I press my right foot into the chair seat, can you, or can I, descend this buttock bone down, descend the corner of the hip down, And it's almost like I have a third leg here descending from the buttock, and this is the work? Can I figure out where my hips are in space and level the pelvis? Okay? And you can work on this. Then, ultimately, if you feel balanced, we can also take the arms up like so. Okay. So let's give this a go. You may have done it with me just now, but we'll do it again.
Okay. Let's go for the second side. Stand on your right leg and raise the left leg up to the chair. Okay. Check your alignment. Kick the right heel out a little bit. Suck that right hip in.
You gotta stack your knee over your ankle. And now shoot the left buttock bone down. Okay. And work with this seesaw action a little bit. You can let the right hip go out. Suck it back in. Let it go out.
Suck it back in and shoot the left buttock bone down down down down down down. Now lift your chest up. Drop your shoulders down. Okay. Study your gaze. Breathe. Be here. Alright. And then release.
Lower the leg down. K? One more time. We'll add the arms now. Send stand on your left leg and raise the right leg up. Stock your knee over your ankle. Check that.
And lift your left knee up up. Lift your left thigh. Up, suck your left hip in. Pressurize the three points of your right foot down and now shoot the right buttock bone down. Work out. Levelness in your pelvis. K? Now steady your gaze, shoulders down. And then if you feel okay, reach your arms to the side, turn your palms up, roll the shoulders down again, and then, like, you're lifting something heavy, raise your arms up, up, up, up, up, and from the wrists lift the sides of the body.
Hold it. And then release. Lower your arms, lower your leg, stand in. Take a second here. K. Second side, second time.
You can did you see what I just did there? So from Tadasna, you can just separate your heels slightly. This helps you get into the correct placement for the us now. Stand on the right leg and Riz the left leg up. Again, right kneecap, right thigh, lifted up, and suck that right hip in. Pressurize the left three points, big toe mound, inner heel, outer edge of the foot, push it into the floor, and shoot the left buttock bone down.
Level your hips. Okay. Lift your chest. Drop your shoulders. Ice steady. Breathe.
K. Then reach the arms to the side, turn the palms up, roll the shoulders back, and raise your arms up. And as if your arm ends not at your armpit, but all the way by your waist, lift up, up, up, shoot that left buttock bone down, but reach up into your arms into those fingers. And then release, lower your leg down, stand in. Hey, steady yourself. Stabilize. Just connect with your breath here.
K. Each time we come back to Tarasna, it's an opportunity to gauge yourself, right, to observe what's happening. Okay. Let's continue with some of this hip action. And for this next, just to drive home this idea of pulling the hip into the socket. Okay. So take for yourself a brick, a block, it can be wood, it can be foam.
Just take something. It can even be a hardcover book, right, just something to step on that can carry your weight. And then stand on the this brick here. With your right foot and just let the left foot here dangle. Okay. Now I want you to imagine a, line from your outer hip all the way down to your ankle bone, like a the band. Okay?
And as you stand here on this brick from the outer hip to the ankle bone, push down and suck this hip into the body so that that dangling foot comes off the floor completely. Okay? So when I let my toe come down, this hip sorta has to stick out in order for my legs to be straight. Okay. Then suck this hip in and let this foot dangle. Okay? From the outer hip to the ankle bone, push down, foot comes off the floor.
I let it down. Okay. Do this. Do this 5, 6, 7, 800 times. See how it goes. You may find that the hip gets tired. After a number of rounds, and that's okay. We're exercising the hip, okay, outer hip to ankle bone, push down, push into the brick, and let that other foot come off the ground.
Okay. Then step down, release, and let's do a few rounds on the other side. K. So stand on the brick this time with the left foot, keeping the leg straight. So you're not, like, stepping up and down. You step on it. Both legs are straight. From the left outer hip to the ankle bone, push push like you're digging your foot into the brick, and then this other foot, the right foot comes off the floor.
And then let the hip come out, toes touch down, and then again, suck the hip in and push into the floor. The right foot will just float, float off the ground. Let it go, suck it in. Let it go, suck it in. Okay? The three points of the foot here will also come into play. So feel free to to feel those to connect with those three points.
As you're working your hip. K. Couple more. Suck it in. Let it out. Suck it in. Let it out. K? And you may notice, I know for me, it's like this. Right side and left side are very different.
So you may find that one is more challenging than the other. Okay. Finish up when you feel even and then step down. Okay. We're gonna take this principle. It can absolutely you may notice the resemblance. Be applied to Utita hasta Penangustasna 1, which we just did, but we're gonna, translate it into Utita,asta Penangustasna.
2. Okay? So for this one, the number 2 variation is a sideways variation. Okay? You stand. We'll stand like this, stand on the left leg, and then externally rotate your right leg. And place it up on the chair like so.
Okay. Stack the knee over the ankle. And align the heel of your right foot more with the big toe of your standing leg as opposed to anywhere else. Okay. Now this standing leg here is the leg that was just standing on the brick. Right? So if the hip is out, pretend like you're on the brick, push into the brick, outer hip to ankle bone, go down, suck it in. Okay. Now deep in your right hip socket, externally rotate that thigh and turn it from inner knee to outer knee, turn. Inner thigh to outer thigh. Turn.
Pressurize the three points of your right foot into the chair seat and roll that right buttock under. Once again, suck the left hip in, rotate your right thigh under, chest up, shoulders down, k. Here, you can extend the arms. Good. And then turn your palms up. Roll your shoulders down. And raise your arms up to the ceiling.
Lift up. From your wrists, lift the sides of your waist. Hold it. And then release. Let it go. And then lower your leg down.
K. Again, stand in. Tadasna. Stabilize yourself. Breathe. And just notice as you come back to Tarasna, observe the the quality, the texture, underneath each foot. Right? You may find that there's a different sense of connection of alertness awareness as you start to, move through the this.
Okay. Moving along, 2nd side for Utita hasta Padangustasna too, this time, you'll stand on your right leg and raise your left leg up to the chair seat. Okay? Everything is the same. You're working on that alignment. The right heel just kick it out slightly. And on the left side, left knee over the ankle and left heel in line towards your right big toe.
Okay. The standing leg, the right leg now is just the same, is the same kind of leg that was on the brick. And so from your outer hip to your ankle bone, push down, suck that outer hip in, and now deepen your left hip socket externally rotate turn. It's almost like that leg bone is spinning in the socket continuously turning. Right out our hips, suck it in, externally rotate your left thigh, lift your chest up. K. Pressurize the three points of each foot, big toe mount, inner heel, center point on the outer edge of each foot, push down, just up again. K. Reach your arms to the side.
Turn your palms up. Rule your shoulders down. And raise your arms up. Okay. Lift up. Notice if you can achieve a little more lightness to the spine, as you raise the arms up. Stand strongly in your right hip, suck it in, rotate the left thigh out, and reach strongly up into those fingertips.
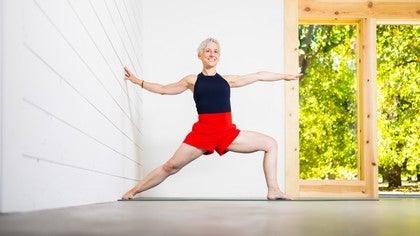
To Good. And then release, lower your arms, lower your leg, and stand in. Okay. Carrying on. So now for this next, Usna, we're we're gonna go for Vrikshasna. Okay? If the knee action, sometimes knees can be a little bit cranky, And if your knee doesn't love this action, please repeat what we just did because is it actually a very similar us now?
Okay? Those of you who can go for a deeper bend in the knee will take, vyachesna. Okay? And let's start with the right hand at the wall here like this. Okay? As before, separate your heels just slightly. And now transfer the weight onto your right leg, turn your left leg out, and then raise your foot as high up on that standing leg as you can. Okay? Now, again, everything we're doing is progressive.
It's all the same actions. So this standing leg is as if it's standing on a brick, outer hip to ankle bone, push down, and suck that hip in. Right? Deep in the hip socket. Externally rotate the left thigh. Roll that buttock under. K.
Extend your arms to the side. Drop the shoulders, lift your chest. A lot of times people think they're pushing their foot into the thigh, but it's more important here to push the thigh into the foot. Okay. Now if you feel steady, you have your balance. You can also add the arms.
K. Turn the palm up, left palm up, roll the left shoulder down, and then raise just that one arm up. Reach up. Reach up. Reach up. Crawl your other fingers up the wall. Turn the back of the hand on the wall. And then slide up, up, up, up, up. And, again, if you've got your balance here, you can float the arms up for Rick Shasna.
Suck that right hip into the body. Turn your left thigh out and reach up, up, up, up, up, Okay. And then release. Lower your leg. Stand in. Second side.
Okay. Turn yourself around. If you're using the wall here like this, and start with your feet together, then just separate the heels slightly. Okay. Now shift the weight onto the left leg, turn the right leg out, and place your foot as high up on your inner thigh air as you're able. Okay. Now connect with the pelvis. What's happening there? How can you get the pelvis to level?
From your outer hip to your ankle bone, push down and suck that hip in, in, in, in, in, into the midline. Deep in your right hip socket externally rotate. Like, you're trying to roll the buttock under. Knee goes back, but roll that buttock under. K. Left hip socket in. Turn your right thigh out.
And then extend the arm. Shoulders down, chest up. From here, turn your palm up, roll your shoulder down, and then raise one arm up. Just stay steady. Find a steady spot to gaze at, and then crawl your second arm up the wall.
Turn the back of the hand and then reach up, up, up, up, up, and find rickshosna. Left hips, suck it in. Roll your right buttock under. And reach up. And then release lower your leg down, collect yourself, taught us, and be there. Breathe.
Yeah. I always find coming back to Tadasna an interesting post us, like consolidation, an opportunity for consolidation, but especially with the balancing poses, there's an interesting connection with the legs to the to the earth, to the ground. So just, again, notice that texture, that sense of connection, that comes as we go through the practice. Okay. Let us shift gears a little bit and move next to Ad Mukha Svanasna. K? I'd like to show you Anad Mukashvanasna, downward facing dog using the chair. So it's a modified pose. Okay. For this, I suggest having the chair right against a wall. It's just the most stable. And what you're gonna do is take hold of the chair And if you're using, I often use a folding chair, something something like this, and instead of holding right at the front seat part of the chair, I would hold as far back as the chair lets you. Okay? So right up to where the legs come into play.
And then step back, step back, separate your legs, and then Push back here like this. Okay? And the idea here is to step far enough back that your legs are, in fact, angular. K. What I mean by that? Right. This would be a straight leg, and we can do sometimes we do a pose like this, most like an arta uttenasana. But for this, step really far back. Okay.
So you get that angle in the legs. Okay. Adjust so that you're at the back of your tall mounds and then lift your kneecaps up, lift your thighs up, and reach your thighs back hips back. Okay. Now raise your eyes. Just look a little bit forward and up. Rotate your upper arms from inside out.
Now push the chair away, but reach your hips up and back. And then just let your head go to a neutral position be here, breathe. Mokashvanasna. Enjoy this nice extension through the side body. Okay.
And then slowly release. Gonna walk yourself forward and then slowly stand yourself up once again. Tadas now. K. So one thing I mentioned in that UADMOCA was to turn your arms out. Okay. And just to clarify, inner arm, outer arm, you're gonna turn from inside out. Right? So you're holding the chair.
Rotate your upper arms in this manner. Okay. Let's repeat that one more time. Okay. So once again, hold the chair. Step back. Separate your legs.
I would go at least hip distance apart if not even wider. Okay. And find those angles. Lift your kneecaps up, lift your thighs up, and then reach your hips up and back. Raise your eyes. Just look a little forward.
Rotate those upper arms from inside out. Now push the chair, but reach your hips up and back even more. Then let your head go to a neutral position, ears level, between your upper arms. Be here, breathe. Mukesh Vanasna. Okay.
And then release slowly walk forward and stand yourself up. Hey. Notice. This was an inversion. Right? So has a different character, a different nature. This particular post. It'll have a different effect on body, breath, mind.
So after each Astna, just take notice of that. We're gonna go next into an asthma called Chaturangasna, and we're we're we're moving. We're winding it the practice down at this point. K. For this cheddar on Gosna is a little bit involved. There's a number of props involved as far as the setup goes. But I think it's really worth it.
So with your chair, place the chair such that the chair is on the rubber, but you have access to your floor. Okay. If you're practicing on carpet, it probably doesn't matter. But if you have a floor that can slide, then it it's a handy way to way to do it, but as I mentioned, it can be done any which way. Okay. And then you're gonna place a bolster here on the side, where there's no rubber, and this is what's it's just nice if the bolster can slide. Like that.
Then have 1 or 2 bricks nearby, and this is really gonna depend a little bit on your proportions, the height of your chair. So what the setup that I was showing you here is a starting place is a starting place. Okay? And then also depending on your chair, this is a nice soft cushy chair. So I don't really need a blanket. But sometimes I practice with a full metal chair. And in that case, I might soften I might soften the the chair seat with a blanket, something like this. K.
So you'll test it out and see what works best for you. And then what you do here is you work yourself literally through the chair. And then place your your pubic bone, your pubic plate up on the chair seat Okay. And then this is why it's nice for the bolster to slide is because you wanna get that bolster so that it supports your ankles. Okay. And what's most important here, the idea is that the knees are not touching the floor. Okay. The knees are not touching the floor.
And then you can work out your head support so that the forehead can touch something. And, essentially, what we're doing here is we're giving you a little bit of spinal traction, the tailbone, because the knees are a weight, It's just slightly pulling the tailbone lower back towards the buttocks, and then you've got your head coming in this direction. I sometimes use the the second brick here just to rest my hands because the floor feels a little too far away. So you can work something like that out. And then just be here. It should feel nice.
Okay? If it doesn't feel nice, something is probably off. Okay? Especially if your breathing isn't right. Please don't stay. K. If something's caught, we you need to adjust, try again. And if it's not working for you, let it go. That's okay too.
Okay? But those of you who are in it who found it, please stay. Find your breath. Engale. Exhale. And just enjoy this width, this breadth across the back body.
And settle here. Let the knees drop. Inhale. Exhale. K. If you found that sweet spot for this Chaturangrasna, Please stay. It can, in fact, be your ending pose.
It can be also like a shavasna. K? If it didn't quite work for you or you've used up the what that cheddarongasna had to offer you, then slowly transition yourself into a flat back shavasna. And you can you're welcome to use, a blanket for the back of your neck. If you enjoy that, and just lay yourself out. Like so.
Whatever position you're in here, just take a moment and observe. Observe the state of your body after this practice. Hey. Notice where you're stiff, where you're loose, maybe areas that are alert or dull, Notice this. Then also observe the state of your breath. Hey. Notice if it's shallow or deep, smooth, or rough.
And then finally observe your state of mind. What impact did this particular practice have for you today? K. Each practice will affect in a slightly different way. But if you observe your body, your breath, your state of mind, both at the beginning of your practice. And also at the end, I trust that you will learn quite a lot, both about yourself and about your practice.
K. Please feel free to stay in your final pose here for as long as what feels natural for you. But that does bring us to the end of today's session. So thank you.
Iyengar Yoga: Stephanie Tencer

Mention
 |
Stephanie Tencer (Teacher) |
 |
Rosanna S |
 |
Justin H |
|
|
Graziella A |
Comments


You need to be a subscriber to post a comment.
Please Log In or Create an Account to start your free trial.
