Description
About This Video
Transcript
Read Full Transcript
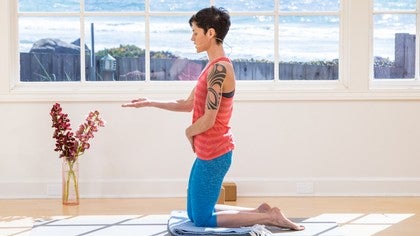
Hi, everyone. Welcome back. Today we'll do a short practice and a little bit of internal body awareness focusing on the pelvic floor. The pelvic floor is one of those places that a lot of people talk about, and we all kind of know roughly where it is, but beyond that, that's often this really mysterious space where it feels hard to access and no one is really sure what to do. The most commonly practiced pelvic floor awareness exercise is called a kegel. You've probably heard of it. A kegel is kind of a really general contraction of the muscles of the pelvic floor. People often give the cue as if you were going to stop peeing as the way to feel that. Kegels are a gross movement in terms of not very subtle, and we can actually do a lot of different work to access the pelvic floor that is more subtle and I've found in my own experience a lot more supportive than doing work with kegels. Especially for those of you who are looking to build up stability in your hips and pelvis, if you have hypermobility that you're working with or other kind of sensation or experience of weakness in your pelvis, pelvic floor work is really helpful. For those of you who have given birth or experienced other types of trauma and change in your pelvis, this work is so supportive. I appreciate you being here and I know that for some people accessing this part of the body also holds a lot of emotional implication. There's the invitation for you to take whatever type of space you need with this practice. If you notice that feelings come up, definitely pause the video and attend to that. This is a space where culturally we're not really allowed in a lot and there's all types of connotations that are there. We just get to hold all of that in this experience. First and foremost, recognize that this is an amazing part of our body. This is a part of the body that creates life and is connected to the earth really strongly. In yoga, it's the home of the Muladhara chakra or the root chakra. We'll talk a little bit more about that later. Ultimately, this is a place of huge power in the body and a place where I hope that I can support you to be more embodied and connected. We'll start just by doing some hands-on sensing. I'm going to touch on my own body. You're welcome to close your eyes. In fact, I would recommend it. We'll do an anatomy segment at another point that talks more about the skeletal structure and looks at it in more of a specific way. For now, what we're doing is just getting a general picture of this landscape. If you'd like to close your eyes, please do. Start by bringing your hands to your hips and see if you can find the top of your hip bones. At the front, there's two bony points, one on either side. Often in your yoga classes, you'll hear teachers cue to the bony hip points in front. These are the anterior superior iliac spines. ASIS is the technical term. Bony hip points in front is just a good place to start. From the bony hip points in front, you can walk your hands all along the crest of your hip bones until they come to the back. At the back, you might feel where they meet up with your spine. Where your hips meet your spine, those are your PSIS, the posterior side. This top ridge of your pelvis is what is sometimes referred to as the false bowl of the pelvis. When you see the anatomical model later, when you feel on your own body, there is very much a bowl shape going from the front to the back. Now, the front of this part of your body, about halfway between your navel and pubic bone, if you were just to continue to walk your fingers around, is soft tissue, is muscles in your lower abs. For our purposes today, let's just call this whole area the bowl. The top of your pelvis will refer to as the bowl. Now, if you can either use your hands to find them, or if you're sitting on a block like I am, you might be able to feel your sitz bones. The sitz bones are bony points that you sit on, otherwise sometimes called the ischial tuberosities. They're the base of your pelvis. You can think of them almost like the feet of your pelvis. Just as if when you're standing in Tadasana, you notice how you're standing left to right. When you're seated, you can feel if you have more weight to one side or the other, to the front or the back. The sitz bones are a really good place to notice where the center of your pelvic floor region is. Between the two sitz bones, there's something that is there called the central tendon of the pelvic floor. A tendon is tissue, a connective tissue. It runs between the anus and the genitals. It attaches on the left and the right to your two sitz bones. I would recommend for this next exploration to sit like I am, if it's possible, in Virasana. I have a block, and I've placed it between my heels. You might want two blocks as well, if you have sore knees. In this type of position, it's really easy to rock your pelvis a little bit. If you can imagine that your pelvis is a diamond shape, and often this is another thing that teachers might say in a class, the diamond of your pelvic floor. The diamond is made of two triangles. One triangle is from your sitz bones forwards to your pubic bone. If you tip your pelvis like you're wagging your tail and roll your weight forwards, you might be able to feel the base of your pubic bone. The second triangle is between your sitz bones and your tail bone. If you tip your pelvis back, like you're tucking your tail, you might be able to feel where your tail bone comes into contact with the block. The pubic bones and the tail bone are both easily felt if you want to palpate and find on your own body where they are. I definitely recommend. For most of us, the pelvic floor triangle is about this big, maybe a little smaller, that big. There's not a huge variation actually in the size of pelvises, maybe a little bit, but for most people, the diamond of the pelvic floor isn't a huge diamond, so it's kind of small. But in this diamond, there are many layers of muscles, and they weave around each other, and they kind of form, you can almost think of like a hammock of support. So just above that hammock, in the front, we have the bladder. In the back, there's the rectum. And then if you're in a female body, between the two of them is the uterus and ovaries just a bit higher up. So again, if you tip your pelvis so that it comes forwards, there you're in the front triangle. And then if you tip your pelvis so that it goes back, there you're more in the back triangle. And these two triangles form the diamond of your pelvic floor. Now, you've probably done a Kegel before, or at least you've used the muscles of your pelvic floor to try and stop peeing. Try that right now. Just notice how it feels. Then give it a try to tip your pelvis forwards and see if you can slightly contract just the front triangle. And then tip your pelvis back and see if you can really lightly contract just the back triangle. And do that a couple of times. And if at first it feels a little foreign or hard to access those muscles, don't worry. This is subtle work. And if you're not used to it, it might take a couple of days, regular practice, probably not much longer than that. I often, when I'm trying to find new muscles, think of like shouting into abyss, like, hello, are you there? And then at some point they respond and you can feel them. So this is one place to start, just kind of fine tuning and feeling that there is the front and the back triangle of the pelvic floor. Now, if we consider that this upper ring of the crest of the hips and the lower abdominals is like a bowl, here where the sit bones, coccyx and pubic bones are, we might consider that the bottom of the bowl, but my feeling is that if you think of it more as a cylinder type shape, sometimes that's for me a little bit easier to access. So I'm going to introduce an image to you and take it how you want. Take it for what you will. But if you can imagine like one of those metallic salad bowls, like, you know, mixing salad in a metal bowl, and then below it a Pringles can and you weld them together. This is kind of a similar shape as when you look from the false bowl of the pelvis. So again, this upper portion down into what is sometimes called the true bowl, which is the portion of the pelvis that's behind the pubic bone in front of the sacrum and between your two sits bones. So we have the upper portion that's more the inner hips and lower abs. And then we have the lower portion, which is pretty low in your body in front of the sacrum behind the pubic bones and between the two sits bones. Right. So again, if you want to watch the anatomy video later, I'll point it out. So we'll move into some balance explorations. I'm going to change my orientation on the mat. Also, if you have sore knees and you want a blanket underneath your knees, now would be a good time to set that up. All right. So if you haven't yet set up in Virasana, I'll invite you to do that now. Again, you might want more than one block and the block can be placed between your heels and then you can sit with your heels just a bit outside of your hips. So take a moment and see if you can bring your attention to the space between the front and the back triangle of your pelvic floor. And now if you can be in that space, you want to balance where your weight is. So notice in your body, it might feel that naturally have more weight towards one triangle or the other. And right now the invitation is to find a balance between. And if you can feel where your two sit bones are and then find the midpoint between them, again, there's a tendinous or there's a tendon there, central tendon, and right at the center of that tendon is what's called the perineum. And so this point is the kind of the center point of the diamond of your pelvic floor. And you could think about this point being kind of like the base of what's right in front of your spine. Think of from that point having support that goes all the way up through the center of your body. All right. Now your legs, where they attach into your pelvis is more in the cylinder. So not so much in the bowl, but further down. And I'm not asking you to grip anything. So if you find that you're doing a lot of muscular gripping, I'm going to say like, you know, go just 10% of what you're doing. It's it's pretty subtle. But if you could imagine that your legs are held in your body, the top of your leg bones are held in your body at either side of the cylinder. And then at the front and the back of the cylinder that you have an equal amount of muscular support. So you want to imagine that all the way around the circumference of the cylinder, there's an even amount of muscular support. Now where the bowl in the cylinder for me, again, is just about at the top of your pubic bone. So if you find your belly and walk your fingers down probably about four or five inches, you'll come to the top of the pubic bone. And if you bring your hands to your sacrum, and you might be able to feel two bumps that stick out, those are called your PSIS. It's also where some women have these really lovely dimples or sometimes people get tattoos. So if you can find that space as well, that's about where if we were to imagine this weld of the cylinder to the bowl, it would be on the front and the back. And what I want you to feel is that the cylinder is balanced on all sides. And then the bowl is balanced on top of it. And the cylinder portion has more of a vertical strength that's happening. The muscular fibers you can think of kind of running more up and down. And the bowl has more of a kind of encompassing strength.
So it's wrapping to the front and to the back and to the sides. So then keeping the cylinder and the bowl balanced, feel that at either side of the cylinder, your legs are attaching and start to reach down through your legs to come up to kneel stand. And then keep a reach from either side of the cylinder down through your legs and come back to sit. So we'll do this a couple of times. So again, the legs come in and are hugged right into the top, excuse me, the top of the legs hug into the sides of the cylinder. And then as you move, feel that there's an even amount of support and balance around the bowl. And then next time you come up to kneel stand, you can stay there, move your block off to the side for a moment. And you can bring your knees a little bit closer together. And if you look down at your knees, you want to see that your knees are below your hips. So in just a moment, I'm going to start to take one leg forwards. And when we shift weight is often when we lose integrity in the hip joint. And it's often when we lose support of the pelvic floor. So as I start to take weight into my left knee, I want to feel that the left side of the cylinder is strong. And the left side of the bowl is as well. So I've got a lot of support on my left side. And then on the right side, I want to reach from the right cylinder into the right leg to take that foot forwards. Okay, so let's try that a couple of times. And one thing that often happens is that when we are taking the leg forwards, the hip goes way out to the side. So the invitation here is to feel that your left leg is connecting into the cylinder, that you have a kind of a homogenous support around the internal space of the bowl in the cylinder. And that on the right side that that right side cylinder can actually move towards the right leg. So let's try one more time and then next time you can keep your right foot forwards. So here in Neil's stand, you'll have your right foot forwards. Notice what you feel on the right side of the bowl. And now if the bowl has been shoved up towards your belly, so if you're doing a lot of gripping in your lower belly, I'm going to invite you to let the bowl relax down towards the cylinder and it's almost like the bowl is deepening onto the cylinder and the cylinder wants to remember its cylindrical shape and support. And I like to imagine here that the cylinder is continuous along my spine. So what we'll do next is just lift the heel from the floor. So continue to check in with your balance and continue to come back to the support of the cylinder and notice if the right bowl is getting shoved up into your belly, that the right bowl wants to continue to relax down. If this feels okay, try lifting your foot up off the floor just for a second. Try that a couple of times. And then use your arms to balance. So let them be part of your balance and we're going to work towards lifting the right foot up and balancing with the right foot up. So the left leg is connecting to the left side of the cylinder and you probably feel it in your body when you lose that connection it becomes a really different challenge to balance. How are you doing? Alright, so let's change sides. And now on the right side we'll practice just a couple of times, excuse me, standing on the right side and bringing the left leg forwards. So first I just want to check in with all of the structures and feel that the cylinder is balanced all the way around its circumference and the bowl is balanced on top of the cylinder. And that place where they meet for many of us is often a place where we lose integration and you might even just want to bring your hands to your own body and remind yourself of this kind of the bowl-shaped support that rests over a narrower cylinder-shaped support. And the right leg comes up and attaches to the right side of the cylinder and the right side of the lower pelvic floor. And when you're ready just left foot coming forwards a couple of times. Practicing that shift of weight and maintaining support from the right leg into the right cylinder and bowl. And then next time your foot comes forwards you can stay there. And with the left foot forwards again the tendency here is to kind of crunch up on the left side. And when we crunch up on the left side then the cylinder kind of swings out to the side and it gets really hard to balance. So I want you to let the left side of the bowl just rest down onto the top of the left cylinder and feel that the right cylinder here can shore up and help support the left cylinder to stay centered. And try just lifting your heel. You just come onto the tips of your toes and that's one place to stay. And then you can try maybe just lifting your foot for a second. And I just felt in myself that the right side of the bowl needed to get a lot stronger. The right side of the bowl had taken off for a second. So just keep your awareness traveling around these spaces and if you would like to give it a try lift the left foot up and let your arms help you balance. And again that cylinder you could think of it rising all the way up through your spine. Like tight rope walking. And then take your left foot down and let's take both knees down. Now if you have two blocks I'm going to say you can grab them and place them to either side of your feet. And let's actually bring them up onto their highest level. And then come back to kneel stand. So we're going to approach a really gentle camel pose. I'm going to just suggest that standing on your knees upright could be a variation of camel. So you don't need to go back. And my hope for you my invitation here is to only move as much as you actually feel comfortable and supported. So there's no competition. And this is a practice for you to feel your own support not to push past it. All right. So just take a minute and once again kind of connect with the bowl. So feel the top of your hip crests. The kind of lower part of your belly. Your lower back. And feel in your body if the bowl is balanced front to back. And kind of if you could imagine the internal surface of the bowl and fortify the internal surface of the bowl. So all the way around that internal surface there's kind of like a hugging in feeling. And then down at the base when we get to the cylinder. Feel the space between your two sit bones. The space between tailbone and pubic bone. The very center point of that. And that center point kind of rising up along the front side of your spine. So right through the center of your body. From either side of the cylinder reach down through both legs and then continue to reach all the way through your toes. So your legs are super active. So from the center point of the cylinder I want you to imagine kind of like a beam of light shooting up through the center of your body all the way along your spine. And maybe the chest starts to lift up. And then you might come back to neutral. So when I go back into camel pose what I want to feel is that the cylinder is still rooted towards the earth. And that the bowl can actually start to tip a little bit. So the bowl might tip a little bit back in the front. Excuse me. A little bit back in the back. A little bit down in the back. And a little bit up in the front. So when I'm tipping the bowl what I'm thinking of is still kind of a circumference through the internal space of the bowl that's really supportive for me. And especially around the left and the right sides. They're both hugging in towards the center. The space that's just in front of my sacrum. So the back side of the cylinder is long and it's reaching towards the earth. The space inside the two sit bones is supportive. And then when I want to come out I'll start to tip the bowl the other direction and come back up to stand. Okay. So let's try one more time. We'll do one more set. And you're just moving at your own pace. So from either side of the cylinder reach down through your legs all the way to your toes. And then feel the bowl kind of lift up off the cylinder and start to tip. And the cylinder might even be a continuous structure that goes all the way along the central portion of your body. And then when you're ready to come out strengthen the cylinder and tip the bowl and come back out. And let's just take a couple of breaths in child's pose. And these few breaths just allow for a total relaxation. Relax your belly and your back. And then when you're ready to come on up you can come up and we'll finish with a meditation. And it's a meditation on the root chakra or on the root space. So any position that feels comfortable to you, that feels supportive is great. I'm going to come back into Virasana. If you'd like to have a cross-legged seat that's also fine. Also fine to lie down if you'd prefer. So we'll close eyes. And I'd like you to first let your eyes relax, let your face relax. And bring your attention into the deepest kind of most central part of your body. So between front and back and then down into the bowl. So a location would be about halfway between your navel and your pubic bone. And about three inches back from the front of your body. And from that place, you can imagine a root. And the root travels down through the cylinder, through your pelvic floor, and through any chair or prop that you're sitting on. And through the floor.
And through the foundation of the building that you're in. And all the way down to the center of the earth. And your spine and your head are kind of just an extension of that root. And through the root, there's an easy flow. And that flow brings support. And what I'd like you to do is imagine that any feelings of worry that you have or any kind of anxiety or any of the feelings that might in sensation seem like you're gathering them in and then they move up. So a lot of times when we get worried or anxious, there's like a rising up towards the head and this feeling of needing to like hold it together and hold on. And we get in our thoughts about things. So any of those feelings can just be delivered through the root. And the feeling here is that the pelvic floor is relaxed and connecting to the earth. And from the earth, there's a rising up of support through the pelvic floor and into your body. So through this place in your body, there's an easy flow where you can release your worry and receive support. And if you can imagine that that root is a life giving support, it's a life giving entity. And so any parts of your being that right now feel tired or feel depleted, just let them rest in towards the root and trust that it's always there for you. And know that at any point you can imagine it, you can feel it. And when you're ready, bring your hands to just touch your lower belly and take a breath in with gratitude for your body, giving thanks to the innate inherent power in your body, the tissues of your body that are fed by materials that come from the earth. And knowing that as long as you have a body, as long as you're alive in this body, you have support from the earth. And in whatever way is meaningful for you, you can close your practice. For me, I like to bow my head and just touch the earth. Thank you. Thanks for practicing today.
Anatomy for Yogis: Renee Sills
Comments
You need to be a subscriber to post a comment.
Please Log In or Create an Account to start your free trial.
