Description
About This Video
Transcript
Read Full Transcript
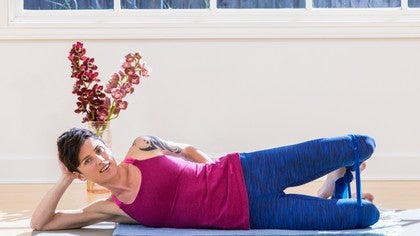
Hi, everyone. Thanks for joining me for this hip strengthening series. The props I'm going to be using are a blanket just to cushion my body against the floor. Later, I'm also going to be using the blanket to slide on the wooden floor. I'll show you that then. But if you're not on a wooden floor, if you have a carpet, I would recommend getting a pair of socks. Socks can also work great on a wooden floor or linoleum floor. And then I have a block and a resistance band or a thera band. You don't need a thera band if you don't have one, but they are great to use for this sequence. So we're going to start off lying on our side. In this sequence, we'll go kind of like around the circumference of the hips to do strengthening at all different parts of the hips. So where we're starting right now is more to the back and sides of the hips with what are called clamshells. So how I'm lying right now is I'm on my side, and I've tried as much as possible to bring my legs in line with my torso. So I'm not folded back at my hips, and I'm also not doing a back bend shape. So you want to just look down at your body and see that you're in a pretty good line with your torso to your thighs. And we've got a little bit of a tail tuck that's happening here. So not huge, but just a touch. You can flex your feet, bring your heels to touch. You can always use your hand for balance, but if you want to work more with stability in your abs, then just let your hand rest on top of your body. So keeping your feet flexed and your heels together, lift your top knee towards the ceiling. We're going to work with sets of five today. So top knee coming up and heels together for three, then two, and one. And now we'll go in reverse. And for the reverse clamshells, you'll keep your thighs moving towards each other and knees together, and you're just going to take your heel up towards the ceiling. And as you do these movements, you're also working to kind of stabilize around your trunk, your spine. We'll do one more. So if you have a resistance band, we'll try a couple of those with a band. And I just want to kind of tie the band not too tight, but enough so that I can work with a little bit of resistance. And we'll repeat the first and the second movement. So for the first ones, you can bring the band around your knees. And again, position yourself so that your spine and your thighs are in line. Feet stay flexed. So now if you have the band, you realize like it actually makes quite a big difference. And if you're incorporating these into your home practice, let's do one more. And then switch and bring the band around your ankles. This one's really hard for me. If you're incorporating these into your home practice, you want to go I'd say like 80%. So if a set of five feels like that tires you out, then stay with a set of five. If you feel like you could do 10 easily, then go to 10. I like to stay somewhere around the 15 range in my own practice. All right, so now I'm going to switch sides. I'm going to turn my back to you. I'll do five without the band, and then five with. So feet are staying flexed. I'm trying not to backbend here, so I have a long lower spine. And then the top knee coming up for the first variation. And here you can see that the portion of my glutes that I'm using is kind of at the back of my hip joint. I'm pointing to it there, strengthening the back of the hip. And then when I go into the reverse clam shells, the portion of the hip joint that I'm strengthening is actually more kind of around the sitting bone. So more of the internal rotators is what they're called. And then you can give it a try with your bands. Okay, so then with the bands, we'll do variation one. And working with the resistance, I think it's great because you can really start to work with the more subtle strength that's required when you're kind of working with a bit more weight than your body weight or resistance. And then switch your bands to your ankle. Okay, and on this one, you want to keep your foot flexed. And so the side of your heel is reaching up towards the ceiling. So if you're using your band, you can keep it where it is. Turn around. And the next movement that we'll do, you can take your bottom knee forwards, and then your top leg long. And here what I'm doing is I'm going to lift my foot so that it's in line with my hip, and then reach it back on a diagonal. So I'm using the lower leg to provide the resistance. And the top leg is reaching back at a diagonal. And here I can feel that my lower butt and the top of my hamstring are needing to work. We'll do one more. So switching to the second side, your lower leg is bent and resting on the floor, and then your top leg, the foot is in line with your hip, and you're reaching it back at a diagonal. And then it's the lower portion of your bum and the top of your backside thigh. So if you're using a band, you can set it off to the side for now. We'll use it again in a minute. And come back to your first side. And now step your top foot kind of in front of your body so that your lower leg is long. And here we'll work with the adductors or the inner thigh muscles. And I want you just to lift your lower leg up as high as you can get it for five. And with all of these, when I'm side lying, I'm trying not to wobble front to back.
I'm trying not to go into a back bend. That's something that if you're having trouble with, just use your hand to stabilize. And then we'll switch sides. So the muscles that we're working with here are kind of where the inseam of my pants are. And that's what I want to feel working as I try and lift the lower leg up is kind of a knitting together around my inner thigh. All right. So then we'll finish with those. And I'm just going to fold my mat up so that I stay in the camera frame. But if you're on a wooden floor, then just move yourself so that your back is on your mat and your feet are on the floor. And if you're on a carpet, socks on carpet should be fine. So basically we want to be able to slide easily. Our feet against the floor. Socks are fine here. All right. So if you've got a blanket, place your feet on the blanket. If you're wearing socks, that's great. What we're working with here is stability that comes from the inner thighs up into the torso. And so you can reach out through your inner thighs to your feet to push the blanket forwards and then pull the blanket back. And it's like the pit of your belly is the thing that's pushing and pulling. So from the pit of your belly, you're reaching out and pushing the blanket forwards. And then from the pit of your belly, you're drawing your legs back in. You might notice that one leg kind of travels faster than the other. You want to get them to go evenly. And with this one, let's do 10. Got another 5. And what's happening in your lower back here is that you're looking to maintain a neutral curve. So you're not flattening your back down onto the ground. And if you feel like this movement is kind of forcing your belly to get pushed up towards the ceiling, I want you to gently use your lower abs to hug in towards your body to stabilize through your lower spine. And last one here. So we'll transition from here to the next movement. You can set your blanket off to the side. Now unfold my mat. So for the next movement, I'm going to use a block. And I'll place the block so that it's underneath my thigh. So right now my back is on the floor, but the block is underneath my thigh. And then I'll take the opposite knee in towards my chest and interlace my hands around my shin. Now what I'm going to do is press the back of my thigh into the block, squeeze my buns on the right side, and lift up, and then come down. And I'll do 5 like this. So here I have more of like a global butt strengthening that's happening. So the large portion of the glutes, and let's switch sides, as well as a lot of hamstring strength. So knee in towards your chest, and then on the opposite side you're pushing down into the block to lift your pelvis up. Last one. From here, go ahead and take your block and place it between your knees. So my feet are about hips with distance apart. I'm holding the block at the narrower level. The block is keeping my thighs about hip bone distance with the part. And from here I'm just going to push up into a bridge, and then come back down onto the ground. Now when I push up into bridge I'm pressing evenly into my feet. And then at the top of bridge I'm going to squeeze the tops of my thighs and kind of the most upper portion of my hamstrings. And I'm thinking about them hugging into the bone. And then I'm keeping that support as I come down. And then relax. So I'm pushing down into my feet, and then at the very top, feel the tops of my hamstrings press up into the bone, and then keeping that as I lower. Let's do 3 more. The entire time I'm holding the block evenly between my knees. I want to feel that both sides, right and left leg, are hugging into the block. And then set your block off to the side and grab your resistance band again. And this time we'll bring the band around our knees. So now with the band I want you to press out into the band. And you're going to continue to push out into the band and do the same thing. And push up through your hips at the top of the bridge, kind of squeeze in the tops of your hamstrings, and then keep that as you come down. The whole time you're pushing the band slightly out. So my knees aren't going much wider than my hips, but I'm feeling the resistance through my outer hips as I press out into the band. And last one here. So go ahead and set your band off to the side. All right, so before we go on with the last little bit of strengthening work, let's just take a minute to stretch out the hips a little bit. So lying on your back, you can bring the soles of your feet together and then reach down and either grab your ankles, your shins, or the little toe sides of your feet and let your knees rest out to the sides. And we'll just take a couple of breaths in each shape. So for me I think it's important that whenever I'm doing strengthening work, I also spend a little bit of time just relaxing and breathing into whatever muscles I've been using. Right, so from here you can bring your feet back down onto the floor. And just take a minute and feel that your weight is balanced evenly between the right and the left sides of your sacrum, or the back of your pelvis. And then keeping the weight balanced, go ahead and bring the little toe side of one foot to the opposite thigh. And here you want to press the little toe side of your foot against that thigh, so I'm creating resistance. And then again, without shifting the balance in your pelvis, if it feels all right to your hip, you can bring your legs closer in. So if it's enough of a stretch with your foot down, just keep it there. Otherwise you can bring your legs closer in and interlace your hands behind your thigh. So the knee that's bending out to the side of that foot, I'm gently pressing the little toe side of my foot against my thigh, just keeping resistance. And then to switch sides, I'll bring both feet back to the floor first. And again, without shifting the weight balance in my pelvis, the little toe side of the other foot comes to the thigh, and then I'll bring my legs in if it's appropriate and interlace my hands behind my leg. So you want to be mindful in this pose, especially if you have wobbly hips that you're not tilting off to one side, and that you're using a little bit of the resistance of the bending knee side right. And then you can bring both feet back to the floor. Alright, so from here, I'm going to pull the back of my left foot, in this case, against my right hip bone. So I've crossed my left foot just behind my right hip bone. I'm going to hold on with my right hand and then release my knee forwards onto the floor. And this allows kind of an opening here in the front of the hip and top of the thigh. If you want more sensation, more kind of release through that hip or more stretch sensation, you can bring the opposite knee in towards your chest and hold with the opposite hand. So I'm holding on to my left foot with my right hand and my right knee with my left hand.
And then we can just take the other side. So again, one foot comes behind the opposite hip bone. You can grab with your hand and then release your knee forwards. So this is giving some opening in the front of the hip joint. And then potentially you can bring your other knee in. I should have said that the last pose that we did, the figure four, was a stretch for the back of your hip joint. And then you can bring both feet down onto the floor and now we'll just do some release for the internal rotators. So take your feet about as wide as your mat and then just let one knee travel in towards the midline. So here my right knee has dropped leftward. And then go ahead and switch sides. And when you're ready you can bring both knees back up. Hug your knees in towards your chest. So we're gonna turn around and prepare for a little bit of squatting to stand. All right, so the strength that we need to come up from a squat into standing is kind of a global strength around all the parts of the hips that we've been working with so far. So the outer, the back, the inner, and the front part of the hips. And what I'd like you to do is bring your heels down to the floor and have your knees bent so you're kind of in a low chair pose or a low squat. And then start to hug in around the outer hips. And I want you to imagine as well that you have both your block between your knees and your band outside of your knees. And you're simultaneously squeezing the block in and pressing the band out. And then from here we're gonna keep that activity level through the hips and the knees and come on up. And we'll go down back into the squat and then stand up four more times. So as I'm coming down I'm imagining I'm squeezing the block between my knees and pushing the band out. Same thing coming up. And as I'm coming down I'm feeling my outer hips, the back of my hips, and the front. And I'm kind of just imagining this like wrapping around my hips that's condensing and holding in the hip joints. So let's do two more. You can add any arm variation that you want. And last one. All of the exercises all at once. And then go ahead and stand up. And just to end today, stand in a simple tadasana. You can have your feet hips width apart and close your eyes. So now check in with your own hips. Feel where they are. And for a lot of us with loose hips it can be harder to feel the upper hamstrings and the backs of the hips being supportive. So I want you to remember the thing that we did where we pushed the block down and kind of thrust your pelvis up. And see if you could get a little bit of that feeling here. It's almost like there's a block behind your upper hamstrings. And then remember the exercise that we did when we slid the blanket forwards on the floor and get a little bit of that feeling. So from the pit of your abdomen you're kind of reaching down through your legs. And then remember the clam shells and the sides of your buns working. And see if you can get them to come on line too. And then finally the adductor work, the inner thighs. And almost like from your knees to your groin, the inner thighs are just hugging in. They're getting kind of longer and hugging in towards the bone. So for those of you that have trouble standing for long periods of time it's pretty common for hypermobile people in their hips that back pain and hip pain occur after standing for not very long. You can work with this kind of stability and you just want to feel like a continuity from your hips and your torso all the way to your feet. And this three dimensional support all the way around your hips. And I do this series probably about five days a week. And it really doesn't take very long. I do it before I go hiking, go running, go walking. And I also like to include it before my other asana practices. For me and my body having hypermobile hips it's really important that every day I do a little bit just to strengthen them up and remember that I have a lot of support in this part of my body. So I hope it's been useful to you. Thanks so much for joining me.
Anatomy for Yogis: Renee Sills
Comments
I'm so regretful for being able to practice with you and follow you sweet kind voice and precise instructions, even without living in Poortland. I've been practicing this hip strengthening chapter with you over and over until I know it by heart, and in evey cell. It's very healing for my body. bless you
You need to be a subscriber to post a comment.
Please Log In or Create an Account to start your free trial.


