Description
About This Video
Transcript
Read Full Transcript
(waves crashing) Hi, and welcome back. We're gonna do a practice for the upper back and shoulders. We'll start the practice seated in a chair, and later on you'll want a blanket or some sort of head pillow, and then a ball to do some self massage. A tennis ball works great. But let's start off seated, and sitting up tall.
Sitting on your sits bones instead of slouching. Sitting up tall with a feeling of a slight arch in the low back. And inhale, and shrug the shoulders up towards your ears. They don't have to make it to your ears, just shrug them up. We're gonna hold this for a couple of breaths actually.
About 15 seconds. And on an exhale, slowly de-shrug your shoulders. Draw the shoulder blades down. Let's repeat that a few times. As you inhale, shrugging the shoulders up in the direction of the ears.
Hold the shoulders, but don't hold your breath. One more inhale, and as you exhale, slowly drawing the shoulders down. One more time. Inhaling the shoulders up. On the inhale holding the shoulders, but keep on breathing.
Inhale. And as you exhale, drawing the shoulders down, this time holding, gently drawing and holding the shoulders down for a few breaths. And then relaxing. For the next movement, we're gonna turn our head about 30 degrees to the left. Inhale, and exhale, you're gonna keep your nose along that plane, as you draw your chin down towards your left chest and shrug the right shoulder down away from the ear.
Now hold that, getting a lengthening feeling across the right shoulder and neck. Then inhaling, drawing the nose up along that same plane, and lifting the right shoulder towards the back of the head. They may not touch, they probably won't touch, but the back of the head is moving towards the shoulder, the shoulder is moving towards the back of the head. Holding about 15 seconds. Inhale, and as you exhale, lowering the nose down along that same plane, shrugging the right shoulder down, away from the back of the head, chin dropping towards your left chest, right shoulder drawing down, feel the stretch along the right side of the shoulder and neck.
And then inhaling, slowly drawing the nose up, the right shoulder moving towards the back of the head, the back of the head moving in the direction of the right shoulder. Hold the position, but keep breathing. Inhaling. As you exhale, releasing the shoulder down, drawing the chin towards the left side of the chest. Then we're gonna hang out here in the stretch position about 30 seconds.
And slowly lifting the eyes to the horizon. Then turning your head back to center. And then turn the head about 30 degrees to the right. Lower the chin towards the right side of the chest, shrug the left shoulder down, feeling the stretch across the left side of the neck and shoulder. Then looking up along that same plane, drawing the nose up, drawing the left shoulder up in the direction of the back of the head.
Holding each of these positions about 15 seconds, except for the last one that we hold for longer. And on the exhale, releasing the left shoulder down, as the chin drops towards the right side of the chest. Feeling that yummy stretch across the right side of the neck and shoulder. And you can start to inhale the nose up towards the ceiling, the left shoulder up towards the back of the head. And hang out here, breathing.
Inhaling. As you exhale, drawing the left shoulder down, as the chin lowers towards the right side of the chest. (breathing noise) Hanging out here a little longer this time. And keeping the left shoulder relaxed, inhaling the nose up to the horizon, and turning the head back to center. For the next part, we're gonna come down to the mat, and do some point work on the scapula, on the shoulder blade, and in between the scapula and the spine.
So the scapula, the shoulder blade, the first point we're gonna come to is right in the center of the shoulder blade, right about there. And then the second point we'll come to, is between the shoulder blade and the spine. Hard to reach with your own hand, but easy to get with the ball. So we don't want to be right on the center of the spine. Just between the spine and the shoulder blade, right in the lumpy zone in there.
We wanna keep the shoulder blades... Shoulder blades can lose their ability to slide and glide along the back, and we really want them to slide and glide. Especially since a lot of us are sitting like this. We need to free up the shoulders as much as possible. Move the chair.
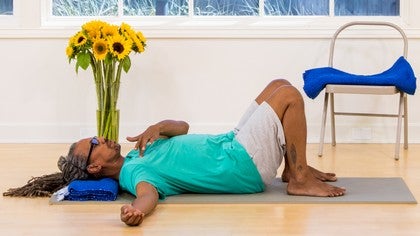
We'll need the head pillow. Bring the head pillow in, towards one end of your mat. And your ball. Let's start with the ball on your right side, and come on to your back. Bringing the head pillow in, so your head and neck feel comfortably supported.
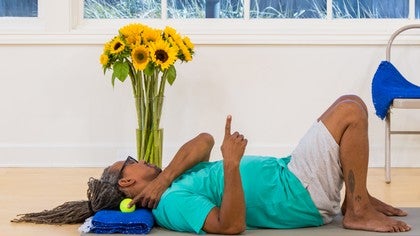
And then getting the ball into the outer, right into the shoulder blade. It's gonna be about there. And then open the arm all out to the side. You can use your legs to adjust how much pressure goes into the ball. If it's too much, I can roll my legs and my hips a little bit away.
That makes it a little lighter on the ball. To add more pressure, I can take my knees slightly towards the ball. And breathing, into the pressure of the ball. Right in the center of the shoulder blade. This is one of those magic points that I learned in acupuncture school.
It's great for releasing the shoulder and the neck. And after about five breaths, you can re-position the ball a little bit. It's kinda hard to reach there and re-position, so one way you can do it is to shift the weight a little bit off the ball, and take your hips a tiny bit towards your feet so the ball rolls up a little bit, and find a new point. Breathing. Melting into the ball.
(sighing) Good, and then to re-position, we're gonna slide the ball now just inside the shoulder blade, but to the right side of the spine. And one way to open that space up a little more, is to take that right arm, and reach it across the body. It really helps the shoulder blade rolls a little more forward so you get great access into those rhomboid muscles in between the shoulder blade and the spine. Again using the legs to modify pressure. Checking in with the quality of your breath.
Breathing into that upper back point, where the pressure is. After about five breaths, you can shift the ball up or down by shifting the pelvis. And get into another good spot. Going for that yummy achy sensation. Not so much pressure that you're gonna give yourself a bruise, but something that you can relax into, breathe into, melt into.
(breathing) And in this area you can do two to five points, moving a little bit with each time. One other nice thing to do in this area is to shrug the shoulder slowly up, and slowly shrug it down while pressing in to the ball. And you're gonna reach over and slide the ball out. Come flat onto your back. You may notice your right shoulder and right arm resting really differently on the mat.
You may even feel your breath moving a little differently, from side to side. Then we'll take the ball, over to the left. Right in the center of the shoulder blade first. Opening the arm out to the side. Adjusting the pressure with your legs, and the movement of your pelvis.
(breathing) Right in the center of the shoulder blade, we have one of the rotator cuff muscles, and this can feel really great if you've had a shoulder injury. Just the right amount of pressure. Good achiness at the most. (breathing) Then you can re-position the ball a little bit, or shift your hips a little bit, still right on the shoulder blade. Breathing, melting into the pressure of the ball.
Good, and then tipping the knees to the right. Reach the left arm across the body, and slide the ball in, between the spine and the shoulder blade. And as you have the arm reaching across the body, it opens up the space where you want the ball to come, right into that upper back. Adjust your pressure with where your knees go. Again, breathe, right into that pressure.
See if you can melt it from the inside with your breath, with your intention and awareness. Softening the zone at the back of your heart. In about five or so breaths, shifting the ball position a little bit, still in between the shoulder blade and the spine. Sometimes you gotta explore to find just the right spot, and then lean your weight into it. Making sure your breath is moving, your jaw is staying relaxed.
(breathing) If you like, you can do like we did on the other side of, slowly shrugging the shoulder up, slowly un-shrugging the shoulder, while leaning in to the pressure of the ball. (breathing) And then tipping the knees to the right, somehow getting the ball out from behind your back. And coming to rest on your back, with your arms a little out to the sides. Let's take stock of how your shoulder blades are feeling, how your upper back is feeling. (breathing) And then one last movement with the arms.
To start, bring your pinky edge of your hand on the ground, and your thumbs towards the ceiling. Inhale. As you exhale, turn your right palm towards the ceiling, and your left palm towards the floor. As you inhale slowly rotate both thumbs towards the ceiling. Then as you exhale, again now it's the right palm towards the floor and the left palm towards the ceiling.
Inhale, both thumbs come towards the ceiling. Exhaling, left palm down, right palm up. Inhaling, both thumbs towards the ceiling. Exhaling, right palm down, left palm up. Inhaling, both thumbs towards the ceiling, reach out through the arms, lengthen.
And bring your hands down along your sides to a comfortable resting pose. Let your knees, inner knees, rest into each other. And you can stay here in a final relaxation, for five, ten minutes, or if you're ready to come up, slowly roll both knees over to the same side, rolling onto one side, knees up towards your chest. (breathing) Then bring your top hand forward, let your head stay heavy, and roll forward, pressing your hands down to slowly come up to find a comfortable seated position. I hope that brings some ease, some breaths, some joy into your upper back and shoulders.
Namaste.
The Happy Back Show: Low, Mid, and Upper Back Relief
Comments
You need to be a subscriber to post a comment.
Please Log In or Create an Account to start your free trial.


 !
!


