Description
About This Video
Transcript
Read Full Transcript
(waves crashing) Greetings. Welcome to Session One of Intro to Ashtanga Yoga Course. Today's session we're gonna focus on what's called surya namaskara, it's a greeting to the sun and to get started, in Ashtanga we, all the movements all the positions are connected with the breathing. We use a technique of breathing called ujjayi, that means victorious or expansive. And the characteristics of ujjayi, two.
One is, it's a sound, so you make a sound with that breath. And the second, that sound is inviting to the ear, so it kind of compels you to listen to it. And you make the sound by partially closing the space between the vocal folds. So that happens like when you swallow or when you yawn, and it sounds like this. (breathes deeply) (breathes deeply) So when you use ujjayi breathing it allows you to stretch the breath out and get a measure of control over it, and there's, that's one of our themes that we're working with in this course is the theme of restraint, and so part of learning about restraint and what that means, what yama means, the first limb of yoga, is this aspect of control.
So with the breathing there's a control with the sound. (breathes deeply) And so we'll just do one little exercise that can help you to get it, get the feeling for it, and it's just simply to open the mouth and whisper the syllable ha with an exhalation. So it's just like this. (breathes deeply) Okay, try it with me. Inhale, and (breathes deeply).
And then all is you gotta do is do that again and then in the middle of it close the lips and keep making the sound. So here, let's try it. (breathes deeply) Okay, so it's so musical, and that'll just give you a little taste and we'll be working with breath all throughout the course, and there's even a separate tutorial that you can consult. So, without further ado then we'll stand up and start looking at the positions of surya namaskara. So, this sun salutation has nine positions, so you'll work on it position by position, and the zero position is the first one.
And that's such a perfect name, we don't start with one, we start with zero, and that's called samasthitihi. And so you're, stand with me as I'm describing it and, and enjoy. So you're standing with the feet together and standing tall. And zero position, it means a neutral, and, so, what does that mean? Neutral, kind of a, partly a perceptual thing, a subjective internal feeling within yourself, clearing of the mind and a scanning of the body, and it partly means a neutral skeleton.
Okay, so you start with the foundation, with the feet connected to the Earth, and so they actively stamp. If you look at my foot, I lift it up and I (stamps foot) (exhales deeply), try that, stamp the right foot down and (stamps foot) dig that sound. And try the left (stamps foot). Oh, that wasn't quite as good, huh? (stamps foot) (exhales deeply) So, there's an intention to connect with the Earth through the legs, and then you lift up the belly, the navel, the chest, and roll the heads of the arms back til they're in the side plane.
I'll give you the side view (exhales deeply). Okay, so the side plane is here, and so when you roll the shoulders back, that's the head of the arm that comes back and goes into that plane, so it's not too far back, but it's not the, this habitual computer driving stance, okay, so the shoulders roll back, and then you, like you stamped the foot down you kind of stamp down through the arms, so from the shoulder down all the way through the fingertips, you're reaching and lifting the chest up against that. Then steady your gaze far away at the horizon, but internalize it, so you're kind of seeing inside and listening inside, and turning your skin inside. There's a whole withdrawal of senses that is part of this restraining that's our theme for the day. Okay, so you're standing, enjoying, your legs, pelvis, belly, all the way up the chain to the head, feeling that zero position.
Okay, so from there we've got the first position. So we get zero, and I'm gonna show you that, kind of like, what's the destination? Okay, so that's what we're looking at. We're looking at nine positions and the transitions between them. So first we'll just see where are we going here from zero?
And we're going to what's called first position, so it's an arm reach, and the arms are up vertical overhead like this. Okay, so we're gonna explore just this first position and then we'll look at how to get into and out of it. Alright, so take your arms up. They're shoulder width apart with the palms facing each other, and it's very simple, reach, so reach up with a brilliance from the shoulder all the way through, from the inner elbow up through the hand, fingers. And as you do it plant the feet, firm the thighs.
And then with a move (claps) stamp the hands together. Let's do that, separate the hands, and actually clap, (claps) whack, and use that contact to reach with a brilliance along the whole vertical axis. So that's spanning, if you look up, through the fingers, hands, down through the forearm, upper arm, through the torso, pelvis, down through the legs, feet, trying to slenderize the body to alight it all along that vertical line. And if you look from the side here, there's a stacking of joints, so wrist, elbow, shoulder, pelvis, knees, ankles, and look at my gaze, okay, so you can look forward, kind of try to sense it, but you can also really help yourself out by dropping your gaze, just look down the front of the body and contemplate that vertical line. And you can see start to get tired reaching up there long enough, and that's part of restraint, like, uhh, I wanna take my arms down.
But no, part of me is like, equanimity, I'll just explore right here, with the breathing. Okay, take the arms down, and then we'll look at the transition. Okay, so, and with this yoga practice an amazing thing is every little thing, there's the basic things, the most foundational things you do, standing, sitting, reaching, bending, twisting, you do it consciously and you'll make an art out of it, and you get expressive with it, okay, and so this reach happens in this side plane, okay, and it's a, you spread your wings, it's a mighty expansion out to the side with the ascent and the decent synchronized with breath. So do it with me, so there's an external rotation, turn the palms out with a spin and then reach out to the sides, breathing in and coming to the destination that we worked on, first position, then there's an internal rotation of the arms to make the palms face out and return to the zero position with the exhalation. Here we go.
Again, inhale, all the way up through the movement, come to a stopping point, that's your destination, then, again, exhale, descend the arms to another stopping point. So we're thinking of the destination of your transition. Again, inhale. Exhale. So a smooth glide.
Almost like a swim stroke. Reach the arms up, stamp the hands together as you plant the feet, then exhale. And it can be fun to add a little instability into it, so you can go up on your tippy toes in samasthitihi, so way up and then stabilize that unsteady position and reach up, and exhale, keeping the heels up the whole time, and do it once scanning down the body, so you're keeping that central axis in mind, here we go, spin the arms, palms face out, inhale, reach up. Keep scanning down, and then exhale, and slowly bring the heels down. Couple of last things about first position.
One is that if you're tight in the shoulder area and you have a hard time getting that vertical reach, that's no problem, you can, for one you can keep the hands separated, okay, so this is actually harder than this and yet you want to keep your alignment from below, keep your rib cage centered over your pelvis in your reach. Okay, so if you reach and you end up like this the you're actually not getting the good shoulder work that you can get. So you have to keep the ribs nicely centered and it's easier to do that with the hands apart, so no problem, there's no rule that says you gotta find a specific endpoint, okay, so you're always personalizing the destination of your position, and one way is, in first position, is to keep em apart, and variety is also key, so it doesn't matter if you can do it this way nicely, you can also do it this way just for variety's sake. Okay, so let's look at the second position now. And we'll look at the destination first.
Okay, so when you go from first you end up in second position, which is a forward fold. Okay, so it looks something like this. Alright, so it was tricky, that transition goes from here, I'm gonna reach up, to a forward fold. Okay, so we'll just look at that forward fold for just a little moment, so separate your feet hip width apart, and put your hands right at about, just below the navel, okay, so you're looking to initiate that move from a pelvic tilt. See, feel, look at that.
So you put your hands right on your waist, lower waist, and practice that. So you'll tip your pelvis forward, then make it neutral and tuck it under, okay, so you're starting from neutral and you're going into that forward bend with a pelvic move, okay, and so the spine goes, look at my spine, ho. That sound effect is good, try it with me. So you've got your feet separated, you've got your hands on your waist, and you're gonna tip the pelvis and throw the spine forward with a ho, ho. Okay, do it again, come up and then, get ready, and ho.
So you come halfway down and notice when you project the spine far out there, the legs, they respond by going ahh. Right, they grab, and they galvanize, and they come to life, which is exactly what you want is grounded legs. Okay, so let's try it one more time, it's a exhalation, tip the pelvis forward and project the spine away from you and come to that halfway point, okay, so that's about halfway to your destination, and then you stay as long as possible, but the spine goes into flexion, and you release the head and neck and you may need to bend the knees, but it's actually not bending the knees, there's a big difference between bending the knees and straightening the legs without them getting straight, and you're doing the second one. So if the legs are tight they will bend but you'll be trying to straighten them and that will give you the work in the back of the legs. Okay, so come back up and let's kind of look at the move here, so you go up to first position, reach the arms up, and then get ready with your center, so you're going to tip the pelvis and the arms go out to the side as you, whoo, take a big dive and finally release the head and neck and come into second position, planting the hands, lifting the sitting bones, grabbing the thighs.
Try it again, come up, reach the arms up into first position, with a breath in, and then exhale, long spine, grounded legs, and come down all the way to your destination and stop, and come up and try again. So from samasthitihi, reach the arms up with a breath in and exhale. Okay, so let's look at it one more time. I want you to try it, couple of ways to make it easier. One is separating the feet, two is bending the knees.
So really what's important in this is to get that pelvic tilt, alright, so if the backs of the legs are tight that's gonna be hard to do with straight legs and with feet together, so you give a little freedom, separate the feet and bend the knees a little bit, and then let's try it. So we'll take the arms out a bit, too. So you got feet apart, bent knees, hands at the waist, and then come forward. Okay, try that again. Bent knees, and feel that forward means out first.
Project, whoa, outwards. Look at the speed of that, just watch me for a sec. Watch how dynamic it is, it's a, hey, and that's what you're trying to get, but then follow it, come do it with me, set yourself up, bend the knees and then, whoo, and then enjoy, once you get forward, stop, release your head and neck and keep the hips lifting and your weight shifted forward, so you look at my body and do it with me, rock forward almost at tipping, the heels lift up, and back, and then forward, and back, and we got no hands, in fact, reach the hands up behind you, and rock forward, and then finally stay forward, so that forward bend is, wow, to a tipping point is where you're looking to get. Okay, look at this, not back here, there's a tendency to be fearful and to hang back, but that won't give you the work that you want in the backs of the legs or in the belly, so by getting forward the backs of the legs get worked, they get elongated, and the belly is able to be free, and the spine extends and it elongates, so the whole body gets involved in the position. Whoa.
Okay, come up and let's just do it one or two more times, and you can choose how you wanna do it, with your feet apart, with the knees bent, feet together, legs straight, so we're going from samasthitihi, strike the Earth with the feet, lift up the chest, and then inhale, reach up, join the palms, fingers together, come to first position and exhale, forward, come to a stopping place with the body shifted forward, second position, then all the way back up to first position, return to samasthitihi, we'll do it one more time. Inhale. Exhale forward. Come all the way to a distinct stopping place as you empty the lungs, enjoy that position momentarily and inhale, come up, stamp the hands together, clarify your vertical line in first position, and exhale the arms down to samasthitihi. Alright, so we'll move on and have a look at third position, the suryi namaskara.
Okay, so in that position from second you, so we small move, you lift up the chest and elongate the spine, almost like that halfway point that we came to when we're working on second position. So there's a stamping of the feet, grounding of the thighs, the lifting of the chest, the looping back of the shoulders, so I'm way up on my fingertips. Okay, let's try it out. So, going to second position, create your forward fold and then inhale, lift up the chest and go up, way up on your fingertips, with the hands are in front of the feet by about six inches, so your legs are grounded, the navel is lifted away from the pelvis and the chest opens. Just enjoy that position for a moment, you look up but you keep the back of the neck long.
So as you're exploring, come up for a sec. So these positions, we only spend one half of a breath in them normally, in suryi namaskara, it's a flow, right, but we're stopping and breaking it down, and it's a excellent thing to do to kind of research and investigate the position and get knowledge about it, and don't think that it's not practice or it's not work, that's, this is an amazing practice, come back in to third position, and what I say is every position is fit for meditation. Okay, yoga is about stopping the body, stopping the thoughts, stopping activity. Okay, and so you use the movement to stop the activity, so part of researching is coming to these positions and exploring and investigating and wondering about them. So, look at the legs here, feel your legs.
So I'm sort of talking to you but I'm expecting you to be in the position exploring it at the same time. Okay, so the legs are tall, and if you're particularly, if the backs of the legs are tight and you're bending your knees ordinarily, here you got a chance to straighten the legs and lift the sitting bones so that the buttocks bloom like those sunflowers, they go, they blossom, kind of open as you work, right, it's very different than if they're tucked under, so there's a kind of, whoo, feeling that you want to create. Okay, and that's an in breath position. Okay, so you go from second position where the lungs are empty, and you lift up the chest and breathe in. It's a very nice move.
And remember this shoulder loop we talked about in samasthitihi, right, where you draw the heads of the arms back and move the scapula down and into the body. Okay, stand up in samasthitihi and feel that. So you're feeling your position from the back side of the body and it's an active kind of stamping in of the, this scapula. Okay, that happens again in third position, it's a very key move as part of it, and that's part of why you lift up so high here is so that you can loop back the shoulders. If you're down here and you try to do it you'll notice that the scapula goes forward, okay, so you got to lift up high enough, it might even be up here, to really get the chest to lift and the shoulder girdle to come into its proper positioning.
Okay, so let's just do it, and remember that there's a dynamic move from destination to destination, that's always the case, so from second to third it's a whole move that you're doing, it's what I call as the gesture, so you go here, come to the endpoint of second position, do it with me, and also then turn your head and watch, and then, wow, see that, whoo, there's a little gesture there. Let's try it a few times. So exhale, fold, and then inhale, find your endpoint of third position, stamp the feet, lift the chest, roll back the shoulders. And again, fold, and inhale. Lift the chest, lift the sitting bones.
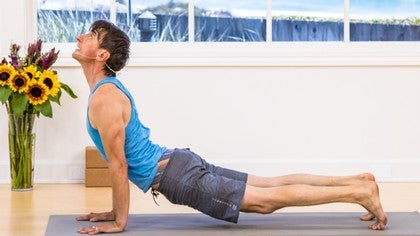
Explore that position, exhale, fold. Okay, so there you have it. I'm gonna be frank with you here, fourth position is a doozy, okay, that's just all there is to it, chaturanga dandasana, it's like the foundational strength posture of all of vinyasa yoga, so we're gonna take our time to kind of build it and look at the possibilities and see how to do it safely and skillfully and creatively. Okay, so we're gonna come down onto all fours here. And the starting point is plank, okay, so the lowly plank position, so we're gonna kind of look at how to develop that and then see how that leads into chaturanga dandasana, the fourth position, but as we work on these options they're all, they are all options, so you can use any of these as a substitute, as your version of fourth position, right, so you got to personalize your destination according to your individual circumstances.
Okay, so here we go. We've got, we're all fours, the knees are hip width apart, shoulder are, the hands are shoulder width apart, and you've got the hips vertical over the knees and the shoulder vertical over the wrist, and that positioning is, sounds easy, but it's actually not necessarily, and so you have to really make sure that shoulder is directly over the wrist, and generally that's more forward than you might think. Okay, so start with your pelvis, okay, look at my pelvis, like we did with samasthitihi, and looking at that, so you've got neutral, and tip forward, see that very, and do it with me, so you're on all fours, find that forward tip, maximum, so the sitting bones lift and separate. Okay, then get back to neutral, no tilt, and then the other way, so a backward tilt. And back to neutral, forward, neutral, a rounded back, backward tilt, and back to neutral.
So neutral is what you're after in this plank, and shift your weight forward, actively stamp the hand down, so look at that, lift up the right hand and, pow, and the left, pow, strike the Earth, and as you do that lift up your upper back. Okay, so look at where I'm pointing, this part of the back kind of domes and lifts as you're there, and remember, your weight is forward. Okay, then straighten the right leg, straighten the left leg, keep your weight forward, and, now, just look at the pelvis, so you got, do the forward tilt, exaggerate it, then go to the backward tilt, really tuck it under, and then find the middle. Okay, so powerful arms and legs here, and look, so there's very, you can look down between the hands, you can look forward, kind of along the floor in front of you, or you can even look up at the wall and they all kind of give a different perspective, all desirable at various times. And notice how tiring it is, whoo, so that's part of restraint, it's finding the immovable spot and looking to align the skeleton with the precision and with power, so utilizing your foundation, utilizing the Earth.
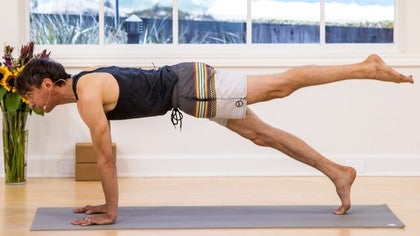
Okay, so we're gonna do a few plank exercises, here we go. Strike the Earth, lengthen the legs, come into your position and then with a move lift up the right leg and hold, keeping your weight shifted forward, and reach back all the way through that right leg toes. And switch, take the right leg down, lift the left leg with a move, and reach through that leg, you can point the toe or flex the ankle, and back to plank. And now you're really gonna love me, lift the right arm and bring it alongside the body like samasthitihi, and stay, and then return to plank and left, so that left arm is reaching away as you lift the chest. And back to plank.
Feel. Okay, so you can feel, lot of work in the upper body and the legs, everywhere, the whole body, plank is such a beautiful position. Okay, last thing for that, it's very dynamic that you wanna do, and you wanna remember this, the legs, the pelvis, the torso, they stay in like, it's called a danda, a staff, okay, very connected, so we're gonna do this little hopping move, and when you hop you don't want all the parts going up and down at different times, you want the hop to go like this, tchoo, tchoo, tchoo, tchoo, so the whole body turns into a staff, like a rod, okay, here we go, the weight is forward, and then look. Just the littlest bit, clear the hands, and do it with me, take your plank and jump, jump, jump, jump, and if you can't clear, suppose you're like, yeah right David, then any bit just try, lighten the hands, light, light, light, it doesn't require that you actually get any air time, it's more the intention, and then one more time, and feel it, what happens, you want a dynamic plank, whoa, strike the Earth, lengthen the arms and legs, keep your weight shifted forward and enjoy. Okay, so that is going to do it for this session.
We'll pick up our study of fourth position and go further, see the options for building from plank into the further position. So thank you for joining me and look forward to tomorrow's session.
The Ashtanga Practice: David Garrigues
Comments
You need to be a subscriber to post a comment.
Please Log In or Create an Account to start your free trial.
