Description
About This Video
Transcript
Read Full Transcript
Namaste, I'm Ali. For this practice you will need two blocks and a blanket and we're going to start on our backs. So anything that you're sitting on you can just slide it off to the side and lie down. So once you're down, squeeze your knees into your chest and you can just let your sacrum widen here and your tailbone settle and breathe all the way up and down the length of your spine. And then we're going to let the legs drop off to the left, taking an easy twist.
And you can look back over your right shoulder and let the right shoulder drop and use the left hand to encourage the right leg to drop a little bit further. Some nice big breaths into the right side of the body. And then bring your legs up and we're just going to take it over to the other side. So you might adjust your pelvis slightly more to the left to drop the legs to the right if it got a little off center. And then knees come together and you'll look back over the left shoulder.
And if this bothers your hips at all, you can always put a block in between your knees or a blanket. And that just helps to align the hips a little bit more. And then come back into center and we're going to cross the right ankle over the left thigh. And then you'll reach through and pull the left leg towards you. And I like to flex my right foot a lot here.
That just helps to protect the knee, keep everything in alignment. The ankle stays nice and even. And then you can lift the left leg up and roll out the ankle a couple of times, get any little creaks or cracks out of it. And then roll it in the opposite direction. Step your left foot to the ground with your left knee bent.
Take a hold of your right big toe and come into a half happy baby here. So we're drawing the right knee down towards the right armpit. And if it feels okay, you can lengthen your left leg out on the ground. If that feels like too much, you'll keep your left knee bent. And again, this is a gentle pressure here, no yanking, no straining, just nice and easy.
And then keep a hold of the right leg and bring the left leg up as well so you're in a full happy baby. And while you're there, think of lengthening the tailbone away from the crown of the head so you get more length in your spine. And just big belly breathing, especially in a shape like this where your breath can get a little constricted. Find the room to let your belly expand. And then you can stretch the legs up and give them a little bit of a shake.
And then one more time, draw the knees into the chest, and this time we'll start dropping the legs off to the right, looking back over the left shoulder. And then bring the legs back up to center, again, a little adjustment of the pelvis to the right, and drop your legs off to the left. And then bring the legs back up to center, and this time we're going to cross the left ankle over the right thigh, reach through, draw the right leg towards you. And you can use your left elbow to press the thigh of the left leg away a little bit. And one little note here, if your chin is jutting away from your chest here or you feel constriction in the back of the neck, you can always put a blanket underneath your head.
And then lengthen your right leg up and roll your ankle around, and then a few rolls in the opposite direction. And then step your right foot to the ground with your right knee bent, reach for your left big toe with your left hand, and draw the left leg into that half-happy baby. And as best I can, I'm trying to anchor my tailbone here, even keeping a hint of the natural curve in the spine. So it's almost like you're sticking your bum out a little bit here, and then coming into the full happy baby. And a few breaths there.
And then one more time, legs up in the air, give them a little bit of a shake. Draw your knees in, roll over onto your right side, and we're going to come onto hands and knees here. Bring right onto your mat, and then wrists under the shoulders, knees underneath the hips, and let yourself release back into a child's pose. Most of this practice is going to stay very low, just a little more connection to that earth element. And then hands under the shoulders, roll yourself up to sit, and we're going to slide the right leg forward and come right into a pigeon pose.
So depending on the hips or the knees, you'll have the foot a little further away or a little closer in. And then I like to come onto the fingertips first and activate my legs, activate my feet a little bit, and then fold forward. And palms can be down or you can turn them upward. Try to relax the neck and the shoulders. Take a few breaths into your hips, and then walk your hands underneath your shoulders, and pressing down through the top of the right foot, push into your hands, and come all the way up.
And then come into a variation of Marichy Asana B. So you're going to bring your left leg around and step the sole of the left foot to the ground with the left knee bent, and you're crossing the left ankle right in front of the right one. From there, I'm leaning into my right fingertips, reach up through the left arm, sneak it around in front of the left shin, and you'll take it behind your back and let your head drop in. And that's why I like this one is because it is a deep folding in and a nice hip opener, but I'm not coming into the half lotus with my right leg, so it's a little bit more gentle on the hips. And if your hands don't connect here, no worries. You can just let your hands rest behind your back.
You could also use a towel to connect between the hands. And then again, pressing into the feet to engage the legs, and come on up and release. And then Baddha Konasana, soles of the feet together, knees are open. And if your hips feel like they need a little bit more room, I know mine do, I'm going to sit on a blanket here. And that just gives me a little bit more room for the lower back to tip forward.
And you can slide the elbows in front of the shins and drop the head. And all of these releasing type forward bends, a little extra emphasis on the exhale can be really helpful. I find the exhale to be very grounding, gives me a little bit more release, and then roll yourself up. From here, we're going to close the knees in towards each other. Bring your feet to the ground and wrap your forearms around the fronts of your shins, and just let your forehead rest on your knees.
Give yourself a moment just to close in, and then you'll come on up. And you can slip the blanket off to the side if you're using that. And come into your pigeon on the other side, left leg forward, right leg back. Again, just a moment to be a little bit more upright, pressing down to lift up. And then fold forward.
Any size that you need here. And I'm still trying to think of the left hip drawing back slightly towards the inside of the right thigh. So you can make it a little bit more active if you like that. If you need to just totally let go, then you'll do that. And then your hands will come underneath your shoulders, pushing down to roll up.
Bring your right leg around for that Marici variation. Right ankle right in front of the left. And I'm tipping over into my left hand. Reach up through the right arm. Send yourself way forward here.
Give yourself a little bit more room, and then slide the right hand behind you. Left arm comes behind the back and fold yourself in. This is such a great stretch for the back of the shoulders. Still opening up the hips. And then release the arms and roll yourself up.
One more time, soles of the feet together, knees are open, blanket underneath. Moving forward into your Baddha Konasana. And you might find you can get a little further this time. But if that's not the case, don't worry about it. This practice is really just about getting yourself settled, relaxed, maybe it's been a more challenging day if that's the case.
Just be gentle with yourself here. And then one more time, coming back up, drawing the knees in towards each other, wrapping the forearms around the front of the shins, and change the crossing of your forearms. So if you can't remember, just do what comes naturally and then do the opposite and you'll be fine. And if it is the same arm, then it's fine. Then it's the same arm.
And just let your forehead drop. One more time, closing on yourself. If you've had a day that has required you to be very social, or maybe you have a busy day at work, you've been dealing with a lot of people, it's just nice to have a moment to close in, and roll yourself back up. And we're going to take a seat for a pranayama. I love finishing practice with pranayama.
This one is called brahmari breath, and that means bumblebee. And so this is really good for vata because it is very soothing. And it also stimulates the thyroid gland, which is great for vata because that can be an area of weakness. So it's very simple. You'll just breathe in through your nose, and then on your breath out, you hum very softly and it doesn't have to be loud.
It can just be a nice, easy hum. So it sounds kind of like this. So come on, do it with me, breathing in. Just twice more. Breathe in, breathing out, humming, mmm, mmm, mmm, mmm, mmm, mmm, mmm, mmm, mmm, mmm, mmm, mmm, mmm, and when you're finished with that, just a couple of breaths while you're not controlling the breath.
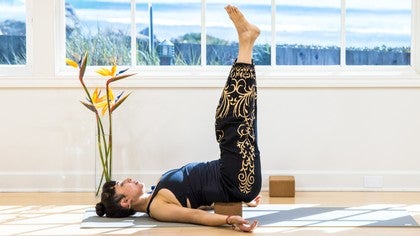
Just allow yourself to be breathed. And then we're going to slide the blanket off to the side, and we're coming into a restorative shoulder stand. So for this, no blanket, but you can use one of your blocks. And if you don't have a block, you might just slide over to a wall and put your legs up the wall. That could be nice, too.
If you are using the block, you'll roll down onto your back, and the block is going to go on the lowest level, and the placement can be a little tricky. You want to slide it high enough on your body that you feel like your hips can release a little bit there, and then I'm kind of tucking the shoulders underneath me. And when the legs come up, keep the knees soft here, and there shouldn't be any effort. It should feel like the block is doing all the work of holding your legs up and you can just chill out. And it's wonderful just to let the legs drain a little bit, if you've been on your feet all day.
You'll stay here for a minute or two, with no effort in the legs at all, just letting them view up there, the feet can dangle. And then if you need to stay a little longer, you'll stay a little longer, otherwise the feet can come down to the ground, and you'll lift the hips, slide your block off to the side. Take a moment in a pose called constructive rest, so the feet are slightly wider than the hips, the knees hang in on each other, hands can come to the very lowest part of the belly for a moment. And then rolling over onto your right side, come on up to sit, and our last shape will be a Supta Baddha Konasana. So for this, I'm using a blanket and two blocks.
Just to set yourself up with the blanket, so that it creates a little pillow for right behind your head, and again it's kind of like right at the line between the shoulders and the neck. I like to do it with the rough end underneath my head so that I can roll it under, and that way I create a little cradle for my neck. So when you've folded your blanket like that, you can place it there at the back of your mat, you'll grab your blocks, one block in each hand, and you do want to set yourself up well in restoratives, you know, because if you're thinking to yourself, God, I wish that block was a little bit more to the left, you're not going to be able to relax fully. So I'm taking my feet together, my knees apart, and then little trick here, nice to turn the blocks on the diagonal, because then you get the soft, flat edge against your leg instead of the pointy corner. So I really like that one, a little tip there.
So when I roll back, the blocks are coming in, and take your knees up higher than you think you might need to. With restoratives, we do want to stop before the full range of movement, and that gives the body an opportunity to really let go. And then I'm taking the sides and the corners of my blanket, and this might be a little tricky to set up at first, but you'll get used to it, and I promise you, it feels amazing. So the corners slide underneath, and it's like you've created a little cradle for your head. And then the hands can come out to the sides.
And if you've got anything around that you can use as little handbags that could be lovely, or something across your eyes. And if you don't have blocks, you can use pillows. If you don't have pillows, you can use towels. Use whatever you got. And then just let yourself go here, let it feel good.
And let yourself go quiet. Okay. Thank you. And then feel free to pause and stay a little bit longer. If you're ready to come out of it, you can take the blocks off to the side.
One more time. I'm going to come back into constructive rest. So walking the feet slightly wider than my hips. The knees drop in on each other. I'm taking my hands to the very lowest part of my pelvis. Whenever we're coming out of a restorative pose, do it slowly.
And bring the legs over to the right so you can roll onto your right side for a moment. Use the arms to push yourself up to sit. And then coming back to sit on your blanket. And if you are somebody who has a seated meditation practice, it might be nice to do that here. If your time is running short and you need to close up.
Thank you so much for joining me. Namaste.
Ayurveda: Practices to Feel Like Yourself
Comments
You need to be a subscriber to post a comment.
Please Log In or Create an Account to start your free trial.
