Description
About This Video
Transcript
Read Full Transcript
Welcome, today's practice is a practice that you can do while you're menstruating. So there's a lot of debate of can you practice when you have your period, can you invert. This is a very gentle practice that can, it's restorative and it's safe for while you have your period. There's no inversions and there's not really any postures that will cause you to contract your abdomen or engage your bonda. So you're not interfering with the free downward flowing energy of menses.
So to get started we'll come on to our hands and knees for cat cow pose. You'll just bring your wrists underneath your shoulders so that your hands are shoulder distance apart and your knees about hip distance apart and your knees will be underneath your hips. And then with your inhalation you'll just start to sink the chest so you're sinking between the shoulder blades and tilt the pelvis forward so the sitting bones are reaching to the ceiling and let the head follow the curve of your rest of your spine. So you'll start to tilt the head up, pull your upper arms back, reach your chest through your upper arms and then with your exhalation you'll do the opposite. You'll press into your hands and knees, tuck the tailbone under, let the head and neck drop and round your upper back and then an inhale to go back into the cat pose reaching your chest through your upper arms, tilting your pelvis forward, looking up and exhaling to press the hands and round your back, inhaling to reach the chest through the arms, looking up, exhaling, stay here, do two more rounds of that at your own pace, let it feel good, find any areas that are sticking, maybe even spend an extra breath in either of those shapes.
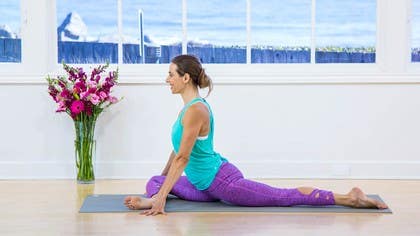
And then complete your last round and move into a neutral spine on an inhale just coming into a flat back and we'll take the right foot forward inside the right hand and heel toe it a little bit or kind of wiggle that foot forward a bit and then we'll start to bend into your right knee and just let the hips sink forward and down. You can move your hands, adjust them, starting to open up the front of the left leg and the hip flexor and breathe deeply in and out through the nose and even guide the breath into that area. Relax any tension in your neck or shoulders, you can even kind of shake your head yes and no, do little circles. Take a couple more breaths here, sinking a little deeper, letting go a little more. And then from there we're going to press into the right foot and start to straighten the right leg, taking the hips over top of the left knee and pointing the right toes to the ceiling and you can use two blocks underneath your hands here and lift the chest forward, tilt the pelvis forward and if your hamstrings are quite open then you may be able to start to fold out over that right leg.
And then we'll just turn the right toes out, so turning the thigh bone from deep in the hip socket, so there's a rotation in the hip and then as you turn the toes out you'll notice that the stretch will go more to the outer hamstring, maybe even starting to inch into the IT band, the glute. You may need to back off the stretch or you may be able to go a little deeper here, up to you. And keep breathing, see if you can straighten the leg a little more, turn the leg out a little more and then we'll inhale, come up and keep the toes turned out and we're going to step onto the right foot with the toes turned out at about a 45 degree angle and take your hands inside of your foot so they're underneath your shoulder and you can start to bend into that right knee, sinking the hips down low. You want to add another layer of intensity here, you can curl the back toes under and straighten the back leg here, let the pelvis be like a paperweight. A couple more breaths there, sink into it, soften any tension in your face or your shoulders and then we're going to shift out of that, bring your right foot back and we'll take the left foot forward, coming into your lunge, your low lunge and just sinking into it here.
You can stay up on your fingertips, so the left knee is over the top of the left ankle, right knee is down, toes are pointed and the hips are just sinking towards the floor. Let's see if you can relax the quad, you may notice the hips let go a little deeper if you do that. If this is a lot of pressure on your knee, feel free to put a blanket or a pillow underneath that knee, the right knee. And then we'll lift the hips up, straighten your left leg, you may need to adjust by bringing the heel forward, hands can come onto blocks, two blocks, tilt the pelvis forward, lift the chest forward, keep the toes pointing to the ceiling, you can either stay here or start to lower down. And keeping the left leg straight, just start to turn the toes out, but feel that that is happening from in your hip, the whole thigh bone, the whole leg is turning out.
And this may become more intense for you as it moves to the outer hamstring or it might become easier, enjoy it either way, see if you can tilt the pelvis forward a bit more, adjust your shoulders, your neck, your cheeks. And then we'll inhale, come up, we'll keep that angle of the left foot and we'll just start to step onto the left foot and start to bring the knee over the ankle and take your left hand inside of the foot and the hands about shoulder distance apart and let the hips sink. You can adjust your hips forward so the knee goes a little bit more bent and as long as your knee is pointing to your second toe, it should feel pretty good in the knee joint. So we still have that external rotation of the left thigh bone in the hip socket. And then if you want to add another layer of intensity, you can curl your back toes under and straighten the back leg as the weight of the hips falls down, the weight of the pelvis falls down.
Check in with other areas in your body to see if you're holding tension in the jaw, the cheeks, the shoulders, the abdomen. Couple more breaths there. You determine the intensity, so depending on how you're feeling today, you may want to go to your full range or you may not. And then lift your hips up, step your left foot back, let's take a downward facing dog here, curl your toes under, lift the hips up and back, press your hands, just take a few breaths here, in and out through the nose. Repeat your next exhalation, look forward and walk your feet to your hands.
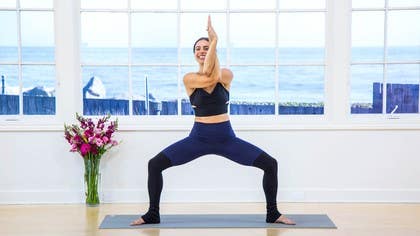
Inhale and lengthen, exhale and fold. With an inhalation we'll just circle the arms up overhead, and exhale, arms down, just take another half salutation, inhale and reach, exhale and fold, inhale, lengthen, hands can come to your shins, exhale and fold, and inhale, come all the way up, and exhale, arms down. One more time, inhale, arms reach, exhale and fold, inhale and lengthen, and this time exhale we'll bring the hands forward, heel toe the feet out about hip distance with the toes turned out, we're going to take this into malasana or a squat, you might need a blanket for underneath your heels, we'll just start to bend the knees and sit the hips back so the knees are a little wider than your side body, just let that feel good, settle into it, so if you need the blanket it would go under the heels and you can keep your hands forward, and in just a moment we're going to take this into some squats, moving with the breath and the inhale will come up to standing and then with the exhale we'll squat down to as low as we can go, and with the next inhalation we'll press the heels, start to lift the hips simultaneously, sweep the arms out to the side and inhale, and then exhale take the hands through the center of the body to prayer position, sink the hips down, inhale lift up, exhale sink the hips down, sit the hips back so your knees don't go too far past your toes or your ankles rather, inhale and lift up, exhale lift, sit the hips back, bring the hands to prayer, inhale lift up, arms up overhead and exhale moving with your breath count, couple more rounds on your own time, inhaling, trying to let the breath be slow and deep, just complete two more cycles at your own pace, sinking deep into the squat with the exhale, reaching up on the inhale, and then we'll end by reaching up to the ceiling and with your exhale you'll keep your legs straight, stay standing and just bring the hands to prayer position at the heart and bring the feet together and we'll open up to the side and we'll turn the toes out again about 45 degrees and you're gonna want a pretty wide stance here as we'll take like a goddess pose, so as we bend the knees we're gonna press the knees out so that the knees are pointing to the second toe and here as well you go as deep as you can, pressing the knees out and sinking the hips low and we'll reach the arms out to the side, take a deep breath in and then with exhalation we'll cross the left elbow over the right, neither bring the hands together or the palms together, the backs of the hands or the palms and as you sink the hips down reach the fingers, hips up, we'll take a few deep breaths here, really letting the belly soften, chest soften, you can add a little pulse with the exhalation, sinking the hips and then we'll stretch the arms out to the side, go ahead and straighten the legs, give yourself a moment and we'll go back in, on an exhale you'll bend the knees, press the knees out and this time we'll cross the right elbow over the left, either bring the backs of the hands together or the palms reach the fingertips up, take a few deep breaths here, reach the elbows forward and the fingertips up as you drop the shoulders down and breathe and then with inhalation we'll rise up, stretch the arms out to the side and exhale we'll come to the front of our mat and then we're going to start a little bit of a restorative practice, so we'll come down onto our mats, you're going to need a bolster and possibly two blocks and also a strap, so we'll lie down on our backs, we'll grab your strap and lie down on your backs, supta hasta padangustasana, reclined hand to big toe pose, so we'll start out on the right side, bring your shoulders onto the floor, chest nice and open and just start to pull the front ribs in a little and you'll take your strap, you may have to loop it around a couple times if it's long and we're going to loop the strap around the mounds of the big toes, the left leg is going to stay straight and then we're going to start to straighten the right leg and you'll hold onto the strap both sides of your feet, so you'll hold both hands onto the strap and wrap your outer right hip down reaching your right sitting bone towards your left heel and then press the top of your left thigh towards the floor, it's almost like you're pressing a little more through the mound of your big toe and if you can you straighten your right leg and then just start to slide the hands down the strap so that you can really feel your shoulder blades on the floor. And then from there we're going to take this into the open version so bring both straps together and take the straps into your right hand keeping the left hip and left thigh pressing towards the floor, we're going to start to open the right leg out to the right and just be careful because if you go too far your left hip and thigh might start to peel up off the floor and you just tumble to your right side. We do want to keep the left hip down and then you'll start to open the right leg up, take deep breaths, keep pressing through the big toe mound a little more and pulling the outer edge of your right foot back towards you.
And then we'll inhale bring that back to center, that leg back up to center and exhale release. And we'll take the left side so we'll straighten the right leg, bend your left knee, loop the strap around the mound of your left toes, wrap the outer left hip down towards your right foot, the left sitting bone reaches in towards your inner right thigh and then start to press through the roots of all toes but particularly the big toe mound, pull the outer edge of the left foot back towards you and then start to slide the hands towards you down the strap so that you can make contact with the shoulder blades on the floor. Really straighten the leg all the way, relax your shoulders, draw them down away from the ears and keep the breath nice and smooth. And then we'll take the straps into your left hand, you can bring the right hand to your right thigh, remember to keep the right hip down on the floor and open the left leg out to the side. And it doesn't have to go very far, might be a foot, might be six inches.
Guide the breath anywhere that feels tense. And then with inhalation we'll take that leg back to center and exhale we'll release and drop that leg to the floor. And then we'll come up to seated just for a moment so we can set up for our reclined baddha konasana. So I like to take this posture with two blocks and a bolster. The first block is at its highest height and the second block at its lowest height.
And there's like three inches between the blocks roughly. And then you're going to take the bolster and you'll set it on top so we have this nice little ramp. Then you'll move your hips back so that your hips are right up against the bolster. And you may want to have blocks or pillows, pillows are really soft, you can place them underneath your knees and then you lie down on your back, let your head come back onto the bolster so that everything's nice and soft. And then we turn the palms open to the ceiling and we just rest here.
Just for a moment bring your hands onto your belly and let the warmth of your hands come into your lower abdomen, warming the abdomen. Just send positive energy through your hands into your lower belly. You can either stay there with your hands on your lower belly or you can take your arms down alongside the body, palms open to the ceiling and you can stay here. We're going to stay here for a full three minutes. Just scan your body, you should be comfortable.
This is less of a stretch and it's more of a place where we restore. If you're not comfortable maybe grab some more pillows or blankets if your body temperature is starting to cool and put on some layers. Just let the breath be very soft and easy, scan your body, your fingers are straight and tense, soften them, maybe wiggle them a bit, head and neck, relax that, the face makes, the eyebrows widen, the eyes relax. Just let your torso relax around the breath. Let the belly soften so that with inhalation it slightly rises, with exhalation it falls, let the ribs relax, all the muscles between the ribs, all throughout the hips, the feet, the thighs, the legs.
Relax. And we're going to slowly come out of this as you come out of this restorative posture. Stay internal, stay relaxed, move slowly, and just gently bring your hands to the outsides of your knees and start to guide the knees together, pause once they're touching, slow transitions, get comfortable there, and then we'll roll over to the side, or right side, carefully coming up off of your wedge, and we'll just cross the ankles coming into an easy seat. Again, relax your shoulders, your neck, and we'll just bring the hands to prayer position. Thank you all for joining me today. Namaste.
Yoga, Hormones, and Fertility: Balance Your Hormones
Comments
You need to be a subscriber to post a comment.
Please Log In or Create an Account to start your free trial.
