Description
About This Video
Transcript
Read Full Transcript
Welcome. In this episode I'm going to share with you a seated forward bend twist sequence. We're going to start by turning and straightening the legs out along the mat, and we're going to start with a simple forward bend known as Paschimottanasana. Grabbing the big toes with the forefinger, middle finger, cross the thumbs, ground your thigh bones, reach through the heels, and then without overloading that navel, just take an inhale down into that space, and then as you ground, the thigh bones allow the lower abdomen to draw you in, folding, exhale into Paschimottanasana. Take two to three breaths here, deep, slow inhales. The outcome of the exhale is Udiyana Bandha. Take one more breath.
Inhale down to the navel, exhale from the navel. At the end of your exhale rise up slowly. The counter pose to Paschimottanasana is Porvottanasana. You're going to lift the heels, point the toes, and then land the heels. Exhale fully, and then just one breath, inhale, lift the hips, point the toes, big toes towards the floor, head back, exhale fully.
From Porvottanasana we're going to move into Ardabhata Paschimottanasana. This is a half lotus position with the right leg, starting with the right leg. You're going to take the foot in, and you're not wrestling with the leg, you just allow it to take its natural course. Ideally, the right heel comes up to the left, growing. Keep the left leg on track so the leg isn't externally rotating.
The right knee releases towards the floor. As long as there's no stress in the knee, you can fold a little into this. We're just going to repeat this a few times. You exhale, you fold in, and you release. This is a nice way to open up the hips, the knees, and the ankles.
You're going to pull the foot in. Again, it's real natural. You just pull the foot in up the inner leg line. You take hold of the top of the foot, you turn the foot in, you take the heel towards, left heel towards the right, growing. That left knee will come forward to a comfortable point.
Keep your right leg on track and fold. Some of you might go a third of the way in, some of you might go halfway, some can go all the way. I like to repeat this several times. Sometimes in my personal practice, I'll do this 20, 30, 40 times. Really, especially if you're dealing with any knee issues, it's a safe way to open up the hip into this position, and it doesn't stress the knee.
If you do have any knee issues, you just fold, you touch it, and you release. So we're not hanging out here, and we're just going to repeat this another few times. You pull, left heel towards the right, growing. If that knee's kicking way out, you don't have to jam it forward. Just allow it to take its natural course, keep that right leg straight, exhale from the lower abdomen, fold.
You just get it into a rhythm with your breath. Release the left leg, take the right foot in, inhale. Exhale. Come up, release, left foot pulls in, inhale, exhale. Again, this could be repeated many, many times.
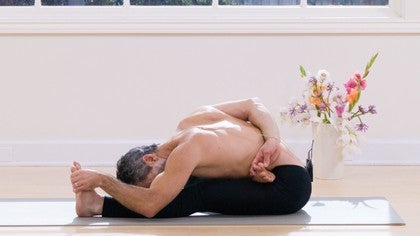
If you're working towards padmasana, I highly recommend repeating this posture over and over, and it'll safely start to open up the lower body. Fold one more time. Now, going into the next stage with arabhata. Paschimottanasana, the right foot pulls in, and this is where it gets into more of an intermediate advanced version. You're going to take, if your body's allowing you, you're going to take the right hand behind, and as it comes behind the waist, it catches the right foot.
Now, everything likes to roll off to the side. Keep the left leg on track. That right knee, if it's up, take it down to a comfortable point, and then the left hand comes out from the navel, exhale. Keep the coccyx rooted, exhale fully. Release.
Take the leg out. Left foot pulls in. Half lotus, and the right hand, you don't have to get kind of dramatic with it. Just find the path, the quickest path is just you slide the hand behind the back, take hold of the foot. If you feel your shoulder pulling back, square the shoulders.
Take hold of the foot. You can grab the big toe. There's all sorts of variations. You can take the edge of the foot, whatever feels comfortable for you, and then as you go in from the navel, exhale. Release.
Now, out of this entire sequence, if you're going to work with any of these forward bends, I recommend this one, repeating this one. I'll do this a few more times, because this is going to help open up the body for the half lotus, and also it starts to get into your shoulders once you start reaching around and catching that foot from the backside, and then you exhale, you fold in. Release. Left foot in. Left hand behind the back.
It catches the big toe. Keep that right leg on track. Fold. And release. Now we'll move into the next pose, triyamukha ikapara pashimottanasana.
This requires one leg to be in a half virasana position. I'm going to tip very slightly, just enough so I can catch hold of my lower shin, and I'm going to bring the top of my right foot to the floor. If you have any knee issues, please be very conscious of your knee that you don't overstress the knee here. The knee doesn't have to touch the inner thigh. There can be a little space, but it's not too wide, not too much space.
It's in line with the hips. This leg is on track, the straight leg is on track, and then from here you're simply going to reach out. Watch that you're not over projecting the chest. You're going to take hold of the foot. As I enter into this, I ground my left thigh.
This is very important to ground this thigh. I reach through the heel without hardening the ball of the foot, and then I'm not lifting from my head and over projecting my chest. I lift from the base of my skull, from the back of my skull. I inhale down to the navel, and then as I exhale, elbows bend, but I'm not forcing myself in. I let the navel take me in, and I exhale, I fold.
Eventually when the head meets the shin, the elbows can rest on the floor. Ground the thigh bone, breathe to the navel, exhale fully. Take one more breath, inhale, find a little more length in the spine, exhale fully. On empty, rise up, and to release that leg just tip to the side, right leg out, and then again just tip slightly to the right. You can take the hand of the floor, take hold of the foot, and position the left leg.
You're on the top of the foot. Again, there can be a little space, hips are square. Watch that you're not rolling out to the side, keep this leg on track. Take hold of the big toes. Again, there's all sorts of variations.
If you can't reach the foot, you can take hold of the ankle, you can reach the sides. Traditionally in some practices you grab the big toe. Inhale, lengthen, ground your thigh bone, lengthen from the back of the skull without over projecting your chest, and then exhale, allow the navel to draw you in. Elbows bend, but it's gentle, we're not struggling, we're not pulling excessively from the upper arm bones. Exhale fully, and taking about three breaths here.
Slow breaths, inhale down to the navel. Exhale, find a little more length in the spine. One more breath, reach through the heel without hardening the ball of the foot. Find a little more length, inhale, and exhale. Rising up with the next inhale, release the foot, and then take the left leg out.
Now moving from the forward bends, we're going to go into a seated twist known as Matsyandrasana. Taking the right leg up, you're going to sweep your left heel towards the right sit bone, and you're going to cross the right leg over the left leg. Stage one is simply taking the upper left arm bone to the right thigh. Now watch that you're not collapsing in the spine, you want to create length in the spine and the waist. You're not over projecting the chest, but you're creating from the ground up, from your base, create length in the spine.
Now variation one is this left hand can be like a blade, and you're not aggressive with it, but the back of the left arm is working with the right leg. The back hand, the right hand, keep the fingers up. If you drop the hand down towards the floor fully, the right side of the spine will start to shorten and collapse. You want to have the fingertips touching the floor, and this will keep equal length on the left and right sides of the torso and spine. And then working with the breath, inhale to the navel, and as you exhale, the twist slowly spirals up the spine with each breath.
Inhale to the navel, exhale fully from the navel, and each breath should take you deeper into the twist. Exhale. So many of you may want to stay with this variation. A little more advanced variation is actually taking your left hand, and it drops down and you catch your right foot, the inner foot. This deepens the twist. It also gets into your shoulder.
Now variations of the back hand can stay on the floor. The gaze can go over the right shoulder. The gaze can also go over the left shoulder. The full variation that I personally take in my personal practice is I take the right hand to the left lower back kidney, inhale, and then as I exhale, I slowly twist in the waist, but I turn my head to the left and I look slightly down. Inhale to the navel, exhale from the navel.
And then you release. With control, release. Straighten the right leg, straighten the left leg, and then we're going to do this on the other side. Again, you lift the left leg just enough so you can sweep the right heel towards the left sit bone. You're going to cross the left leg over the right leg, and then stage one of more of a beginning intermediate level is having the fingertips on the floor and just making a nice connection, upper right arm bone with the left thigh. You can make a little blade with the left hand, and this is a great twist.
Inhale to the navel, exhale from the navel. And like I said, there's variations with the neck and head. Inhale. In this particular variation in initial stages, you're looking to the left, and with each exhale, the twist spirals up the spine. Inhale.
The right arm is helping to take you deeper into the pose, but again, it's not aggressive, but it's applying just the right amount of pressure into that left leg to deepen the twist. Exhale. If you want to go further into this, and your body's allowing you, you take hold of the right hand, you take hold of the left inner foot, like so. If the hand can stay in this position, again, the head has a few different directions it can go. The last variation I took my left hand to the backside, to the lower back, near my left, the left hand is near my right kidney.
I inhale. And now I like this variation where you turn the head, and you actually look down towards the right hand, foot, exhale. Stay with the breath. Breathe down to the navel. Last two breaths.
One more, inhale. When you complete that exhale, release the foot. Straighten the left leg, straighten the right leg, reset your sit bones. Now we're going to combine all of these asanas together into a seated twist known as Bharadwajasana. It's a very powerful twist, it's one of my favorite seats twists.
Now what you're going to do is you're going to take your left foot back into the triangmukha, ikapada position. Then you take your right foot into arabhara, pashimottanasana. So we did these two poses, now we combine them. Then we're going to add the twist in. From here, the right hand comes behind the back.
You don't have to get dramatic with it, you don't have to reach out too far. You just slide that hand behind the back, catch hold of the foot. Eventually you get the big toe. And then the last variation here, the last section here is you take your left hand and you're going to take the back of the hand just above the right knee, the base of your thigh, and the fingers meet the floor. Once you get a hold, inhale.
And then as you exhale, holding onto that right foot, this will enhance the twist and then I turn my head to the left and slightly down. Stay with your breath, inhale. Exhale. Take one more, inhale. And exhaling.
Release the left arm, release the foot. Right hand releases from the right foot, right leg out. Tip to the side, take the left leg out. Now we're going to do everything on the other side now. Right foot goes into a triangmukha ikapada position.
Left foot slides in, half lotus, and there's arabhata-pashimottanasana. So we just united those two movements. Then we're going into the twist, you take your left hand, it's going to slide around the lower back, get a hold of your left big toe if you can. And then the last part of the sequence is taking the right hand and the back of the hand goes with the contour of this left thigh just above the knee, the fingertips can touch the floor. So we've combined all three of those moves that we previously have taken and then we're going to just breathe into this twist, inhale.
And then from the navel, exhale, and you very gently draw the chin. It's not dropping into the shoulder but it's slightly down and you look towards the right knee. Maintain the depth of your breath. One more, inhale, exhale fully, release. Release the left leg out, release the right leg out, inhale, Paschimottanasana, exhale.
So this concludes the seated forward bend twist sequence. I hope you enjoyed. Namaste.
Yoga Chi
Comments
You need to be a subscriber to post a comment.
Please Log In or Create an Account to start your free trial.


