Description
About This Video
Transcript
Read Full Transcript
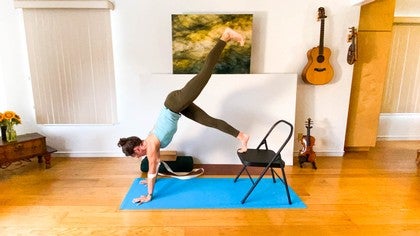
Hello and welcome back for another adventure. Today we will be focusing on mountains going up and down the mountain and like most wonderful adventures outdoors we need a little bit of gear for our practice today. So we will need a chair at some point or maybe you have a wall you could also use that instead of a chair I'm going to use a bolster a block and a strap for our practice today and for your strap to be even more specific before we get started is to make a tiny non-sliding loop and one that's going to be you know big enough for your foot it doesn't need to be much wider than that for the start of our class. So if you have that set aside we'll be in good shape to start our practice we're going to use a bolster at the beginning and when we have a bolster lay down on the mats have room to stretch your legs out in front of you and then slide the bolster back so that it catches the back of your rib cage lean back and have your upper body supported by a bolster or firm pillows legs straight down on the floor and then arms that some place that's easy down at your sides. And as you start to find a comfortable base here all the props in the right place see if you can imagine yourself as a mountain the profile of a mountain maybe you've got one where you live or where you've traveled that looks like the profile of somebody sleeping and maybe you can imagine that mountain maybe at the beginning of our journey more like at sunrise and as you lie here imagining your profile now starting to be illuminated and lit up by the sunlight rising and as you feel the shape of your mountain maybe a place that again that you know you've been to or visualizing the ridge of a mountain looking like a person lying down with their hair whatever amount of hair flowing down to the sides face being lit up by the sun rising or the sky above just letting your awareness travel all the way down this this profile this ridge of the mountain from what you might imagine the face line to look like down through the chest imagine the belly area being part of this mountain and even the legs being part of the mountain that might be dropping down towards areas and valleys flatter places perhaps you've been feeding into little small towns around the mountain just a few more moments just imagining your mountain here being lit by the early sunrise light imagining that blue sky up above you maybe some floating clouds that sort of mimic our thoughts that might be passing through our mind as we settle every now and then we dissolve into that blue sky spaciousness without any thoughts pulling us into the past or the present and as we take a few deeper fuller breaths just to get ready to move this stable body of ours now into a few fun shapes to warm up for our adventure up and down the mountain I want to invite you to bring your legs whenever you're ready together and to send a little more energy like your legs are starting to elongate and stretch away from your hips so ankles flex and raise your arms whenever you're ready straight up in the air above your shoulders and just make a few little circles with your wrist to loosen up an area we'll spend some time in today and then if we will mindfully now point your right palm towards the ceiling and use your left hand to help you pull your right fingertips a little bit more towards your face so you get a stretch maybe a little bit more into your right wrist or inner forearm area pressing your right palm again towards the sky flexing that right wrist let's switch out and flex your left wrist so your left palm faces the sky use your right hand to gently pull those left fingertips towards your face nice strong left arm here and after you feel a little bit of that stretch now let's take both palms to face the sky so you're flexing both wrist keep your wrist flex as you take both arms now back towards your ears and imagine as your hands are reaching away from your head that you're in that handstand shape here on your back supported by this bolster now engage your legs like you would in a handstand and press your hands away from your shoulders like you would in a handstand and now focus on your back body pressing into your bolster or pillows so you're decreasing the back bend tendency and trying to get a little bit more stretch between your wrist and your ankles take one more moment with your back body pressing into your bolster to decrease the back bend after that stretch now we're going to reach your arms in front of you and lift off your bolster and press your hands out in front of you and then we're going to go ahead and lean back into your bolster and take your arms again back into our supine handstand position arms reach in front of you and they help you peel yourself off your prop reach forward lean back take your arms back into your handstand warm up lift up press your hands forward and one more time as you lean back arms by your ears supine handstand and then this last time when you're up drop your arms to your side and reach back for your bolster and we're going to set the bolster onto our belly as we come down onto our back with bent legs and when your feet are on the ground raise your bolster up into your raise your bolster up into the air with your hands about shoulder distance apart like you're doing plank pose so wrist or flexed hold on to your bolster and as you press your feet firmly into the floor let your arms take that bolster back a few inches towards the ground behind you and then take your bolster back up in the air above your chest take again the bolster back behind you maybe closer to the ground back up so we're trying to keep the hands connected to the bolster you're balancing that and working into greater range of motion in your shoulder area while also building a little bit of strength maybe one or two more times kind of warming up that shoulder area holding on to your bolster or pillow and now this last time either keep your hands on the floor with your bolster on top of your hands if that's too much put your hands on top of the bolster and then let's stretch your legs out one more time and try to do mountain pose legs so strong legs press down ankles flexed and stretch a little longer between your hands and your heels at the end of your next exhale full breath out maybe through your mouth as you let your belly settle in and down towards the floor pause slide your hands out from under the bolster rebend your legs please and grab your strap that has that little loop once you have a little loop let's put your right foot in that loop and stretch your right leg in the air as you hold the strap with both hands bend your right knee straighten your right leg bend your right leg and kick your leg up and down a little bit to wake up that right leg a little bit more in particular your hamstrings when your leg feels a little bit more warmed up slide your hands down the strap and you might need to move your bolster out of your way slide your hands down as far as you like down towards the tail of the strap so we've got the right leg in the air arms back by your ears and whatever the appropriate amount of stretch is that you want to feel in the back of your right hamstrings this morning or afternoon or evening whenever you are practicing then we'll add maybe the left leg down on the floor so as we stretch a little bit through that left side of your body going for length right hamstring gets a little stretch take one more moment giving your right hamstring your full attention now let's walk your hands back up the strap and as you could maybe set your strap let's actually set your strap to the side grab the back of your right leg and start to slide your hands up towards your knee or calf as you raise your head up towards the direction of your right knee and bring your head back down to the floor and curl up towards your right leg lower down curl up towards your right leg and then lower down set your right foot on the floor and let's tip your left leg in towards your belly put your left foot in that strap loop and raise your left leg hold the strap for a moment with both hands and then bend your left leg straighten your leg and kick that leg up and down a few more times until that leg feels a little bit more warmed up and then whenever that feels more warmed up for you let's keep your left leg in the air slide your hands down the strap so your arms end up more by your ears allows you again to find that right amount of stretch for that left leg to keep you interested in what's happening in this moment and then as you keep that left leg in the air see if you like adding your right leg straight and down to the floor so add a little more energy now to your right leg right side body stretching left hamstring left calf area opening and maybe take one or two more moments completely dedicated to that left leg left hamstring getting a little bit more of your love and attention and that's bend that left leg a little bit so you can get rid of your strap and we'll set this strap aside for a bit as you grab the back of your left leg and start to slide your hand towards your knee or your calf and then raise your head towards your left knee on exhale lower your head and shoulders again exhale curl your head towards your left knee and lower down one more time lift your head towards your left knee as you exhale and as you lower your head down drop your left leg to the floor both arms back by your ears full body stretch and then grab your knees curl into your little ball on exhale slide your legs down to the floor mountain pose legs arms by your ears curl back into your ball go back to your mountain pose legs full body stretch on the floor and then as you grab your legs curl into your ball and then maybe rock back and forth until you come up to sitting as you're upright please keep your legs bent knees pressed together and then let's bring the hands in front of the chest area with your palms pressed together in prayer pose we'll lean back an inch or two as you stretch your left leg up towards the ceiling and come back to neutral with your left foot down lean back an inch or two stretch your right leg up towards the ceiling right foot down tip forward tip back in your spine as you stretch your left leg up left foot down tip forward a little boat pose variation right leg goes up towards the ceiling right foot down one more time lean back stretch your left leg up left foot down and lean back and we'll take that right foot up and then right foot down let's turn to any side and we're going to spin around to tabletop position now as you come around to tabletop we're actually going to come down to put your elbows on the floor shoulder distance apart and then palms pressed together let's bring your knees a little closer than hip distance apart and find a focal point towards your wrist that allows you to look forward without crunching up your neck then take your left leg and swing it up towards the ceiling bring your left knee towards your nose and round your back look toward the left knee lift that left leg as you look forward towards your wrist without crunching up the neck and again left knee to nose left leg in the air look a little bit forward knee to the nose keep that wide chest as you look forward and then one more time knee to the nose left leg up look a little forward and then bring your left knee by your right knee okay so next side let's take your right leg up in the air a little higher than the glutes look forward towards your wrist and then right knee to the nose find your rhythm swing your leg up look forward knee to the nose right leg swings up we look forward without crunching up the neck two more times find your rhythm right leg up and then after that right leg goes up let's put your right toes at the back of your mat right leg straight come to forearm plank both knees off the floor for a moment and see if we can feel our front body lift a little bit away from the earth so we're widening our back body towards the sky above us so let your whole back body get some light that sun that might be as we imagine getting a little higher up in the sky take one more moment finding your core awareness here now knees down hands under the shoulder let's come to more traditional tabletop position and as you come to your tabletop you might allow your hips to sway a little bit side to side for a moment maybe a little circle or two and then when you come back to neutral let's stretch your left leg straight back and the toes stay on the floor as we let our body tilt forward and then tilt your body back so hopefully you feel a stretch through your left calf area maybe even your left hamstring as your body tips forward and back so you lean towards the short front end of your mat and then the back end one more moment now bring your left knee to the floor and take your right leg straight back toes press into the floor tilt your body back and tilt your body forward to get that right calf a little bit more warmed up all right when that feels a little warmed up now keep your right leg where it is we're going to take the left leg back so you're in plank pose adjust the width between hands and feet swing your hips up towards the ceiling for down dog and respread your hands so maybe pick up each hand and respread it now bring your feet a little closer together we'll swing your left leg slowly up towards the ceiling just above the height of the left glute then lower your left leg down take that left leg up and lower the left leg down and take your right leg up towards the ceiling right leg down and then again right leg up bring your foot back down to the floor keep your feet together and then walk your feet up to the space between your hands let your knees bend as you keep touching the earth with your hands bring your ribs to your thighs with bent knees fold over your legs as the head drops towards the floor see if you can feel a little bit more into your hamstrings one more exhale head dropping towards the earth as the pelvis lifts towards the sky drop into a little chair as a transition arms up towards the sky hips moving back towards the back of your mat and now up to straight legs hands in front of your heart center and drop your arms at your side for our first standing mountain pose just take a moment to press your whole foot into the floor as you firm those muscles of the legs to the bones of the legs keep rooting yourself in your mountain as we raise the arms up towards the ceiling look up towards that sky fold forward over your legs and give yourself permission to bend your knees take one leg back at a time into your push-up pose of plank and then as we exhale we'll come into downward facing dog and swing your hips hips up towards the ceiling again step your feet a little closer together and as we balance we'll take your left leg up towards the sky and then take your left foot back to the floor lift your left leg this time lift your gaze a little more towards the space between your thumbs left leg down look towards your feet left leg up look towards the space between your thumbs and then left leg down let's tip forward into your push-up of plank come down knees belly chest and stay on your belly as your toes point back for hands-free cobra as you root your feet lift your hands and your chest on inhale and then lower your chest and face back to the floor the hands lift as you rise up into your baby cobra lower back down one more time lift little baby cobra hands off the floor now keep your hands down as you inhale lift your chest and then swing your hips back into your downward dog get to the other side as you bring your feet again closer together take that right leg up first find your balance and then take your right leg down now when the right leg goes up look a little bit towards the space between your thumbs drop the right foot look back towards your feet right leg swings up we look between the hands and then that right foot down we'll look down come back into your plank pose lower your knees belly chest and again we'll do that hands-free cobra where you point your toes back inhale lift your hands lift your chest as you look down at the floor lower back to the ground lift your hands your face your chest hands-free cobra lower back down so we're tuned a little bit more into your back muscles one more lift hands off the floor and as you lower down we'll curl up and press ourselves off the floor and into downward dog with your feet now maybe hip distance apart sink your heels towards the floor and then lift your heels up sink your heels down and heels up go ahead and walk your feet up between your wrist between your thumbs as soon as your feet are together here fold over your legs and let your hands touch the earth as you fold over your legs see if we can release the neck here upper back and then a quick little drop into your chair pose as you bring your arms up your favorite way and then all the way up into straight legs with your arms down at your sides take a moment in your mountain pressing your feet down firm the muscles of the legs to the bones of the legs now we can find where your block is and grab one block and have that block in your hands in the wide position take a step back with your left foot so your right leg is forward for your warrior one position with your right knee bent raise your arms holding that wide block in your hands above your head feel that back half back heel get a bit of a stretch and then straighten your right leg a tiny bit as you tip your torso forward and hold that block out in front of you bend your right knee lift yourself back to warrior one with your hands holding the block straighten your right leg and tip your body a tiny bit forwards bend your front knee warrior one straighten your front right leg with the tip of the torso reaching forward hold that block bend your right knee and now take your arms down in front of you and step your left foot forward let's step right away back with that right foot so you're in warrior one with your left leg bent raise your block up above your head and feel that back right calf maybe get a stretch and then straighten your left leg and we'll focus on that hamstring as you tilt your body forward bend your left knee tip your torso up straighten your left leg reach your body forward holding that block perhaps bend your left knee and we don't need to reach very far forward if that bothers your back last time reach forward keep your core engaged bend your front knee take your arms down and go ahead and step that back right foot forward now let's get rid of the block for now and as the blocks out of the way we're going to bring your feet a little closer together hands to your hips focus on the balance as you transfer your weight to your right side and grab the back of your left knee and pull that towards your chest then keep your fingers laces you stretch your left leg forward bend your left knee left leg forward bring your knee to your chest left leg forward keep your left leg here lift your toes to the sky then take your arms up towards your ears so you're balancing on your right leg right leg is doing mountain pose as we swing those left toes towards the ceiling take your arms down and your left foot down bring your right knee now up towards your chest tuck your hands under your right knee and then stretch your lower right heel forward bend your right knee stretch your right heel forward bend the knee now keep your leg out straight wherever that works for you raise your right toes to the sky and free those arms up by your ears now do hands stand hands flex your wrist press up as you keep floating your right toes towards the sky and then release all right give the legs a little shake out and now we'll need your strap one more time getting closer now they're turning our mountain upside down we're going to take your strap and your arms make this loop big enough so it goes just below your elbow crease just below the elbow crease flex your wrist and make sure that you have your hands about shoulder distance apart and have this big tail end to deal with so just getting used to the idea there's a bit of a strap off to your side place your hands shoulder distance apart and make sure you can press out into the strap and it's holding your arms straight then we walk the feet back maybe from plank into a downward dog like shape with your feet hip distance apart press your arms out into the strap and notice that your arms won't bend or buckle right so we've got this support to focus on straighter arms and maybe a little more ease in the shoulders bring your feet closer together and now step your feet from where they are and downward dog one little step closer to your hands rise up to the ball of your foot and swing your left leg towards the ceiling as you look towards your fingertips so you're broadening your chest push into your strap left leg down look towards your feet take your right leg up and look towards your fingertips as you rise up to the ball of that left foot bring your right foot down walk your feet a mini little half inch step closer to your hands one more time right foot down left leg swings up look towards your fingertips and tilt your body a tiny bit forward left foot down look towards your feet right leg swings up look towards your fingertips and now tilt your body forward press into that strap with your arms and release walk your feet up towards your hands chair pose reach your arms in front of you press your arms out into your strap come into straight legs arms down now we're going to get rid of the strap just for a second keep that loop and I want to invite you to bring your chair onto your yoga mat if you had a wall to put this up against it would keep the chair from tipping over or you could do this at the wall you can skip if you're not comfortable with the chair and we're going to do that same practice with addition of a chair so as I slide my arms back into the loop flex the wrists so I make sure I'm doing my handstand arms and as I bring my hands down shoulder distance apart walk my feet back in between the legs of the chair here and I'm going to bring my toes to this front end of this chair seat that's important bring your feet to the front end of the chair and press down rather than push the chair back to the wall push into this front part of the seat to push the chair seat down and then place both toes the ball of the foot is up and you're now in a more inverted handstand so now we're turning our mountain upside down press into your arms you can keep both feet on the chair or swing one leg at a time maybe your right leg goes up press into the strap with your arms switch out with your right foot down and maybe your left leg goes up and then we come down if you like the feeling of that take the right leg again one more time up try to lift towards the sky so you're creating space in your shoulders right leg down left leg up and lift that foot towards the sky and then come on down both feet to the floor so ideally you'd have your chair backed up against a wall definitely makes that more stable as we exit like get rid of that strap don't need that anymore and set that to the side now let's go ahead and have a seat after the excitement of our inversion our upside down mountain and let's get grounded again and create a little bit of mountain pose legs in dandasana and I encourage you to have your fingertips off to the side of your hips and press into the floor as you lift and lengthen your spine see if you can bring your pelvis into that forward tilt as if you were in standing mountain pose bring that quality of firmness and strength into your legs as you sit here now see if you can bring your hands in front of your chest and press your palms together and keep that lift and lengthen your spine and the grounding down into your legs take another moment trying to keep that neutral pelvis curves and the spine elongated now keeping your hands as they are here I'm gonna scoot forward just to have a little more room behind me keep your palms together look towards your fingertips and start to roll down slowly and mindfully so your head hits the floor last as you come down let's grab a hold of your right knee and tip your right knee in towards your chest give that a squeeze let's have your right arm out to your right side maybe in line with your chest as you put your right foot on your left thigh and start to gently tilt into your twist with your right leg moving over to the left until you find that right amount of stretch and release through the right side of your hip outer waist or right side of your chest just general areas we might feel some sensation and perhaps we appreciate the ground even more after doing some upside down balancing types poses today it might feel really nice to come back and feel the support of the earth here let's take one more moment as you are in your twist and then go ahead and roll back to center and bring both knees into your chest so in neutral for a moment hold your kneecaps tilt them towards your belly and then let your hands help you move those knees forward above your hips bend your arms so you can pull the knees towards your chest the hands help you move those knees forward now hold on to just your left leg and put your right leg down on the floor keep hugging left leg in take your left arm out to your left we'll do our twist on our other side with your left foot maybe resting on your right thigh let's see if you like to tilt your left leg to the right here and is it a tiny bit of twisting or we rolling to the side so maybe some of us will have the left shoulder pop off the floor right so you're kind of exploring what feels interesting to you maybe if you have been out doing some hiking you were noticing some tightness in the outer hip area which is quite common or tightness in the chest area or shoulders from carrying weights on the back bring your left arm anytime that you're ready now down towards your side or sometime soon and we'll once again tip both knees in towards your chest take a moment and tip your body a little bit right and left massage you not any kinks or soreness or tightness in your back body and then at some point we'll just take a pause and try to eventually find your center squeezing these in towards the chest once we've felt that support here with the knees towards the chest do one last move where we put the feet back down on the floor and I want to encourage you to grab your bolster and your block for our final relaxation today and in this way after having our big adventure we treat our lower back to a little bit of extra love by putting a flat block down on your sticky mat down kind of by where your knees are and then take your bolster at an angle towards your hamstrings on top of that flat block so flat block we've got a bolster draped over at an angle over your block so I can put my hamstrings the backs of the legs over the bolster catches the knees and my heels get to touch the floor with this bolster under the knees we're going to come down onto the floor for Shavasana arms out to your sides and try to find that with for the legs where you feel like any tension in your hip creases gets to go away support under your legs so it feels like your heels sink into the ground and maybe we start to imagine ourselves again this mountain this profile and in my case like a sleeping lady and that profile where it feels like your hair is flowing down the sides of the hills and the mountains and a visualizing light from the top of your forehead going down the nose and now maybe imagine it's a little bit more like sunset time that golden light hitting this new side of the mountain illuminating the different shades of green that we might see and brown or depending on the season different hints of orange and brown or yellow imagine the sunset light hitting further down towards your belly highlighting the different shapes along this region of the mountainside down towards your hips your thighs your knees still part of the profile of this sleeping person in my case sleeping lady profile light hitting the sides of the shins and the calves ankles and feet imagining we've been out a full day from sunrise getting that midday lights ending our adventure more towards sunset it's time for reflection as we feel supported and complete with our adventures letting yourself and settle maybe more deeply into that quiet spaces that arise between your thoughts between body sensations between sounds out in nature or in your space spend a few moments together here together in silence silence Thank you.
Thank you. Please slowly start to take a few deeper, fuller breaths. Feel into the quality of the earth and your mounted shape. As we get ready to turn to a side, and as best as we can, try to take the quality of our mountain, the grounding from our practice to our side and up to a seat of meditation. In your own way, curling over to a side, taking a rest as long as you need to, and then working our way up to a seat, and I'm going to have a bolster underneath my hips as I sit for a little bit of support, crossing the ankles and letting the knees drop down towards the floor.
And you could sit in your chair if that's a better position for you to meditate. Now, as we make our transfer to a vertical position, see if you have the ability to reach down. And I always grab the peace fingers here, the thumb folds the ring finger and pinky finger into the palms, so peace fingers together. And try to root your peace fingers down into the earth. Your legs are kind of the foundation of that mountain, connected to all the flat lands and the communities down low as we then start to work our way up our adventure, the sides of your torso being the sides of the mountain, arms being sides of the mountain, and imagine your head being the peak.
And keep encouraging your legs again to drop into the ground, the addition of the fingers pressing into the earth keeps that mudra to perhaps deepen our concentration, bringing a little bit more of the quality of the grounded mountain into the center of your body towards your bones. Now, maybe visualizing your favorite mountain peak here, one that you've been to perhaps recently or remember from a previous vacation or photograph. And as we sit still, we're aware that there's still life energy moving in the mountain itself and the life growing on the edges of the mountain, so letting yourself can have that sway or subtle movement when you're breathing in and out to avoid getting rigid or stiff. A few more moments tapping into the grounding through your fingertips, top of the head open to the sky up above, deepening our presence in this moment, noticing how much effort it takes today to keep coming back to grounding through the fingers, retracing your foundation up through your side body to keep the head floating up towards that blue sky above you, noticing is there a lot of clouds and thoughts in this moment, or just blue sky and space? Just noticing again the thoughts passing and keep choosing to come back into this blue sky awareness, sitting strong like a mountain.
See if you can become aware again of the vitality moving through the center of your spine, the center of your torso as we lift the fingers off the floor and join the hands together in front of the heart center. Just a moment maybe setting your intention now for this new day after completing the adventure of going up and down the mountain. Perhaps may this inspire you to seek a place where you might see the sun rise or the sun set some time in the near future, namaste and thank you so much for being here and I hope you enjoy this practice and it will often in my experience anyway get even better if you repeat the sequence maybe for a week or two to get more comfortable going into our inverted mountain position, it's often better with practice and it's nice to do those moves to get your wrist, shoulders and hamstrings ready for that awesome upside down pose. Until next time, take care everybody, stay healthy.
Yoga for Our Nature: Reaching New Heights
Comments

You need to be a subscriber to post a comment.
Please Log In or Create an Account to start your free trial.
