Description
About This Video
Transcript
Read Full Transcript
(waves crashing) Hello. Now we're going to take a look at some passive poses. Passive poses are very powerful, and they're not always passive, 100% passive. Often times they're semi-passive. (deep breath) Passive poses are different from restorative poses because when I do passive poses, when I teach passive poses, the lines of pull can be very strong.
For restorative poses often time muse will use support, props, bolsters, sometimes straps so that the bones don't fall heavily with gravity, and create strong lines of pull, otherwise known as a stretch. So, that's restorative poses, where we minimize, or completely take away the stretch, the sensation of stretching. Passive poses, we often times exploit, or make use optimize, challenge our sense of being in the shape by way of the line of pull, and the stretch it creates. So, we're gonna do a few passive poses. They're very powerful poses because, often times the lines of pull can be very strong.
And sometimes the lines of pull are so strong that it's very stimulating, so it feels, actually, not quite passive. So they're technically passive because you're not using muscular energy to support the body, so they're passive in that regard, but they can be very stimulating, and they can have very active qualities, and neurologically, and also very active, stimulative qualities in terms of our psychological bearing within them. So passive poses give us an opportunity to study the movement of our breath, and allow the breath to come and go as it does. And understand how to have an inter-player, a dialog with the breath, and how to let the breath, and use the breath, our awareness of the breath and the movement of the breath, to mitigate as it were, the strong line of pull. Often times, we use the opportunity in passive poses, to study the breath pathway and the quality of breathing that is difficult often times to do in the more active poses.
In active poses we're concerned with, and we, initially concern with, how we're aligning our bones and how we're creating support. And what we need to do, the way we need to do the active pose, so that we can do it in a way that's safe, and that holds the internal space. So that's a cognitive activity that takes place in passive pose and active poses that does not occur in passive poses. So what that activity is taken out of the equation, it is actually, in some sense, easier to begin to explore the transformative, the alchemic effect of the breath on the shape change of the body, in the context of a challenging shape that we may be in. Okay.
So the first pose we're gonna do is Supta Baddha Konasana. For Supta Baddha Konasana, we'll start with the knees bent up. We use the hands and we roll back onto the back. By the way, take care that when you do go to Shavasana, or in this case Supta Baddha Konasana, resist having the legs straight and laying down, or even using the arms. Try to remember to have the leg and knees bent, and now, use the arms to roll back onto the back.
Bring the feet comfortably close to the pelvis. We'll bring the feet together, the heels together, the toes together, the knees together. Now, we wanna have the feet on the center line. So, I'll show you a trick. When you're sitting up, if you see where your feet are, and they're right on your center line, and then when you lay down, if you keep them there, they'll probably still be there.
And then simply take the knees apart. And once you take the knees apart, walk the outer edges of the feet in to each other, and now, just let the thighs fall open. Now if this were a restorative pose we may prevent, present, provide support for the thighs and the shins so they fall passively open with the weight of the bones, and the thighs, and the bones that the thighs, the bones and the weight that they carry by way of the thighs. So, quite simple. And now we'll take the hands, interlace the fingers behind the head.
I like to tell students to point the tips of the thumbs down the sides of their neck towards the tops of the shoulders, so the hands are like so behind the neck. Not like this, but like so. The tips of the thumbs pointing down the tops of the shoulders. Now the passive poses are simple, they're quite accessible because of the simplicity. But depending on how much openness you have in a given area, they can be quite challenging.
Now there's certain situations where, someone may be very, very flexible, hyper-flexible in the hips, and they actually will need support here. Now I'm just gonna lay here, (deep breathing) and just watch the breath. You can close your eyes, I'll close my eyes, and just notice what you notice. I will say though, for some of us, the shoulders are tight, and so the arms actually don't go towards the floor. The chest and shoulders and upper back may be very resistant.
So your arms may be hovering at this place. Now that's okay, as long as the line of pull you feel is in the chest, the upper back, perhaps the sides of your armpits, but your shoulder joints, the very heart of the shoulder joint is not in pain. If you feel pain in the shoulder joint, then you should just put your arms out to the side. So passive poses are wonderful because they give us an opportunity to study the quality of acceptance and surrender. The idea is to just observe the movements of your breath, and bathe in the experience that occurs from putting yourself in this shape.
The idea here is to be as passive as possible. (background chatter) After a few moments, you can, on the wave of the exhalation, (deep exhale) lift your head, change the interlacing of the fingers, and stay a little longer. On the exhalation, after you've stayed for awhile, you can bring the elbows in, release your hands, take your hands to the outer thighs, and on an exhalation, when the belly hallows, and the throat softens and the sternum softens, (exhales sharply) bring your legs together. (deep breath) The next pose we'll do is Supta Sukhasana. It is also a pose lying on the back.
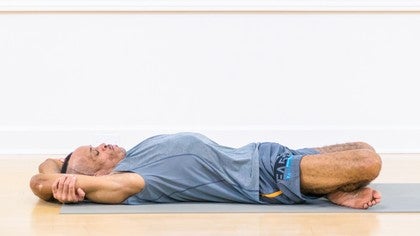
So you can start with your feet together, like we did starting for Baddha Konasana. Here, cross the feet and the ankles. When you cross the feet and the ankles, cross them both over each other. Don't just cross one, or the other, cross them both so they're centered. And then, slowly walk the feet away from each other as you drop the thighs open.
So your right foot will be on the left side of the body, your left foot will be on the right side of the body. Now I cross my legs with my right ankle closer to my pelvis. My left ankle is further away. My right ankle is closer to my pelvis. My left ankle is down, outside of my right ankle further away from my pelvis.
So since I have my right ankle closer, we'll take the arms up. I'm gonna bring my left arm closer to my body, bring it in first, and then the right arm. I wrap all five fingers around the outer, upper arms, like so. It's not an opposing grip, it's a non-opposing grip. Now this because a semi-passive, passive pose.
I'm going to hold my hands strong, so they don't slip. On an inhalation, I'll hold the hands as they are, I'll take the arms overhead, my left arm should be closer. I'll take the arms overhead, and as I take the arms overhead, my left forearm, which is closer to my body, closer to my head may be in the way, I'm not gonna let my hands slip. I'm gonna hold my hands and relax the shoulders, and let the shoulders extend. So the arms go overhead, and rest on the floor.
Now the reason this is a semi-passive pose is because my feet, once I've walked them across, my ankles, my knees, my thighs, my pelvis, my lower body, my torso, ribs, back, belly are very passive. My hands, however, are active. So as much as I relax around the shoulders, the tops of the shoulders on both sides of the neck, the skin at the back of the neck, and my head heavily on the floor from my neck muscles relaxing, I continue to keep the hands active as they are so that they don't slip. So the only thing that's active in the semi-passive pose is the hands and the energy it takes to hold the hands on the outer, upper arms, but only the energy it takes to do that. Again, just allowing the body to take the breaths it needs.
And notice what you notice, as you practice. Passive poses are very powerful. They give you the opportunity to be the seeer and the seen. They give you the opportunity to be in the shape, and by way of feeling, sensing an actual awareness of how the shape looks, you can experience yourself, and see yourself in the pose. (background chatter) To come out, catch the wave of an exhalation.
When the belly hallows, (deep exhale) keep the hands and arms in the shape that they're in. Bring them down in front of your face. Release the hands and arms. Extend the elbows so the fingertips point to the ceiling in front of you, the palms facing each other, and just change the legs. Now I had the first side, my right ankle closer to my pelvis, now I'm gonna cross both ankles, and put the left ankle closer to my pelvis.
As I drop the knees open, I'm gonna walk the feet away from each other. So the left foot will be on the right side of the body, the right foot will be on the left side of the body. It's simple cross-legged pose lying down. Now since, now my left ankle is closer to my pelvis, closer to the body, my right ankle is further away, I'm gonna bring my right arm in first, and then my left arm. So again, my left leg is closer to my pelvis.
My right forearm is closer to my head. Wrapping the fingers the same way, not an opposing grip, but a non-opposing grip. All five fingers wrapping around the outer, upper arm skin. (deep breath) I hold the hands firm, and on the wave of an inhalation, take the arms overhead. And as I need to, clear the forearm that's closer to the head away from the head so my arms actually go over my head.
I'll keep my hands firm, let the shoulders elongate, lengthen and shape change. So the hands and arms rest on the floor. Now, again, this is a semi-passive pose, because what is active here is the energy it takes to hold the hands on the outer, upper arms. Outside of that, the rest of the shape is as passive as possible. So, no matter how relaxed, and easy my shoulders get, I wanna maintain, you want to maintain the clasp of your hands on the outer, upper arms.
And notice the lines of pull. My diaphragm releases, the ribs widen, the back lengthens, the side-waist lengthens. When you do this pose, since you're doing one crossing the first side, and then another crossing for the second side, you may notice that one side feels very different than the other. Not to worry. You do however want to ensure that you're setting yourself in the same relationship, holding the hands the same way on the first, the second side as the first side, and crossing the feet on the second side the same way as you did on the first side.
So outside of the energy it takes to hold my hands in the shape that they're in, my shoulders, neck, armpits, side ribs, waist, belly, diaphragm, back, hips, knees, ankles, thighs, legs completely passive. (background chatter) And after you've been here for awhile, on the wave of the exhalation, when the belly hallows, hold the hands in the shape that they're in (deep exhalation) bring the arms down. Release the hands, extend the elbows so the fingertips point to the ceiling in front of you. The palms facing each other. And walk the feet towards each other, uncross the legs.
Now I'm gonna lengthen the waist a little bit. Make a strong fist. Put the elbows beside your ribs. Bring your shoulders up a little bit towards your ears. Keep the knuckles pointed to the ceiling.
So, not here, not there. Press the elbows in the floor, and move the elbows down towards your pelvis to lengthen the lower back a little bit. Take the arms out to the side, palms face the ceiling. (deep breath) So, you can take the feet a couple of inches from each other. You might start with them touching the inner boarders of the feet, the inner heels, the inner ankles, the bases of the toes, the big toes touching each other, so you can feel that they're lined up.
And just take them at the same time from the center, the heels out to the right and left side, at the same time a couple of inches, and then bring the toes, at the same time, a couple inches apart. So the feel are slightly apart from each other. And now we're gonna do a passive twist. So on an exhalation, when the belly hallows, we're gonna let the pelvis and the knees go gently, fall gently to the left side. Now, when you do this it's very important to keep the spine fluid, the spine fluid, as relaxed as possible.
(deep breath) Exhale, the belly hallows, and the knees and pelvis go to the left side. The more fluid your spine is, the more easily your head will go towards the right side. It's a natural head-tail response. It's built in to all of us. It's the way the body moves.
The way the body works. So if you drop the knees and pelvis to the left side, and your head is still facing the ceiling in front of you, that just lets you know that there's some tension somewhere along the spine. Most likely in the middle, upper spine or the neck. And practice it a few times, so, and learn how to feel from the spine being as relaxed as possible. The wave that comes up your spine from your knees and your pelvis going to the left side that will take your head to the right side.
(background chatter) Now after being here for some time, on the wave of the exhalation, when the belly hallows, firm the left scapula into the floor a little bit, and bring the knees up, you can even reach the right arm just a little bit, and bring you head and knees back where they came from so you're facing the ceiling with the face, and the knees are pointing to the ceiling. Let's do that adjustment once again. Make strong fists, elbows on the floor besides your ribs. And bring the elbows and shoulders up just a little bit towards your ears, And then press the elbows back in the floor, to lengthen the waist and lengthen the neck. Take the arms back up, shoulder level, palms facing the ceiling.
And again, bring the feet together. Feel them lined up. The inner heels, inner ankles and the inner big toe, the base of the big toes, you may even feel the big toes touching each other. And then take the heels a couple of inches to either side at the same time, the right heel to the right wall, the left heel towards the left wall, the same time from the center line, and bring the balls of the feet the same distance apart as well as the knees. (deep breath) And then you're gonna catch the wave on exhalation when the bell hallows, again, you're gonna let the legs fall gently to the second side, the right side, keeping the spine as fluid and receptive as possible to the weight change, weight shift that happens from that shape change.
(deep breath) (sharp exhale) Belly hallow, release the spine. This is a 100% passive pose. Letting the body take the breath it needs. Noticing what you notice. Experiencing yourself having the experience.
Remember that if your spine is fluid, your head will go, in this case, because the pelvis and the legs are going to the right side, your head will go to the left side. If when you take your legs and your pelvis to the right side, and your face is still facing the ceiling, that just lets you know that, you want to practice this, and practice letting the spine go so that the natural head-tail response occurs. The natural twisting head-tail response of the pelvis going, in this case, to the right side, and your head to the left side. Now to come out, on the wave of the exhalation, when the belly hallows (deep exhalation) from the right scapula, you can reach a little cross, a little bit across the left collarbone on the exhalation of the belly hallows from that, bring the knees and the head back at the same time. The knees to point to the ceiling in front of you.
The face, parallel, facing the ceiling in front of you. Again, let's do that little adjustment. Strong fist, elbows on the floor beside the pelvis, beside the ribs, so there's a little space, they're not actually touching the ribs, little space between the ribs, a couple of inches on either side. Bring the elbows and shoulders up just a little bit towards the ears, and then press the, with the hands strong, press the elbows back into the floor behind you. And then scruff the elbows down, to lengthen the waist a little bit.
And then from there, we'll just, take the right arm up, and roll onto the right side. (deep breath) And on the exhalation, push the floor away, let your head hand. Try to keep the legs relaxed, and use this arm as it becomes available. (deep breath) So it's very important in passive poses to take care with how you move from one shape to another. The quality of, ease and the dropped in vibration that you create, you want to, as much allowed, to flow, and cascade from one pose to another.
So that, that accumulates through the practice. The final pose we'll do is Prone Shevasana. So you'll come to your hands and knees. (deep breathing) Remember the hands scapula? Use it a little bit here, and then lower yourself forward to the floor.
Place your forehead on the floor. Your forearms on the floor, besides your, little bit besides your head. Press the forearms in the floor. Walk the knees in to each other, and let the heels roll away from each other. So the legs will be internally rotated.
(deep breath) From the forearms on the floor, and then, use the forearms, try to relax the buttocks, relax the legs, press the forearms in the floor like babies do, when they lift, and drag the elbows down a little bit so you open up the front body and lengthen the body. The elbows are dragging towards the pelvis, down towards the feet, down towards the back of your mat, or the bottom of your mat. And then lower yourself gently forward. Curl the hands down so the fingertips point the same direction as the toes. The arms as passive.
Now on an exhalation, you rotate your head to face the right side, gently. Place the head. This is a 100% passive pose. They're only passive. These poses teach surrender.
They teach letting go, and being present in the moment with the situation as it is. They give us an opportunity to explore the movement of the breath. In that very special place. That special place we arrive when do accept, notice what is, and be with it. Now here, as you notice the movement of your breath, you will become not very long here before you become aware that the front body is not very mobile.
The front body is, the movement of the front body, the belly, forward, in spaces obstructed by the floor, obviously. So this gives us a chance to explore letting go of the back body. The pelvic, the back belly as I like to call it. The back, pelvic belly, which is the lower back sacaral junction, this area. Remember that the lungs are three-dimensional in their shape, and when one area of movement of the lungs with response to the shape change of the breath is obstructed, as here is the case with the front belly, we typically have someplace else the breath can go.
And again, the forearm foot, the hands active and firm on the floor. Press the forearm foot on the floor, and try to keep the legs passive, the back passive. So you don't lift yourself back, you actually push the elbows in the floor. Push the floor away, and drag the elbows down towards your toes. Drag the elbows down towards your pelvis.
Drag the elbows, drag them down towards the bottom of your mat to open up the front body, keeping your back as relaxed as possible. And then lower your forehead and you upper spine back to the floor on an exhalation. Curl your fingers so the fingertips reach down towards the bottom of your mat. The direction your toes are, pointing. Relax the wrists, the arms, the elbows.
And then on an exhalation, gently turn your head to face the left side. Now, I have a mic on so I'm facing the left side now, for the first side I also faced the left side. But when you do the first side, you face the right side so you're looking over your right shoulder, and on the second side, you'll face now the direction I'm facing, looking over your left shoulder. As soon as you turn the head, allow in this pose you'll have an opportunity to really study the quality of surrender that happens with the, (deep exhale) letting the body go with the breath. The release that happens from letting the breath go out of the body.
So you get a chance to experience the alchemic and the transformative effect of the breath from the quality of release, letting go, surrendering, and the way that the bones into the floor. Now, just as in Supta Sukhasana where there's a right and left side, and also on the twist where there's a right and left side. We first looked at this pose with our head to the right, and now we're looking with the face to the left. One side may feel very different than the other, or not. Be not alarmed if they feel different from one another.
Be aware that in this pose, it's very important to let the shoulders fall forward, to let the upper back soften and release.
Put your left hand on the floor. Continue to take your right arm overhead. (deep breath) And on an exhalation, from the hand, left hand firm on the floor, be aware the hand-scapula action, and firm the scapula on the back and on the exhalation, just body half and roll onto the right side. Bend the knees up. (deep breath) Just lay on your side for a few moments.
And place your hand firmly on the floor, very firm, so you stabilize before you mobilize. And keep the quality of ease in doing so. (deep breath) Exhale. (deep exhale) Try to keep the legs passive, push the floor away. Hang the head.
So, those are some passive poses. When you do the passive poses, you may feel some discomfort. You want to, as much as you can, allow your breath, the move of your breath, and the surrender, allow that to, as much as you can, mitigate the discomfort. If you feel pain, provide some support for yourself. In Supta Sukhasana when the arms are overhead, they may not get all the way to the floor.
That's okay. But if you feel pain in the shoulder joints, you may need to provide some support. In Supta Baddha Konasana, the elbows may not get to the floor, which is okay, but if you feel pain in the shoulder joints, you can provide some support there, enough so there's still a line of pull, and the pain's not there. Or, just have the arms at the side. I showed a short stay in these poses in the interest of time, and the interest of exposing them, and sharing them with you.
These poses take practice and endurance as all of the practices do. Even the semi-passive poses, and the poses that involve deep states of relaxation actually require endurance. It's not the same endurance that we know is required with active poses. (deep breath) So, I encourage you when you do this practice to stay as long as you are able to, and over time as your practice these poses over the months and years, allow yourself time so that you can begin to stay and luxuriate them in the longer periods of time. So that you can find the benefit they're in.
Thank you.
Asana Studies: Chris Hoskins
Comments
You need to be a subscriber to post a comment.
Please Log In or Create an Account to start your free trial.
