Description
Transcript
Read Full Transcript
Hello, everyone. Thanks for being here with me today. We've got a great balanced class for you today, and we'll use two blocks, a blanket, and a strap for our practice. We're gonna begin standing today We'll do just a little bit warm up in the standing position. However, why do you like your feet to feel stable? We're gonna start with some basic little shoulder rolls.
Giving yourself a little massage here, arriving from whatever you've been doing today, And then let your arms and shoulders roll the opposite direction a few times. So right those elbows bend out to the sides. And then we'll pause that movement and let your left arm maybe sweep up and back, getting a little more clearance in the chest shoulder, right arm is up and back, and your hips can move a little bit with you. So you're getting a little bit more play and flow as you sweep your arms forward up and back, almost like you're mimicking a little bit of a back stroke. Could I make that work for you?
Right. And then we'll slow down that sweeping the action and with your arms at your side, do a little twisting where we just kind of tap out our legs, get a little rotation in your spine before we begin, some of our balance moves, see if you can turn your gaze to look a little bit over that shoulder that you're turning towards. K. And let's bend the arm in front and the arm in back. A little different movement for the elbows and arms and shoulders. Alright. And maybe one more tap to each side.
And if we look straight ahead for a moment, just to our little hula hoop circles, little check-in. It's that low or half of the body. After circling a few times that first direction, then put it in reverse and go that new direction. Alright. Let's go ahead and take a pause and bring your feet just a little closer together. Put your hands on your left thigh.
We're just gonna point and flex your right foot ankle, then calf moving, ankle moving, Alright. Let's step into that right foot. Put your hands on that right thigh. And with the hips tipped a little bit back, point and flex. Getting into your ankle and calf. A little more present in the body.
Let's put both feet on the ground and maybe your arms out to the side as you do a little lift up to the tips of your toes and then down just a little lift of the heels and down. I was getting used to balance with the ball of the foot on the ground. And those arms can be really helpful to stabilize us. Alright. Now let's go ahead and begin with feet on the ground. We're gonna do a little marching in place where the right knee and left arm are gonna lift up and then come down. Left knee and arm up.
And down. And we'll try to look straight ahead, right knee, left arm, come down, left knee, right arm. Were no particular rush. It was kind of a warm up, little marching in place, putting that stretch to the shoulders, Hit flexors engaged. You've got a few more. If you feel like speeding up the pace, feel free to speed up the pace.
We're trying to really have the foot that's on the ground really feel solids So whatever movement you can do while keeping your lower foot really grounded. Right. Now hopefully that's feeling pretty fluid. Let me take a pause with your arms at your side. Feet underneath your hips. Now it slips your right knee and bring your left elbow toward that knee.
Come back to neutral, right elbow toward left knee, back to neutral, right leg up, left elbow to knee, we're gonna keep alternating, trying to keep our balance, which we will discover will come and go. And if we start to feel like we're losing our balance, slow it down as best as you can focus on the foot that's on the floor, staying really grounded. Even if it means the elbow and knee never touch, they're just kinda heading toward each other in space. A challenging that leg that you're standing on in that little twist, which can really throw off your balance as I'm demonstrating here and there as well. Part of the plan k. It's not about perfection. Again, you're definitely bringing some tone and strength to that standing leg, whether you're wobbly or stable.
Let's maybe do one more to each side. Alright. Now take your arms down for a moment. Okay. Get a little grounded with both feet on the floor. Then we'll step back with your left leg and have your arms up to the side per balance. Now we're bringing the arms down as we swing the left knee up and step back with your left foot arms to the side.
In the up, arms down, step back, use your arms to help you balance. So we're gonna try to keep lifting that knee and maybe step back deeper into your lunge. Lift your knee, step back into your lunge, knee up, blah, step back to lunge. Again, balance will come and go. As best you can, use those arms to steer you back to your center.
So two more. And going towards that lunge, stretching that front of that psoas, and then strengthening. But your left foot down step back with your right foot as your arms move up to the sides. Let's get ready here. Arms down, right knee up.
Step back, right knee up, step back with your arms wide, knee up, step back. Alright. So I'll keep demonstrating being wobbly at times as well. It's part of the program. Step back and keep trying to press into that standing foot. Human feelings, you go slower.
We're looking for grounding and then we lift up. Let's do one more. And let's go ahead and pause with your feet on the ground. Alright. Take a breath in and out. Now we're gonna add some blocks to our practice.
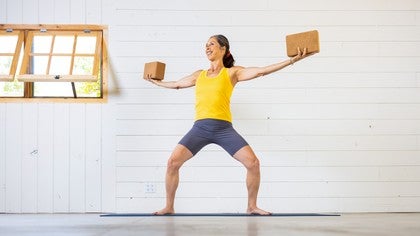
So if you go ahead and grab your blocks, and, squeeze them together in front of your chest. And we're gonna settle into a little bit of what would be like chair legs a little bend of your ankles and knees. And then we're gonna explode out into a big x shape as we reach out with your left foot and send those blocks way up towards the ceiling. We'll step back together maybe with your feet close into your chair, go back to the same side to the left, and come back, and maybe we sink deeper into the legs. Going out to your x and then curling to your little ball shape.
Going to your x. And coming to that chair that might curl in a little deeper. Going out to our big x and curl in. Last one on that left side going wide and then come back with the blocks in front of your chest. Okay. Make sure you've got room to step to your other side. We'll come into your chair legs as a starting position.
Step out with your right leg. X come back in to center squeeze, reach out, come back with squeeze, maybe deeper legs, squat, reach out, come back, squeeze, going out, squeeze, and maybe one more time going out. And come back to that squeeze. Let's come up to stand for a moment and have the arms at your side. Take a breath getting grounded.
Now from here, we're gonna take a step to face the short end of your mat. And as you face the short end of the mat with a block down in front of your thigh. So let's take a step back with your right foot into a balance lunge where your back heel is up and we have some room to bend your back right knee towards the floor. So when we're there, let's move your blocks out in front of you hold them tightly as we bring them into the side of the ribs, we'll drop the right knee towards the floor. So we've got open chest, and a strong back leg.
Straighten your legs. Give them a rest as you squeeze your blocks in front of you spreading those shoulder blades. Bring the blocks in as you lower towards the floor, open chest, straight, strong legs, squeeze the block in front of you. From let down, blocks to the ribs, reach out, and squeeze. As you come down, blocks to your ribs, reach out in front of you, k. Blocks to the ribs.
And now let's reach out and step your back right foot forward and maybe do that chair, leg position, separate your blocks and just swing them back as you exhale and then swing them back together in front of you. Big exhales when your blocks back and then in front of you. Step back with your left foot, a place where you can lift your back heel and bend your back left knee. Let's bring the blocks in and sink into that lower lunge and then straight strong legs as you squeeze the blocks in front of you. Pull them to the ribs, lower down, straight strong legs, reach in front of you, come down, blocks to ribs, Strong legs reach in front of you.
Squeeze, come up, blocks in front of you. Lower. And let's hold those blocks in front of you. Step your back foot forward and then tip into your forward fold. So you've got blocks for your hands and just give your hamstrings an opportunity to start to warm up as you bend your elbows, ankles, knees, and the hinge from the hips as you point the top of the head, perhaps a little bit more towards the floor. And this lean a little bit forward and lift your heels up and then put your heels down.
Lean a little forward, heels up, and heels down. Let's do one more little tip forward, heels up, and then down. Right? Come into more chair legs, grab those blocks, and circle them up into the air above your head, and give a little squeeze. And if it feels okay, we look a little bit up towards the ceiling. And from here, let's go ahead and bring those blocks down in front of your thighs.
Fold from the hips and, again, use them to have an easier transition into your forward bend. As we're facing down eyes looking maybe to the back of your yoga mat, move your blocks to the side for a moment, and or to a side and then step back one leg at a time into your push up pose of plank. When you get to your push it pose of plank, let's bring your knees down to the floor. I'm gonna keep the ball of my foot on the ground for a moment. And we're gonna firmly root that left hand as we lift your right hand and touch your lower back.
Bring your right hand to the floor and firmly root that right hand as you touch the lower back with your left hand. And back to center, and let's lift both knees. As we exhale tip the hips up, head down as you exhale. Step your feet a little closer and let that right leg lift up a little higher than the height of your pelvis, right foot down, and then bring that left leg up. A little higher than the height of the pelvis.
Come down, knees to the floor, and get grounded in a version of child's post with your hands walking wide and forward Let your ears drop between your arms. We'll come again back to that table top position and maybe separate your knees a little wider. Firmly root that left hand, again, bring your right hand to your lower back. Right hand to the floor, left hand to the lower back, left hand to the floor. Go ahead from here, lift your knees, hips up in the air, down dog with your feet walking closer together.
Right leg stretches up and back, right foot down. Left leg reaches up and back, Left foot down, knees to the floor, again, getting grounded with that child's pose variation where you're hands might be walking really far apart. Let's do that one more time. We come back to your tabletop with your knees about hip distance apart, and maybe we do a little bit more tipping forward of your torso. Route your left hand and bring your right hand to touch the lower back.
Right hand down, engage your core as you bring your left hand to touch the lower back. Back to hands on the ground, knees up, hips up, walk your feet back together, right leg, stretches up, and the right leg slowly comes down. Right leg goes up, and then bring that foot down. Let's bring your knees to the ground and get grounded one more time in this way into child's pose with your arms out in front of you. Ears lined up with your arms.
Now when we tip forward, let's come forward and put your elbows on the floor instead of having your hands on the floor. Now when we come to your for our in plank position, we're gonna send the legs back So for a time, we're gonna have the knees lifted and your feet relatively close together and forearm plank. Now balance, you're gonna add a little challenge of stepping your right foot off the mat to the side and then bring your right foot back in. Take that left leg off the mat to the side, bring it back in, right foot out to the side, back in. Left foot off to the side.
Back in. Again, right foot. Neutral, left foot off to the side, back in. Maybe we do five, right foot out, back in. Left foot out. Back in. Last one.
Right foot out to the side. Back in. Left foot to the side and back in, and let's put those knees down. Walk your hands towards your knees. And we're gonna spin over to the side.
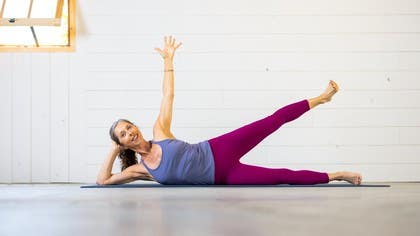
So I'm gonna start on my right sides and invite you to join me as you prop your head up with your hands settling to early slumber party pose. And if we are in kind of a straight line from our head down to our heels, we'll have to work our balance a little bit to stay here versus falling forward or back. So we're gonna try to raise your left arm straight up into the air and See if we can hold our balance here without tipping forward or back. Then we'll add a little layer of lifting your left leg away from your right leg and press out strongly through that lifted leg. Keep your left hand in the air as we lower that left foot down.
Measuring, you're pushing up against some resistance and, again, lift that left leg up and slowly lower it down. So that right side of the body is engaged pressing to the floors that left leg floats up, lower it down, Let's do one more, lift, and then slowly lower it down. Alright. Let's bring that hand in front of the chest, and we'll come to the second side. And I'm just gonna swivel to the other side, and maybe you'll join me here where you prop your head up with your left hand, I mean, into your slumber party pose and take a moment again to feel your heels are lined up with your head and If you are, you're already having to pay a little more attention so you don't tip forward or back. K. Once your left side is pressing to the ground, take your right arm up and see if you can balance here.
This could be our point of challenge, or we start to float that right leg up and press out strongly through your right leg and then lower it down. Rest of the body stays pretty neutral. Slowly float the right leg up. And then take it down. Again, we're going up and then take it down.
Again, going up, push out through that right leg, and lower down one more time. We'll take that leg up, and then lower. And we'll bring that right hand back by your chest, and let's turn to face the floor and then push back up to your tabletop position. Now if your knees are a little sensitive, you might add a blanket underneath your knees. Okay. So it will settle into kind of your usual tabletop position And we'll do one more shoulder arm challenge where we take the right arm straight out in front of you or lower if that shoulder has an injury. Strong left arm, take your right arm out to your side, and then take your right arm back by your portho, I'm gonna squeeze that right hand in towards your glute. Reach out to your rights.
Reach back out in front of you. And then put your right hand down. Firmly root that right hand. Walk the left hand forward. Lift your left arm up maybe towards the height of your ear without moving any other part of your body, open the left arm to the left.
Squeeze it in towards your torso like your hand is squeezing in toward the glute. Left arm back got to the left. And your left arm straight out in front of you, bring that hand to the floor. Let's do one more cycle. So walk that right arm forward, floated toward the height of your ear out to your sides, and then that right arm squeezes in towards your torso.
So fingertips point toward your towards your back. Heal, right arm to the right, out in front of you, right hand to the floor. Walk the left hand forward and then float the arm up towards the ear, left arm to the left, Left arm straight back point your fingertips to your back foot, left arm to the left, straight out in front of you and then bring your hand down. Alright. Maybe do a couple little cat cows just to loosen up any tension from holding your spine in that nice position where you were very stable. And then we'll come to neutral tabletop. From tabletop, we'll swing your feet to any side and see where your blocks might have gone.
We're gonna use them in a moment as we sit with our feet out in front of us. Okay. So please grab a block for each hand while was looking for fun ways to play with boat pose. With your feet on the ground in front of you, hands on blocks, lean back so you have straight arms with your hands on those blocks. And we'll do a little test run where we lift the left foot up an inch or 2 or 3, put that left foot down. Right foot comes up an inch 2 or 3 and then put that foot down.
Alright. So now we're gonna lift the arms because we know we're we're gonna end up. And as we lean back, Let's take a moment holding those blocks, straight strong arms, put your blocks down, and then focus on the legs, left leg up, and down, right leg up and down. Flout your blocks and maybe we lean a little bit more back. Come forward, plant your blocks, left foot up, left foot down, right foot up, down, float your blocks, and maybe do a little tipping back. Come forward alternate again.
So you're doing a little bit more leg work, left foot up, get that quadriceps fired up, right leg straight foot down, float your blocks and then lean a little bit back. Okay. Last time, hold the blocks down, lift your left foot, lift your right foot. Now slide your blocks by your hips. And as you cross your ankles, press your hands down into those blocks and see if you might lean forward and lift your hips up. Do a little move going up and down.
Press into your blocks and lift up. And down. Now maybe we lean a little more forward and lift up. And come down, just kind of feel into your arm area that you're engaging, lift, and lower. We'll do one more. Little leaning forward and lift and lower.
Alright. Let's set the blocks to the side for a moment, and let's grab your blanket. And I'll just show you again how to fold the blanket. We'll use also the strap shortly. So if you have a blanket maybe in that rectangular shape. Let's open it one more notch. So it is more of a proper rectangle, and we're gonna fold it in thirds, smooth it out, fold it back on itself, smooth it out, fold it back on itself so that you've got kind of a long thin, what would be like a replacement for a bolster. And leave yourself some room here as you put your hips buttocks on the far end of the blanket, and then we're gonna have this back end for our head.
Grab your strap, have it close by, when you come down onto your back, you already feel like maybe you have to balance a little bit to not fall to the right or left and take a little bit of that extra blanket and tuck it under your neck. Gives you a little bit of neck traction and support. So before we go to the strap, we're gonna have your arms just out to your side. And feel what it's like when you take your left leg up towards the ceiling, we're gonna try to keep your hit points neutral as you circle your left leg around and try to keep the balance as you engage your lower abdominal muscles. And we might also feel that we're recruiting some of our corset like muscles in the torso to keep your ribs from shifting up and down as you move a leg.
Kinda feeling that out. Different ways to do balance. See if you can feel your back rubs dropping towards the blanket into the blanket versus freezing up and pushing up towards the sky. Let's put your left foot down for a moment, soften your back ribs into the blankets. Lift your right leg up.
Your focus is on your hip points. That they're stable, neutral as you circle your right leg. Again, are you noticing your back sinking into the blanket or resisting that support and kind of freezing or tensing. Let's do what you can to get your back body to soften into the blanket. Alright. Let's go ahead and put that right foot on the ground and feel where your strap might be.
So when we bring that left leg in, gonna add the strap around the bottom of your left foot and take your hand up towards your left foot so you feel an interesting stretch in your left hamstring area at the back of your leg while you hold the strap with your left hand. Now we're gonna add a little more balance challenge until to your right knee and to your right hands. From here, we'll open the legs away from each other in little small increments so that you don't feel like you're gonna fall off your folded blankets, and we could let the shoulder blades hopefully slide to the sides of your blankets as you look towards the ceiling. You can probably challenge your balance more by closing your eyes and kind of sensing, are you falling more to the right or left? And keep doing what you can do to steer yourself towards center.
Bring your legs back to the center position. Let's make some room to slide your right foot up into this strap and as that hand comes up, we'll hold the left knee with your left hands. K. So on our second side, and then little increments to open the right leg to the right and left knee to the left until you reach that point where you're may be good to tip over to the right and we steer it back to center and be willing to keep adjusting the legs if you haven't quite found that place to be stable. And then when we feel relatively stable in the legs, can we press the shoulders back towards the floor? It could get more interesting with your eyes closed if you feel comfortable and you can kind of feel which part of your back is not releasing into the blanket and spend a little more time there trying to connect to the blankets.
K. So we're kind of softening through the back body. Now let's go ahead and just slide that right foot out of that strap and have a hand hold each knee. And as you separate your knees here with the hand on a knee. Let's circle each leg while you try to maintain your balance on that thin folded blanket. Kind of finishing with a little bit more massage for the hips and maybe you also feel a little benefit there at the lower back. K. From our standing work releasing any tension.
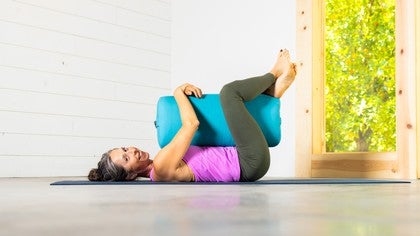
Let's keep your knees now squeeze together and raise your legs in the air as your arms stretch back by your ears and hopefully have clearance for your arms to reach back you don't hit your blanket and then squeeze your knees back in towards your chest. Legs up. So we're doing our upside down, downward dog shape. Draw your legs back in. Legs up in the air, and then hug back in. Let's do one more.
Legs up in the air, and then hold the knees towards your chest. Just enjoy that stretch for a moment. Maybe your tailbone sacrum slightly lips away from the blankets. One final thing here might feel nice to hold the right knee with your right hand. And stretch your left leg and arm long where you float your left heel and float your left hand.
Hey. Come again. Find your balance so you don't fall to the left or right. Hold that left knee again. We're gonna take that right arm and leg towards the ground, but we'll float the heel, float the arm take a pause. And let's tip the d back in and then put your feet on the ground, maybe a little wider than hip distance apart, arms out to your side, and just a moment sink into that blanket.
Do a little grounding here before we sit up and move into whatever adventures you're gonna head into after your practice. I'm gonna take a moment here. Just noticing any changes in your body, mind, or spirit from practice today. When you're ready, let those arms come a little bit more towards your side. And I usually like just a tip over to whatever side's easiest to tip to.
And as you tip to your sides, start to lift yourself up, and we've got this convenient little blanket now to sit on as you align yourself for a moment in this way, bring your awareness to your head, over your navel, over the center of the cullvis, maybe shoulders up and back and down. And let's get stable in your seat here. Before you move out into your day. So arrive before you leave. And once you feel settled here, just wanna acknowledge all the efforts you put into your practice today.
Thanks so much for being here. Until next time, be well. Namasteem.
Yoga for Mobility
Comments
You need to be a subscriber to post a comment.
Please Log In or Create an Account to start your free trial.
