Description
About This Video
Transcript
Read Full Transcript
(waves crashing) Hi everyone. Welcome. Thanks for joining me today. I'm gonna talk about yoga props, how to use them. I've called this Props With Purpose, because they all really do have a specific purpose.
Usually what yoga props help us to do is find our balance in the pose. As you can see, I have many props behind me, and I'm sitting on my most favorite prop, the chair. I'm going to demonstrate a couple of poses on the chair so you can see how creatively we can use the chair. Let's get started. So obviously, we can stand and face the chair, and use it so that we can put our elbows on it, or our hips on it, or anything like that.
It helps to bring the flexibility of the pose to the student, rather than forcing the student into the flexibility. But there's really creative ways that we can use this chair as well. One of my favorite ways to use it is a backbend. So I'm gonna turn the chair around. I'm gonna place a blanket right here in the back end of this chair.
I'm gonna turn around and have my back facing the chair, come down on one knee, bring my arms back to hang onto the back side of the chair. Then I'm gonna line the middle of my shoulder blades right up with that back edge. I've got one foot in front of me. I'm gonna slide that other leg out, get myself centered on the chair, begin to lift the chest, firm through the legs, lift the chest some more, drop the head, interlace my hands behind the head, and drop back into the bend. Oh, it's so awesome.
That was easy, right? Another really unique way to use it, I'm gonna remove the blanket, turn it around. Also, this part of the chair could be at a wall so that it doesn't move at all, but I wanted to show you a nice way to take a downward-facing dog pose, especially for people who have a tough time externally rotating their shoulders. Because I have the chair on the mat, my feet may go beyond the end of the mat. Don't worry about that.
You bring your hands to those back legs of the chair, and you turn your hands to try to get that rotation. I'm turning, turning, turning my shoulders. And now I'm in the pose. So that's one way to teach shoulder rotation using the legs of the chair. Another way would be to stretch the calves open safely.
I'm gonna go ahead and put that blanket back on the back side of the chair, just to give a little padding there. And then I'm gonna hang onto the back side to the chair, the back legs of the chair, put my heel bone right at that lip, and now it's padded, so it feels pretty good. Extend through the spine. Maybe I want to do parsvottanasana from here. And if you're dealing with somebody who is working with some flexibility challenges, there's that bar.
So I could also stretch both of my calves by moving the chair again. This time, we're gonna flip it around so it's in its upright position, but facing forward. And just to keep it weighted into the ground, I'm gonna grab my sandbag, put it on the seat of the chair, and take the balls of the feet and bring them right to the back side of the chair. Then I'm gonna push down with my hands, try to draw my tailbone in and forward. 'Course, you have lots of opportunities to do whatever you want with your arms.
Maybe do baddhanguliyasana. Maybe not. Lots of options. So, what about the sandbag? The sandbag is typically 10 pounds, but you can make them as well.
If you have a 10 pound bag of rice at home, you can use that. You can also buy your own sand and make them. The point of using the sandbag is to ground some part of the body. They're really useful in twists. They're great for the lower back in things like child's pose.
I think that it is a prop that's underused. You can get really creative with the sandbag as well, just like we got so creative with the chair. You saw me use the sandbag just to weight down the chair. Sometimes just using it like that is golden. Let me talk about a couple of other props that I think you might actually have at your house, just like the chair, and that would be any blanket.
The great thing about a blanket is that if you don't have a bolster, which we'll cover in just a moment, you can use the blanket like a bolster by folding it like the shape of a bolster. There's all different kinds of folds and different kinds of shapes that you can make with the blanket in order to support you. What the blanket is there to do is provide cushion. It's also there to provide some height underneath the pelvis sometimes, or also to get one part of the body to meet the floor. For instance, if you're doing a yoga pose that's down on the ground, it's a restorative pose, and maybe one limb is tight, and so it's floating off the floor rather than dropping its full weight, we would just pad that limb with the blanket.
And this way the limb and the nervous system get some feedback to relax a little bit more into gravity. So blankets are great to use, and again, you can just use them from your house. There are specific yoga blankets, but it's really not so necessary. So I'm gonna get rid of this chair and get one more blanket, and show you how we can build a bolster with blankets. So here's the second blanket.
You would take the first blanket, fold in and along, this is called the double fold. Fold the other one exactly the same way. And by the way, be very fastidious about your folds. The reason is is that these blankets are supporting your body's weight, and where there's wrinkles and crinkles in them, they don't do that very well. I also have the blankets lined up the same way.
You can see that all the fringes are to one side. You have the short edges, folded edges, clean edges together, and the short, open edges together. So this is almost this height, let me pull this other bolster over. You can see the bolster is still a little higher than these blankets, but of course, bolsters come in all sizes and all shapes. But basically, this would be a general way to create the height of a bolster, a general height of a bolster, and use it the same way.
Of course, the other thing about these blankets is they create a great seat for you. Now my pelvis is lifted upright so that I can get a nice long spine. This is good for the person who has a difficult time sitting upright without falling to the back, if they're falling to the back side of their pelvis. I can take bharadvajasana here. Lots of options with support underneath the buttocks.
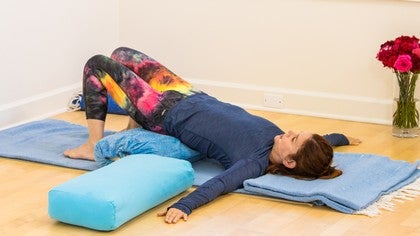
You can also take these blankets and use them as backbend supporters. So instead of folding, I can roll them. One long roll, one shorter roll. You can see that the shorter roll will be thicker than the long roll. In a restorative practice, if I were going to, I'm just trying to get it nice and tight and clean, if I were going to practice a backbend, this would go at my mid-back, this would go at my skull.
Either at my neck, or at my skull. Arms would float out to the sides. The difference between using the blankets and the bolster are that these blankets soften and drop a little bit. They're a little cushier. They give more.
The bolsters, they don't give as much. So they're gonna be providing a little more support than the blankets do. Having said that, if you don't want to invest in a bolster, grab yourself some blankets, fold 'em up, roll 'em up, and they'll pretty much do the same thing. Now let me talk about the yoga block in relation to the blankets. So you have a couple of different kinds of blocks that you can use.
This is a foam block. They all come in different sizes now as well. This is pretty much your standard size. I think it's like a four by six, right around there. And the weight of the block makes a difference.
There are sometimes when you want the block to slide. There are other times when we want it to stay totally stable, when you're doing a standing pose, for instance. If I come and take triangle pose, or trikonasana, and I put this block down, the foam block won't have the same stability as a cork block does. So I'm bearing my weight right now on top of it. You might decide that perhaps a cork block that's a little bit steadier may be a better choice, rather than the foam block.
Having said that, there are plenty of times when you actually want the cushion from the foam as opposed to the hardness of the cork, or even wooden blocks, there're also wooden blocks as well. So you would just determine, well, what do you want this block to do? What kind of support is it actually providing? Is it providing cushion, or is it providing stability? And that would be sort of your reason for using one or the other.
Now let me get back to talking about the difference of the blanket and the block in terms of the backbend. Remember I said this is pretty dense, this is a lot less, (fist knocking) this is really dense. So that means that if I decide to do a backbend on a block, I'm gonna get a lot of stimulation. How 'bout if I show you? I'm gonna move these to the side, and I'm gonna put this down here.
You saw me put my mid-back on the thicker blanket. You saw me have my head down on this thinner blanket. I'm gonna let my head fall back right now, but I put my shoulder blades here, right up against that block. I have a little bun in the back, so I'll use it. (giggles) If you have a bun, it could be used as a blanket.
Okay, so you can see that my chest, my ribs, everything is really lifted quite a bit. It's not so much because I've placed the block across my shoulder blades, which is a little different from when we had the blanket there. It's really because it's not going anywhere. It's pushing into my back, where before my chest was falling down a little bit more on top of the blankets. That's the difference.
So if you want more stimulation, a louder backbend on your nervous system, you would use this. If you want a little less, you would use the bolster. If you want the least, you would use the blankets. Now let me talk about the positioning of the block. This is part of the strategic prop placement, especially for your spine, since we're talking about the backbend.
If you place the block like this across your shoulder blades, what you get is sort of a surface stimulation. You have bigger muscle groups in your upper back, and that's what you'll be stimulating. When you take the block and move it like this, now you're stimulating the smaller muscle groups alongside the spine. It'll be a little louder, a little more wakeful. So you can determine what makes sense for you.
Also, this will create more of a backbend, because the height is more, and as a result, you'll have more movement in the spine, in the vertebral joints. So it really just depends on what you can do and what kind of, the level of sensation that you want to experience. Okay, so we've talked about the chair, the sandbag, the bolster, the blankets, the block. Now let's talk about this lovely little thing. This is the yoga belt.
The yoga belt is good for two things, well, for three things, really. The most obvious thing is if you can't reach something. Say you're in janushirasana. You're sitting down, and you're the person who has a hard time reaching the foot. Well, the goal necessarily isn't to reach the foot.
What the goal is is to get length out of the lower back while we're keeping the weight of the pelvis on the floor. So the belt gives you an opportunity to catch the lowest part of the leg while trying to use the leg and the belt as leverage to lift up out of the lower back so that you're not here, rounded over, and have no access to the breath. That's the first way to use a belt, to help with your flexibility. The second way to use the belt is for compaction, meaning that we're drawing some parts of the body into its center in order to create stability somewhere else. I would say the best way to do that is to fasten the belt and use it as support for a backbend.
I'm gonna go into bridge pose on my back so that you can see what that might look like. I fasten the belt up, and by the way, there are many different kinds of belts. There're the D-rings, the plastic fastener. It doesn't really matter which kind you use as long as you're happy with it. So I'm gonna come down on my back.
I'm gonna take the belt, step my feet through it, and I'm gonna bring it around the top of my thighs. And I've fastened it so that I'm about hip distance apart. Now I can either push away from the belt, or I can try to bring my legs a little closer toward one another. What my legs tend to do are splay out to the sides. So for those of you who have wandering legs in backbend, this is a way to keep the legs compact and together and to create stability around the lower back.
There's my little bun blanket again. So I'm gonna hold onto the outer edges of the mat, push my hands toward the feet so that I'm lengthening the mat, and then begin to lift up. And all the while, I'm trying to use this belt as a way to not break out of it, but actually keep my legs in good alignment. That's one way. The other way would actually be to create some space, or what I like to call hip separation, because it's usually used around the hips.
And this is a way to draw the tops of the thighs out away from one another in order to get some width at the lower back. Sometimes people like to use this in forward bends as a way to create that. It could also be used in some twists as well. The thing about twists is that what we're trying to do is not crunch the legs together. What we want to do is keep that lower back band very broad so it stays healthy in the turn.
The turn happens at the mid-back, right? We don't want it at the lower back. But we need some space and length around the lower back. So putting the belt around the legs in a twist can be really helpful. Let me stand up for this one.
And I'm just gonna step right into the belt. What you can see I've done is pretty much brought the belt again to the top thighs. I've brought the tail of the belt to the right leg. That's gonna be my front leg, and the reason is is I wanna externally rotate that leg just a little bit. But what I don't want to do is this.
When I go to move into the first part of the twist, if I'm someone who's challenged with flexibility in all different areas of the body, let's not even say where it is, but what it makes me do is this, squeeze my inner thighs together, pull my hip out in order to get my hand down to the floor. So what I'm gonna do is I'm gonna try to break the belt. I'm tightening this enough, and I like to hold onto it, and really, I just practice it here. I get, like, halfway down, and I try to separate the tops of the thighs so that I get that opening and width in the lower back that I'm trying to achieve, so that when it's time for me to get into the twist, I'm not squeezing those inner thighs. I'm keeping those inner thighs and top thighs away from one another and then coaching where the turn needs to be at the mid-back.
The next prop that we'll look at is the eye bag. Now, what could a little eye bag be so useful for? Many things. Not just covering your eyes in savasana, but also in the palms of your hands. Consider putting a sandbag in the palm of your hand in a savasana to weight down the hand and to quiet the hand.
Consider putting a sandbag on the top of your forehead rather than across your eyes. Just that little tiny weight is really comforting, or can be really comforting. Consider putting a sandbag just at the navel. Just the tiniest little bit of weight could soften any anxiety around the belly. I love the eye bag, and I use it a lot.
They come scented, unscented. You can make your own. But I invite you to try it and see how it changes your practice. The last prop is the yoga mat itself. That seems a little silly, right, or redundant.
We already have a yoga mat. But having access to another one is great. Here's why. You can use it in a lot of different ways. The way that I like to use it mostly is for backbends.
You can place the mat this way across your spine. You can place it parallel to your spine. I'll show you. There is a soft supported backbend. I say soft because it is protecting, or not protecting, but supporting, all the segments of my spine.
Now if I want a little stronger one, I bring it this way, across, so it's just at the shoulder blades, like you saw me do with the block and the chair. A little louder. See the lift, a little louder. What I'd like to tell you is the props are really there to bring more of the pose to the student. Think about that for a second.
The props are there to bring more of the pose to the student, not the student to the pose. When I first experienced that in my own practice, it kind of blew my mind, actually. Not so much because of what it did. Because it made me think about, it made me think about my teaching in a really different way. I started backing off a little bit in terms of how I was coaching my students to achieve more of the pose.
And what it did in my own personal practice is it allowed me to stay quieter inside. For me, that was huge. I also want to say that, you know, there is this purpose and direction, and an intention for using the props. The intention is to make the experience of the practice on the mat holistic and balanced, and props help to do that. The purpose is to bring more of the pose to the person and to meet the person where they are, rather than the teacher saying, well, you must do it this way, or you must do it that way.
The last of it is how can I strategically place the props? So this is the direction, how can I strategically place the props so that they make sense? Not just for the whole of the class, but also for unique needs. So I hope that this has inspired you to explore a little bit more with props. I hope that maybe we demystified them a little bit for you as well, and I look forward to seeing you in class with as many props as you choose.
Thanks for joining me today. Namaste.


You need to be a subscriber to post a comment.
Please Log In or Create an Account to start your free trial.