Description
About This Video
Transcript
Read Full Transcript
(waves crashing) Hi everyone, welcome to Yoga Anytime. This is the second practice of the Breathing and Feeling series. The props that you need for this are two bolsters, two sandbags, one blanket, one belt and one chair. There is a breathing session or breathing practice in these particular classes, and we're gonna be doing it at the very end this time. And I'm really excited to show it to you, it has a lot of neck traction.
So let's get started with the first pose, which is Jathara Parivartanasana. It's revolved stomach turn pose. Here are a couple of things that you'll need. You'll need a sandbag and two bolsters. The bolsters are gonna be placed like this.
The first one's gonna go to the left of your mat, just parallel to it. And then the second one's going to go across but we're gonna come down on our backs first. Come in a supine position, lift my hips up, bring them on top of the bolster and I've lined these bolsters up like a little L. And then I'm gonna scooch myself forward until I feel really the lower back sit down on top of the support. Then I'm gonna bring my arms out to the sides, shift my hips over to the right, not the shoulders, just the hips, and then take the feet up off of the floor and bring the legs to the left.
I'm going to grab that sandbag and you know, it's 10 pounds so it's a little awkward to hold but you can figure it out. Just manage to get most of it pretty even so that it's not all resting in one particular area of the bag. The contents are pretty equally distributed. And then stretch that right arm out to the side and stretch the left arm out to the side. Take a little look up at your body and see that your top chest, your right chest, is pretty much in the same plane as the right hip.
And if it's not, you can move the shoulder blade on the left side just to the left a little bit, just so you can see it's pretty stacked. And then stretch those arms out to the sides. Your feet and your knees are stacked. Once you get, you know, like you feel like you're at home in it, then take a deep breath and as you exhale, really let the weight of your upper back, your throat, your neck and your skull, get super heavy. It's a really delicious twist.
So let it percolate. You'll notice the feelings that already may beginning to surface. Just breathe through them and continue to relax. We're gonna stay here another minute. Every now and then deliberately relax the chest, the throat, the neck, the skull.
You an feel how that right shoulder stays so grounded with the weight of that extra umph on you, that 10 pounds of sand just releasing the weight of that shoulder into the floor. And this kind of a twist, it's that far shoulder, that right shoulder that'll wanna pop and lift. So let's take one more deep inhale and really relax and let the weight of that sandbag just pour down onto the shoulder. Now to come out of this, what we're gonna do is bend the right elbow and then just remove the bag. Just push it out to the side.
And then bring your right arm in toward your chest and turn your head to the left. Just stay there for a couple moments. And then you're gonna pull your right leg in toward your torso, pull your left leg in toward the torso, roll onto your lower back until your feet can come flat to the floor. Bring your right arm out to the side again and then slide your lower back and pelvis back into the center, so you're right in the center of that pollster again. Just pause.
I like to get into the next side without having to roll out of the whole pose again. So it takes a little bit of manage and skill, but it's totally doable. Just look for that bolster that's to the left of you, pick it up and bring it to the right and line it up like you did before, like it's making the L position going in the opposite direction. And you might wanna take that bag now and just slide it overhead and bring it to your left so it's a little easier to manipulate when you need it. And then make sure that you're right in the middle.
Keep your shoulders really grounded. Go ahead and move your hips to the left this time. Pick your feet up off the floor and then as you exhale, take your knees to the right. Then I like to scooch my right shoulder blade to the right just a little bit more, because I can kind of feel right away when I'm out of alignment. I look up and I see that my top hip and my top chest are in the same plane.
Then you can grab that bolster with your left hand. No, that's not a bolster, that's a sandbag, and bring it on top of your left shoulder and then slide that left arm out, slide that right arm out. Make any little adjustments that you need to, to get really centered in the pose. And now you can close the eyes and begin to breathe in and out of the sensations. And let's stay here a full minute.
The first practice that we did in the series focused mostly on the lower body. This one's focusing a little more in the mid and upper body. For the mid and upper spine. So feel that rotation that's occurring in the mid back. Feel that left shoulder, how it wants to pop if it's tight.
Pop meaning that it wants to pop off the floor. And that sandbag releasing that weight completely into the ground. Notice any other sensation you have and greet it with a slow deep inhale and slow deep exhale. Notice the breath you're taking right now and take one more. And then bend the left elbow begin to slide that bag off of that shoulder.
Bring your left elbow and arm in toward your chest again. And this time, we're gonna actually roll all the way to the right and then just pause and then lean your weight into the floor. Using your left palm to push, come all the way up into any comfortable seated position and just close the eyes a moment. Okay, let's move to the next pose. So the next pose is Setu Bandha Sarvangasana.
It's bridge pose. It's one of my favorite modifications or ways to set this pose up. It's two bolster so it makes a bed. How bad could that be, especially for restorative. So we're gonna take the two bolsters and line them up and I'm taking the short edge of them, putting them together to make that bed.
Now we need two sand bags. If you don't have two sandbags, don't worry about it. You can always put one sandbag on top of the thighs or the shins, but because we're sort of focusing on this area today, I like to use the two sandbags. They're going on the shoulders again. How bad could that be?
So I'm gonna place them right alongside where I think my shoulders will probably go. And then I'm gonna use one other blanket or one blanket and place it here. And again, when you're first setting up, it's like you may not know exactly where the measurement goes for your body, but this is what you're gonna start out with and we'll just change it as we get into the pose. And then we're going to use the belt. And the reason we're using the belt is to bring it around the tops of the thighs and make the legs a little bit more compact.
This is important in a backbend that we're gonna stay in. We're gonna stay in this pose for three full minutes and we want that security and stability around the lower back while were in an extension. So I'm just gonna sit right on top of the bolster. Again, when you sit on it, your bolsters may move a little so it's important to keep them together. And then I'm going to grab the belt, take the tail end of it, put it through the two pieces and then separate the pieces and bring them together.
And then cinch it up just so that you can get your legs through it. Bring your feet on top of the bolster, and now take the belt and bring it pretty high up the legs, to the very top thighs and give yourself a good little tug on it. As I said earlier, if you wanted to use a sandbag you have the option if you just had one. Right here is really nice in a backbend to ground those top thighs. And right here on the upper shins is really nice too.
Even the ankles will work. But I prefer the shoulders. Okay, so now we're gonna scooch forward. I'm gonna lower and then I'm gonna start to slide back until I get that back edge of the bolster right at the base of my shoulder blades. And you can either put this blanket underneath your head or it can go underneath the shoulders, whichever you prefer.
I kinda like it here just underneath my head. I'm gonna stretch the legs out. Often times, the belt will loosen a little, so just tighten it up again. I'm gonna slide my buttocks toward my feet so I'm a little longer in the lower back. Once I get the head really figured out, you wanna get that figured out before you put the sandbags on.
Okay, so once that's good, I'm gonna grab the bag and again, it's not like the prettiest of moves but just grab it, put it on the shoulder, grab the other one, put it on the left shoulder, whichever you started with. And then I kind of push down a little and spread my shoulders and spread my collarbones. And then when I feel I've received the weight, then I can let these arms come out in the school pose position. I'm right in the middle of the skull. Feels so great on the neck.
That grounding on the shoulders really, really makes this pose pretty magical. Let's close the eyes and pause for these three minutes. This backbend is interesting. This little bit of inversion with this chest and little bit higher, you'll feel some weight and some energy collect into the throat and the neck. So can you keep that throat really relaxed and soft?
The jaw, the face, the eyes. And then I'm gonna invite you to part your lips just a little bit. Just explore that and see what that might do to the release around the jaw and the throat. You may notice how you're holding your tongue inside the mouth. See if you can get the sides of the tongue to be soft like the center.
And you may notice where you're actually holding the tongue in the mouth. If it's up toward the roof, or it's actually floating in the middle of the mouth. See if you can get it to float and invite that, the back of the tongue, the root of the tongue to fall deep into the cave of the throat. It's like everything around the chest, the throat, the shoulders, the skull, it's all falling back, back and down. If you need to come out of the pose before you hear the instruction, or you need to just take the bags off the shoulders, go ahead and do that.
We'd like you to come out with me so that I can talk you through that. But if you do need to come out before, the best thing to do is just to slide the bags off, bend the knees and set the feet either flat on the bolster or on either side of the bolsters. And then you can follow along with my guidance as we move out of the pose. If you're still in it, in the shape, let's take three more slow breaths together. We're gonna start to work our way out now.
So just take one hand, grab a hold of the end of that bag and slide it behind you. Do the same thing on the other side. And then take your hands and bring them to the short edge of the bolster right where you can feel it up against the back. Go ahead and bend your knees. Bring the feet on either side of the bolsters and then just lift the pelvis enough so that you can slide or push both of the bolsters out of the way just until your pelvis can hit the floor.
I slide back just a little bit more to make sure that my back feels really supported and releasing toward the floor. You can even put your feet on top of the bolster if you want. And then go ahead and remove that belt, or at least loosen it. But if you can remove it, do so. And then shift your hips over to the left side, bring your right arm out to the side and your left arm in toward your chest and go ahead and roll all the way over on the right side of your body.
When you get there, just rest. If the sandbag is there and it makes a perfect little pillow, go ahead and rest your head on top of it. Okay, let's lean the chest into the floor, push and come up. So we're moving into child's pose now or Adho Mukha Virasana. Or some people call it Balasana.
And you can decide whether you want one or two bolsters. These bolsters are a little on the flat side, so I'm actually gonna use two of them. I'm gonna stack both of them. You could also just use a bolster and a blanket. But the beauty of this is I'm going to use one of the sandbags and place it right alongside my spine.
Again, it's a little awkward to grab it but it's totally doable. I'm gonna push this bag out of the way since I'm not gonna use it. And I'm gonna take my belt and do my prop etiquette by folding it up nicely. Because you know, that's what we do. Okay, and then I'm gonna grab this other bolster and I'm just gonna stack the two of them.
You could even make it bigger by taking another blanket and folding it on top if you needed additional support. But I'm thinking that it might be nice to cushion my lower body so I'm just gonna move the blanket right up against that short end so that my feet are cushioned. And then I'm gonna slide myself in really closely. And because I have two bolsters, the top one I'm gonna pull right up into me so it goes right up against my belly. And then I'm gonna grab that sandbag, hold on to it, hinge forward until I can release.
Bring my elbows and forearms to the floor. So I'm gonna go ahead and turn my head to the left and try to rest as much weight on the ear. Yes, the cheek, but really the ear so I get a good rotation and then release the weight of my elbows, my forearms, let the weight of those hips go. And that added weight now on the spine feels really good. And if you want, you can slide it up a little bit more.
There, that feels good. Got a little bit more weight between my shoulder blades. Let's take a full minute here and then I'll instruct you turn your head to the opposite side when we're ready. Now the great thing about this is can you take an inhale where you don't deliberately push the bag off of you but you feel that natural broadening and opening that happens when you have additional weight on you, right? So take the inhale and don't force the bag away but just feel the resistance that's happening, the sort of dynamic tension that's happening between your breath opening and spreading your body and the weight of the bag coming up against you.
And then when you exhale, really receive the weight of the bag. So now go ahead and take one more breath right here and then push through your palms just a little bit, lift your head a little, tuck your chin and roll your head in the opposite direction. And don't worry, if the bag fell off, you can just start it over again. Just make sure you turn your head in the opposite direction. Try to get as much to your ear as possible and let's start the full minute now.
So these muscles in the upper back and attached to the neck, this area, with your head turned in another direction, may prove to feel differently with the weight of this bag on the section of the spine. But you're just gathering information, right? You're just feeling and breathing. There's nothing you need to do with it. So go ahead and take one more full breath right here and then you're gonna tuck your chin a little bit, turn your head to the center.
And you can either grab the bag and take it off of you, or you can, if you feel comfortable enough, just slide your hands underneath the shoulders, push slowly, let that bag just drop right off of you. Actually, it feels really good when it just drops right off of you because it slides all your tissue down your back and that feels good. If you're comfortable sitting like this, go ahead. Otherwise, move the bolsters out of the ways, sit in any other comfortable seated position. You're upright, just pausing.
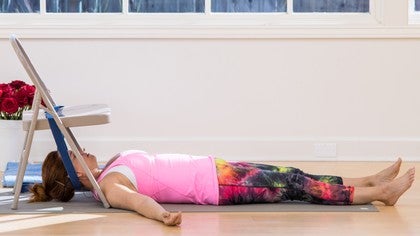
Okay, and then opening the eyes. So here comes that really groovy pose, the neck traction on the chair. So you only need a chair, a blanket and a belt. So let's push these props out of the way and get what we need. Okay so we're finishing up the practice with neck traction in Shavasana.
What what? What is that? That is this belt placed around the chair and then around the neck. So it looks like this. And I've placed a blanket to the side of the mat just so that when I get to the two minutes without this belt, I can place it underneath the head.
I'll talk you through that. We're gonna take the belt and bring it so that it comes underneath the chair and actually between the two legs on that side and on the other side. So I cinch it up, it's fastened. And here's what you're looking to do. When you pull it, you want enough tension so that when you push down on it, it's really about anywhere from an inch to two inches, okay?
So that's your metric right there. All right. I'm gonna just get the tail end of the strap out of the way so it's not an issue for me when I'm getting out of the pose. Okay, here we go. So we sit in front of the chair.
Get way in front of it so that you don't hit your head as you're coming down or your bun. (chuckles) And then start to slide back and you're gonna grab that belt and place it at the base of the skull. Oh, so good. Stretch your legs out and you wanna feel as though basically you're in a hammock. You can kind of slide your head from side to side.
You've still got some curvature so you're not overextending, you're not straightening and flattening it. Try to release your weight into that until you feel like you're right in the middle and feel like your neck is getting lengthened but it's not being pulled. And then release your arms out to the sides. And here's the little tricky part because in the very beginning, you'll feel like okay, well, it's there by I'm kinda holding. Everybody should take a slow inhale.
And as you exhale, let the weight of your skull totally drop into that belt. When you do that, you may decide to make any other adjustments that you want. Sometimes people like to flip their ear flaps over the belts or have the belt rest up against it. It doesn't matter. Relax the shoulders.
We're gonna take a slow deep inhale. And as we exhale, we're gonna let the sound (humming) happen. And please feel the vibration that occurs around the forehead, the throat, the jaw, the neck. Take a slow inhale and exhale. (humming) And now the next three minutes and every minute that goes by, I'll remind you to take that breath.
Take a slow inhale, and exhale. (hums) Take a slow inhale and exhale. (hums) We're gonna come out of this, but let's take one more breath like that. Inhale. (hums) Just really gently bend the elbows, slide that belt out from underneath you, lower the head, pause.
Drop the arms. And then take your chair and slide it behind you. If you're good to go for Shavasana for the next two minutes here, then release your arms and go in. If you wanna use the blanket underneath your head, you can grab it now. And we'll take that breath one more time.
Slow inhale. (inhales) (hums) Go ahead and gently bring your awareness back to your breath. Let some movement start to occur through your fingers and toes and wrists and ankles and then just rock your head side to side and go ahead and bend the knees and set the feet flat on the floor. If you feel like you wanna roll on your lower back, then just draw your legs in, wrap your arms loosely around them and rock from side to side. When you're ready, tip yourself over to the right and rest on that floppy fetal position.
Lean your chest into the floor, push with your palm, come all the way up into any comfortable seated position. (breathes deeply) Just notice what you feel. Notice that the neck feels longer. I know mine does right now. Helps us to be upright.
And this part of the spine, this mid upper back, man, it feels good. Bring your hands to your chest, gently open your eyes. Thanks for joining me today. Namaste.
Relaxation Takes Practice
Comments
You need to be a subscriber to post a comment.
Please Log In or Create an Account to start your free trial.


