Description
About This Video
Transcript
Read Full Transcript
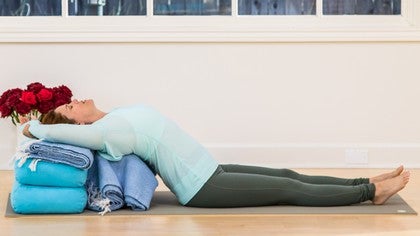
(waves) Greetings, everyone. Welcome to Yoga Anytime. This is the third and final practice of the Yummy Series, which is restorative practice that is sequenced specifically for yummy savasana. What you'll need today are two bolsters, two blocks, two blankets and one eye bag, and we're starting off in a reclining shoulder stretch. I've set everything up right now, but let me talk you through it.
There are two bolsters, and they are exactly the same size and shape, and then there is one blanket. You may or may not use this blanket. I've placed it on top of one of the bolsters, so I can have a little bit more lift in my back bend, and then there's a block, whether it's cork or foam, doesn't matter, and it's placed right between the two bolsters, rather. My shoulders and my upper back is gonna go on this bolster, my head will go here, and my arms folded behind me, so my elbows and forearms here. Okay.
Here we go. Stretch the legs forward. Lean your weight on this first bolster, press into the elbows, I scoot my pelvis forward just a little bit, so I can feel that buttock flesh go forward toward the feet, lift the chest, begin to lower, I reach for the block, let my head rest on top of it, and you can separate your legs. Once they are stretched out in front of you, you can just relax them, and then, on an in-house, stretch the arms back behind, overhead, catch the elbows, and let them relax down into the support. Relax your shoulders away from the ears, wiggle around until you find exactly the right spot where you think you can be for the next minute.
Close the eyes. Don't force the inhale, don't force the exhale. Just let the breath be the pace it wants to be. The depth it wants to be. The length it wants to be.
Collar bones down, away from the throat. Head heavy. Just notice which hand is on the inside of the arm, and which hand is on the outside, in terms of where they are in the elbows, and you're just gonna switch it. Just straighten the arms on an inhale behind you, and switch the hold. Relax those shoulders again, collarbones down, elbows heavy, and let's be here the next minute.
Take another inhale and exhale. On the next inhalation, stretch your arms behind you again, plug your shoulders into the support beneath you, as you reach your arms back up toward the ceiling, and then open them all the way out to the side, so they come between the two bolsters and block, pause a moment. Then bend the left knee, setting that foot flat on the floor, bring your left arm in toward your chest, push yourself to the right, you can push the bolster out of the way a little bit, and then lower your body to the floor. Just relax. That pose is the preparation for the next pose.
We worked on getting an opening around the chest and the ribs and length in the belly, opening in the shoulders. Gently open your eyes, push through your palm, and come all the way up. The next pose is matsyasna fish pose. It's done on two blocks. We're gonna move the bolsters out of the way.
We're gonna push them to the top, and that's gonna be the support for the head, so I'm gonna get one more block, place them like this, and then I'm gonna place another blanket right on top, just to give me some cushion. This other bolster goes here. This is gonna be for my head. And then I'm gonna place one more blanket on top of the bolster, to give myself a little bit more support for my elbows, and you can determine once you get into the pose how much height you still need, or maybe it's too much, so you can see that this is a much bigger back bend then where we were before. I set myself up just like before, in front of the support, hands down with the chest lifted, and then I want to find the very bottom of my shoulder blades right up against that support, slide my buttock flesh forward, scooch a little bit more, bring the support close enough to me so that my head can rest on it, stretch the arms behind, and then hold on to the right wrist with my left hand, so I have some extension in my neck, just like I would if I were in fish pose, but not a tremendous amount.
Separate the legs a little. Again, adjust until it's just right. You should feel the weight of those arms resting on the support. They should not be hovering. Soften the throat and eyes.
Let's stay for about 45 seconds, and then we'll switch, so that it's a little over a minute, holding the other wrist. Take that breath without forcing it. Feel how that part of the body lifts up away from the blocks on an inhale and sinks down into it on the exhale. Take another inhale and exhale here. Then all you're gonna do is just switch the hold of the wrist.
Right hand now holds onto the left. Make any adjustment. Just that little move right there may shift you a little more on the left side, so really try to wiggle yourself around so it's equally distributed through those blades, and both forearms and elbows are heavy on that support. And let's go for 45 minutes right here. Seconds, not minutes.
Listen to the breath that you're on right now, and take one more. And then we'll release the arms, let the right hand come down to the ground, out to the side. Let the left arm come in toward the chest. Bend the left knee, so that that foot is flat, and then you're just gonna push off the left foot, and roll all the way to the right until that right elbow hits the floor, and then you can come all the way down, on the floor. Such a great opening.
(breathing) Give yourself some time here. What I love about especially the back bends is that we don't have to recruit any effort whatsoever to be in them, yet often cases in these supported back bends, they provide bigger openings, than done when we're really recruiting a lot of effort. Let's go ahead and slide the bottom hand toward your chest, and slowly push and come up, and let's just pause for a moment. Close your eyes. You've just done a world of good for the spine.
Let's continue on that path, and now we go to a twist, a prone twist. We're gonna move these blankets out of the way, and the blocks, 'cause we don't need them, and we only really need one bolster. Unless you find that you need some additional support underneath you, because maybe you feel a little caught in the twist, then you can put another bolster on top of one or you can take another blanket and put it on top of one. For now, this is what we'll use, so the short end is privy to pavanamuktasana, and this is the knee squeeze pose, and we're gonna take the right hip and put it right in the middle of the short end of the bolster. Stack the top knee on the bottom ankle, bring the hands on either side of the bolster, lift on an inhale a little bit, and as you exhale, use your hands just a little bit as leverage, to try to get the left chest to come faster to the support than your right.
Bring your elbows and forearms out in front of you. You can either turn your gaze, so that it's away from the knees, or you can turn it so that it's toward the knees, whatever level of rotation you feel you can take in the neck. We'll be here for a minute and a half on both sides, starting now with this one, and again, if you feel as though you're sinking down too much with the head and with the chest, and the hips feel too elevated, there's not an equal amount of load in the stretch, then take another bolster, or take another blanket and put it on top of the one that you're no. Get a little bit more height, and basically, all you're doing is just bringing more of the pose to you, and reducing any reach. Take another easy inhale, and finish with the exhale.
And you just slide these hands down underneath the shoulders. If your head is turned away from the knees, go ahead and tuck your chin, and turn it in the direction of the knees. And then press through the palms, and slowly begin to come up, your head being the last thing that comes up. And it's so easy to go to the next side. You just have to swivel yourself around, do the same stacking that you did before, bring both hands on either side, lift on an inhale, rotate to the left a little on the exhale, and either turn your head away from the knees or toward the knees, whichever you prefer, your elbows and forearms, out to the sides, your shoulders relax.
Now, let's stay this a minute here. You'll find as the twist unwinds a little more, it may feel really natural to slide your arms out a little more. Just follow the lead of whatever your feelings are communicating to you. Take another inhale and exhale right here. If your head is turned away from the legs, you'll slide those palms underneath the shoulders, turn your head toward the legs, press through the palms, slowly push to come up, and pause for a moment in any comfortable seated position.
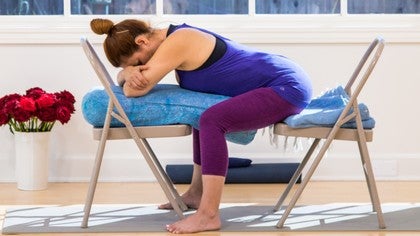
Let's prepare to go to the next pose, which is child's pose, which we always do after a twist, to neutralize the spine, and again, you can use one bolster or two bolsters. I just slide this right between my legs, begin to lower myself till I feel that belly hit. If when the belly hits and the pelvis lifts up, you're a candidate for some more support underneath you. Let's lower down, turning the head to one side, and letting those elbows come out again. Let the weight of those hips go.
Shoulders go, and we're here just like in the twist, a minute on each side. Everything winding down now from the two back bones. You'll take another breath here, and all that's needed is just to tuck the chin a little bit, turn your head in the opposite direction, and then we'll be here for the next minute also. Let any kind of adjustments move throughout the pose, now that you've turned your head in another direction. Sensations may surface that weren't there with your head turned the other way, so just accommodate.
Adjust, and come back to center. Take another inhale and exhale. Then tuck the chin, bring your forehead to the bolster, slide your palms down underneath the shoulders, push with straight arms to come up slowly. You can sit right back on your heels, pause. Getting closer and closer to savasana.
We'll take the bolster, bring it out in front of us, underneath the knees and thighs. One or two blocks for your head, depending on what you might need. You won't know until you get there. Something underneath your pelvis, like maybe a blanket, folded, if you feel like you need to be more upright, slide your legs out in front of you, make sure your heel bones are on the floor, and then the block out in front of you as well. I'm gonna bring it on the highest level, slide my buttock flesh back just a little bit.
I'm not gonna reach out for the longest seated forward bend. I'm just gonna move forward on a breath, so on an inhale, we just get a little length, and on an exhale, we just go. We just go. And now, a minute and a half here. Release the weight of head down onto the support.
Refrain from any reaching with the arms. Any reaching in your mind. Come back to just breathing and letting go. Notice the breath that you're taking right now, and take two more. When you come up, you're going to just gently lift the head off the support, come up with a flat back, as you drag your arms toward you.
(breathing) I love the forward bends. And they are the perfect setup and preparation for savasana, especially if you've had the right support. Let's move the block out of the way. Grab your eye bag, and get our savasana on. Slide back.
Ready. Slide the bag down your forehead. Release your arms. And float inside. Six minutes.
Start to bring your awareness back to your breath. Let some movement occur in your hands and your feet, your ankles, your wrists. Bend your right leg, set that foot flat on the bolster, bring your right arm in toward your chest, stretch your left arm out, push off the foot, roll all the way over to that left side, let the eye bag just fall. Then go ahead and push through your top hand, slowly start to come up into a seated position, close the eyes, bring your hands down to your legs, and be upright again. Just notice how you feel.
See what it feels like to be inside the still of the world around you, but also inside. Bring your hands to your chest. Thanks for joining me today. I hope that you had a yummy practice. Namaste.
Relaxation Takes Practice
Comments
 YES!
YES!
XO
You need to be a subscriber to post a comment.
Please Log In or Create an Account to start your free trial.


