Description
About This Video
Transcript
Read Full Transcript
(wave crashes) Namaste, and welcome to a chair yoga sequence. We're gonna start with a spinal warm up which is always great when you're sitting and you need to loosen up your spine a little bit. Then we'll move onto some upper body work. So, this practice can actually be done sitting on a bolster if you want to add it to your practice for neck, shoulders, wrists. You can also do it sitting at your desk and especially as a little break between other things that you're doing at the computer it can be really a nice practice to gift yourself.
So, we'll start by sitting nice and tall and you can scoot back for a moment and just let your back rest against the back of the chair and close your eyes. Take a few moments to bring your focus from your outer world and from your list of what to do into the inner world, inner landscape. You might take a few deep breaths. This is a moment to just check in and notice how you feel. You might be able to sense whether it's been a challenging day or an easy day.
Just meeting however you're feeling with your breath and with compassion. So, we'll continue this nice, slow, deep, even, inhalations and exhalations. But now, softly opening your eyes and you'll scoot forward a little bit. So your sits bones are on the edge of your chair, you have a little space to come forward, and hinging at the hip joints you'll come down into what I call Crouching Cat Cow Pose. So rather than holding the knees as we sometimes do here, bringing it down a little bit lower.
With your elbows and forearms resting on the knees, as you inhale you'll press down through your arms, you'll draw your heart forward. You can also use this as an eye exercise, gazing up between the breaths. As you exhale start to draw in, engaging the stomach muscles. Pressing the forearms and the elbows into the knees, tucking the chin towards the chest. Finding your own rhythm, inhaling as you come forward.
Gazing up if you like, or you're welcome to keep your eyes closed. Exhale as you pull in, engaging the stomach muscles, relaxing the base of the skull. Inhaling draws the heart forward into an open position, and exhale as you pull in. (exhales) (inhales) Loosening up the spine any places that are tight or tense, stretching into those areas. Just a few more here at your own pace. (inhales) (exhales) Coming to neutral and walking the feet out, a little wider than hip width, and allowing yourself to stretch forward into a nice deep forward fold.
Now this can be a nice moment to rock a little bit from side to side. Sometimes I like to put my hands on the floor and release the neck, stretching it from the base of the skull. Releasing the occiput, all the places along the neck that get tight. At the same time also lengthening and releasing the low back. You can come forward all the way if that feels good.
But remember to always modify, if it's not feeling good to come down that far, you can always do this pose with your elbows on your knees. Opening the knees a little wider makes space for the chest to come forward and actually to hang a bit more. Just a few more breaths here. (exhales) Releasing all the accumulated tension in the hands and the wrists, you can even shake 'em out a little bit as you come up. Rolling up one vertebrate at a time.
The head comes up and then the shoulders roll forward. Up toward the ears, all the way back and down and this helps to open the chest. Noticing how your shoulders feel. One more time and release. You may wanna scoot back a little bit but you don't have to if it's feeling comfortable to perch a little higher up on the front part of your chair.
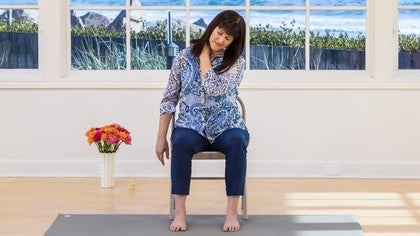
Make sure your feet are grounded for this next movement. You'll inhale and you'll lift up through your heart, through the crown of your head, and as you exhale you'll release your left ear towards your left shoulder. It doesn't matter how far you go, just wherever it feels the best for you. As you do this you'll release your right hand out by your right hip. You can use a visualization if you like here, your hand being like an anchor, dropping down deep into the water.
Let the weight of your hand help to deepen the stretch right along the neck and shoulder region. This can be a good time for some self massage, you can take your left hand up and massage down along the side of the neck. Along the trapezius, working out any tight or tender places. One more time just, massaging along the base of the skull and along the neck and into the shoulder. Squeeze the shoulder for a moment.
Then we'll reach back and draw back to clasp either the back of the chair, if you're sitting on a bolster it would be the back corner of the bolster. Then turn your head, your chin toward your chest, your head towards your left knee, and you'll lean away from the point that you're holding to create a little deeper stretch. Breathing into that back right occiput or wherever you're feeling the stretch. This can be quite strong so feel free to make it gentler to just try it the first time perhaps a little easy so you can see how much works for you. You can always go deeper in your next practice.
Then as you release you'll let your chin come down towards the center of your chest. You'll release your hand and the hold of the chair and then you'll slowly sweep the arm up and out in front of you. Following your hand with your eyes again, making this a nice eye exercise. Feeling the movement of the shoulder, this is great for opening the heart center as well. Breathing into the heart's center.
This is a nice opening for Anahata, if you spent time at the computer. Two more. (breathes) This time as you sweep your arm around you'll take it out directly in front of you with the fingers pointing down. The wrist coming right out from the shoulder, and the shoulder relaxing so watch that you're not tensing that shoulder that we just released. With your other hand, your left hand, you'll clasp ahold of the front of the hand so the top of the hand, the palm faces you, fingers point down and then pressing your arm straight and forward you'll pull the palm of your hand towards your torso.
This is a delicious stretch for the wrists, opening up the tension, tight areas in the forearm. This is also really good for certain musicians that use their hands a lot or if at work you just find that you're doing a lot that requires a lot of your wrist. We're gonna take another breath here, softening the shoulder, and we'll take it another step into to a little different twist or opening for the wrist by turning the palm to face your face. Reaching around with your left hand clasp your thumb, get a good clasp on your thumb, and then slowly start to straighten your arm as you turn your pinky towards your heart. Now depending on how tight you are in your wrist you may not be able to straighten the arm.
That's okay, just start where you are and you will increase your flexibility as you practice these. Soft shoulders, deep breaths. Noticing how this feels in your hand and your forearm. You may feel it all the way up into the shoulder. (inhales) (exhales) Good, and then as you're ready you'll release but you'll clasp your hands together and we're gonna do a little figure eight lying on its side.
I kinda like to loosen up the upper body with this movement and the arms, so it doesn't have to be just in the wrists although it can be. (exhales) Just kinda let your day go, let all that accumulated tension release, have fun with this. Now the challenging thing is to change direction. So as you're drawing this figure eight you'll come back to center and you'll go the other way. So this is also an exercise for the brain. Using the left and right hemispheres.
Very good for autism and for learning disabilities as well, these practices. Stimulate the right and left side of the brain and then we'll take another breath, and we'll release and shake it out. Take a moment to feel what happened. Notice how your right shoulder, right arm, right wrist and hand feel. (inhales) (exhales) Then go ahead and relax, your left hand out by your left side.
Again that visualization of the hand getting heavy, drawing the shoulder and the arm down, and then bringing your right ear towards your right shoulder, just as far as feels comfortable for you. Beginning to stretch right into the side of the neck. Breathing into any tight areas there. Then you can take your right hand up and work out any tension. So massaging, along the base of the skull or the side of the neck or the top of the shoulder.
I like to start up high and then all the way down across the shoulder. Breathing deeply. (breathes) I'll take one more time and as you do, feel free to stop for a moment, squeeze the shoulder. Then release your hand, you'll reach back with that left hand and now clasp the back corner of the chair or bolster. You'll let your head come down towards your right knee.
So we're focusing the stretch into the base of the skull. What happens when we look at the computer screen sometimes is we can get very shortened in that region so this is a nice way to release it. You're leaning away, but don't go to your full nth degree, it's a very strong stretch, it looks really simple but it's quite powerful. (inhales) (exhales) Good, last time, taking a nice deep full inhalation. (inhales) Long exhalation and you'll bring your chin down towards the center of the chest as you let go of the hold of the chair or bolster and then you'll sweep the hand up.
Again following it with your eyes if you'd like to create an eye exercise. This is good for the shoulder, if this is too strong for your shoulder feel free to modify to make it gentler in whatever way feels good to you. (breathes) This also becomes a little bit of a twist as you pull the shoulder and the chest back. (inhales) (exhales) Just a couple more here, deep breaths. (inhales) (exhales) Then as you come around you'll sweep your hand directly out in front of you with the fingers pointing down.
You'll reach around, clasp ahold of the top of the hand, the palm faces your body, shoulders relaxed. Wrist reaches forward as you pull on your hand to stretch the top of the wrist and the forearm. Breathing deeply as these muscles lengthen. There can be quite a lot of energy congestion in the wrists if you spend a lot of time at the computer. It can cause things like Carpal Tunnel Syndrome so this is a good way to keep your wrists healthy, flexible, and keep the chi, the energy, flowing there.
(inhales) (exhales) If you're tight it can be quite a strong sensation. Then to move to the next wrist stretch you'll turn your palm to face your body. You'll reach all the way around with your right hand and you'll clasp ahold of your thumb. Then you'll start to straighten the arm, turning the pinky finger right towards the center of your heart. You can go just as far as you'd like, breathing as you soften your shoulders.
Remember if it's too strong to straighten the arm you can bend it. (inhales) (exhales) I sometimes do this sequence when I've been traveling, I've been carrying a lot of suitcases and things. It's great to give your wrists a treat. Taking just another deep breath here. (inhales) (exhales) Then you'll release and you'll clasp your hands again and do a nice figure eight lying on its side.
Feel free to move the upper body in any way that feels good to you. You can loosen up the head, and neck and shoulders. (breathes) The jaw relax. (breathes) Just noticing how your wrists are feeling. Movement helps to lubricate joints.
Great for all of the body. Then we'll come back through center and you're gonna go the other way. Noticing how that feels. Breathing deeply. (breathes) Can even imagine you have a light saber if you like (laughs) or you're holding something, dancing with something, just making a nice fluid movement here.
Then coming back to center, and we'll shake the wrists out. You'll scoot back now to sit right up against the back of the chair to support your back, and we're gonna do one more thing here, a special palming for the eyes. So you'll bring your hands together, you'll rub the hands together. (hands rubbing) If you have eyeglasses you'll wanna remove them and once the hands are really warm, fully charged, really activated with chi and energy, you'll cup your hands right over your eyes, so the very iris of the eye. The center of the palm, and holding, cupping around the orbital bone and sending this chi, this energy, into the eyes. Feel the eyes and the eye muscles relaxing.
Into the forehead and temples. (breathes) Flowing into the brain and quieting the mind. Feel that warmth also, flowing from your hands into your facial muscles, your cheeks, your lips, your jaw, even your tongue relaxing. (breathes deeply) Then you can slide your hands up to your forehead, and press your hands into your forehead, and slide the hands apart. Lastly taking the thumbs right into the base of the skull, and I like to pull a little bit, create a little lift, and lengthen for the neck.
Lengthening traction for the neck. Then you can release, release your hands, take a few more of those shoulder circles, you may notice the shoulders feel quite different now. (breathes) Then bringing your hands either to rest on your thighs or choose a mudra that feels good to you. Take a few moments to just breathe. (breathes deeply) Feeling the peacefulness, the clarity within.
When you feel ready you can gently open you eyes. Namaste.
Therapeutic Yoga: Yoga for Stress, Anxiety, and Grief
Comments
You need to be a subscriber to post a comment.
Please Log In or Create an Account to start your free trial.
