Description
About This Video
Transcript
Read Full Transcript
Welcome. Dynamic Flow 3 practice builds from Dynamic Flow 1 in Season 1. It's a little more advanced practice and it focuses on backbends and inversions. We'll begin in plank pose. Hands shoulder-width apart, straight arms, legs straight, toes tucked forward.
Pull the navel up a little, tailbone down. Keep your hips in line with your shoulders and heels. Breathing slow, 3 to 4 second inhale, 3 to 4 second exhale. Each inhale, feel the fullness of your breath through the back body. Feel the spine lifting with your breath slightly.
Each exhale as you soften into the shoulders, press down into the hands, pull the navel up, tailbone down, thighs engaged, extend through the heels. Keeping your hands where they are, lean your shoulders forward over the wrists, roll over the toes onto the tops of the feet, but keep your hips up, don't let the hips drop. Navel up, tailbone down. Keeping your toes as they are, push back into downward facing dog pose on your toe knuckles. Release your head and shoulders.
Keep breathing through the back slowly. On the exhale, hips and shoulders soften, arms and legs lengthen. And slowly roll over your toes, onto the soles of your feet in the dog pose. Softening into the hands, feeling the texture of your mat, softening into the feet. Each inhale, spine rounding, like you're coming out of the pose slightly, each exhale, hips and shoulders soften, arms and legs lengthen.
Coming forward into plank, lower one forearm to the floor, then the other forearm, and drop down into sphinx, tops of the feet flat. Walk your elbows forward so they're directly under your shoulders, forearms parallel, head upright. Breathe through the back, into the pelvic floor. Each exhale, soften through the belly, organs drop, lift through the back of the skull. If you want to go a little deeper into this pose, point your toes, lift the feet a quarter inch off the floor.
Lift the spine from the back of the skull. And releasing the feet to the floor, bend your right leg. With your right hand, reach back and grab the foot. Place the heel of your palm on the knuckles of the toes, fingers resting on the top of the foot, and press the heel down. If you can, spin the fingers forward.
Feel the palm still bending the toes down, head upright. Breathing through the back, into the pelvic floor. Each exhale, release the grip in your left gluteal muscle. As the buttock goes soft, press your right heel a little lower, lift your spine a little higher. Lift and inhale, slowly release, change sides.
So bend your left leg, left hand reaches back and grabs the foot. Heel of the palm on the knuckles of the toes, bend the toes down, press the heel down. If you can, spinning the fingers forward, heel of the palm on the toes, pressing the foot towards the buttocks, head upright. Keep your breathing slow, following the inhale through the back, into the pelvic floor, exhale, release the grip in the right buttock. As you feel the grip release, press the left heel lower, spine lifts higher.
And then if you can, keep the pressure on your left foot, bend your right leg, press both heels down, head upright. Shoulders dropping, spine lifting. And releasing, grab your ankles, flex your heels, lift your thighs off the floor and gently rock on your pubic bone. And then lift up, roll to your right, onto your backs. When you're on your back, lift the outer shoulders away from the floor, spread the skin across your shoulder blades.
When you feel that broadness across the shoulders, relax the shoulders down, pull the chin down a little towards your throat, and slowly lift your hips up. As the hips lift, soften your throat, chin drops, neck lengthens. Each inhale, breathe through the back body. Each exhale, soften the top of your lungs, feel your heart drop a little, simultaneously lift your hips higher. So each exhale, there's a release through the shoulders, chest, and throat.
Feel the heart and thyroid dropping, pressure into your feet, hips lift higher. If you want to go into full wheel, bring your hands next to your ears, palms down, fingers pointing towards your feet, and roll up onto the crown of your head. Keep half the weight on your hands, half the weight on your head. Pull the elbows in so the forearms are parallel. Inhale slowly.
On the exhale, press up. Inhale down to the crown. Exhale press up. Inhale down to the crown. One more.
Exhale, press up. Inhale coming down, tuck your head in, lower the shoulders to the floor, keep your hips up, grab your ankles if you can, back to bridge. Slow your breath down. Each exhale, release the shoulders, chest, and throat, lift your hips higher. Chin sinks lower.
Keeping your hips up, slide the right foot next to your left, feet together, then lift your hips as high as you can, pressing into your feet. Keeping the hips up, roll to your right, back onto your mat. Lift your legs, and then roll to the left, onto your back. Slowly lift your shoulders first, spread the skin, and then lift the hips. As the hips lift, the chin drops.
Each inhale, breathe through the back. Each exhale, top of the lung softens, heart drops, lift your hips higher. If you're going for more, hands beside the ears, fingers pointing towards the feet, roll onto the crown of your head. Keep half the weight on your hands, half the weight on the head. Pull the elbows in so the forearms are parallel.
Inhale slowly. Inhale, press up. Inhale down to the crown, exhale, press up. Inhale down to the crown, exhale, press up. Inhale coming back, tuck your head, release onto the shoulders, keep your hips up, grab your ankles, slow your breath down, and slide your left foot beside the right.
Lift your hips as high as you can, keeping the hips up, roll over your left arm, back to the center of the mat. Lift up, releasing the ankles, arms come forward, legs back. Arms out, arms back, curl the wrists, bend your knees, lift your thighs, and release. Hands next to your armpits like a push-up. Pull the elbows back, shoulders down, slowly curl the spine up, head last.
Doesn't matter how straight the arms are. Each inhale, breathe through the back, each exhale, release the diaphragm, soften the top of the lungs, heart sinks, lift the spine. If your arms are straight, lean the head back, chin sinking toward your throat, neck supported. Bend in the knees, touch the back of the skull, mentally, with your toes, good, and release. Coming into child's pose momentarily, arms forward, sit on your heels.
If you're feeling that your back is done for backbends, you can stay in child's pose. If you want to go one more pose, come up onto your hands and knees. Have your hands shoulder width apart, turn your fingers out 45 degrees. Slowly bend the arms, elbows under the side ribs, chin to the floor. With your chin on the floor, tuck your toes forward, straighten your legs.
And walk your feet in, lift one leg, and then hop up. Once you're up, bend your knees. And coming out, not an easy pose to talk in. All right, child's pose, arms forward, release your head, slow your breath down. And now coming up, all together, stand up, and we'll move to the wall.
Walk back so your back is flat on the wall, and even at this first position here, you're going to pull the navel in, try to flatten your lower back, drop through the shoulders, lift through the back of the skull, head on the wall. Take the arms up, extend through the fingers, back of the wrists on the wall, release your collarbone, slide the hands up taller, pull the navel in a little bit, relax your diaphragm, feel the abdominal organs drop, soften the top of the lung, feel the heart drop, extend your hands higher. So each inhale, breathing through the back like the wall is part of your lungs. Each exhale, soften the collarbones, soften the top of the lungs, heart sinks, extend the hands higher. Then release your arms, take one comfortable stride away from the wall, feet hip-width apart.
So as if we're still standing at the wall, take your arms up, extend through the fingers, and it's literally like a virtual wall behind you, chest drops, diaphragm softens, abdominal organs drop, extend your hands higher, collarbones release, arms reach. When you're ready, fingers reach back, arms reach back, hips come forward, chest dropping. As the hips come forward more, take the head back, look for the wall, and then commit, then the arms push off. So it's just a gentle, reach your maximum standing back then, commit, drop to the wall, and then come up. From here, we're going to take half a step forward, not much, feet hip-width apart.
Still with that idea of a virtual wall behind you, extend the arms up, chest dropping, belly soft organs dropping, release the sphincter muscles, tailbone drops. So each exhale, simultaneous release through the shoulders, chest, and belly, even the pelvic floor, organs drop, extend up through the fingers. When you're ready, fingers reach back, arms reach back, hips come forward, chest drops, chest drops, head looks back for the wall, commit, bend the arms, push off. So it's starting to get a little more exciting now, half a step forward more, arms up, chest down, slow, even breathing. Each inhale, breathing through the back, each exhale, releasing through the shoulders, through the chest, belly, release through the sphincter muscles, tailbone drops, lift the hands higher.
And slowly reach the fingers back, arms reach back, hips come forward, chest drops, so heart sinking towards the spine, turn your head back, look for the wall, commit, push off. Okay, so here's the moment of truth, do I stay where I am or do I go a half a step further? I'm going to go for it half a step further. Arms up, chest and belly soft, heart dropping, abdominal organs dropping. So you feel as the weight of the organs drop, this heaviness in the pelvic floor which helps ground your legs and feet into the mat, it gives you that solid base to lighten, to lift through the upper body.
Lower body heavy, upper body light. See yourself reaching the wall. For those who want to go deeper when you reach the wall, we're going to walk our hands down the wall to the floor, or not, you can just push off, stand again and wait for us to join you. So arms up, chest and belly down, sphincter muscles soft, tailbone dropping. When you're ready, fingers reach back, arms reach back, hips come forward, go slow, chest dropping, hips forward more, chest dropping, look for the wall, commit, bend the arms, if you're going for the floor, walk the hands down to the floor, have the wrist right at the baseboard, release your head.
If you want to go deeper here, lift your heels up, walk your feet in, press your sternum to the wall, slowly, and then when you're ready to come up drop your heels, walk your hands back up the wall and push off. Spend a moment standing, releasing down through the chest, slow even breathing, and now turn face the wall, drop down onto your hands and knees, have your hands about 12 inches away from the wall, drop down onto your elbows, forearms parallel. To set this pose up, bring your elbows in a little closer so your hands are slightly wider than the elbows, and then gently press into the heel of your thumb to ground your hands, tuck your toes forward, straighten your legs. The first part of this, I want you to walk your feet away from the wall and then pressing strongly into your forearms, push back and lower your forehead on the floor. When you feel that grounding of the forehead relax your collarbones, feel your shoulders spread a little bit, and then keeping that space in your shoulders, lift your head, walk the feet forward until your upper arms are vertical, lift one leg, like handstand, point the toe, see yourself free balancing.
If you overshoot the walls right there, drop the foot, swing the leg up. So if one heel goes to the wall, keep the other leg off the wall. Pull the navel in, tailbone forward, and if you can, scissor your legs together. When you're ready to come down, come down. Child's pose, tops of the feet flat, arms forward.
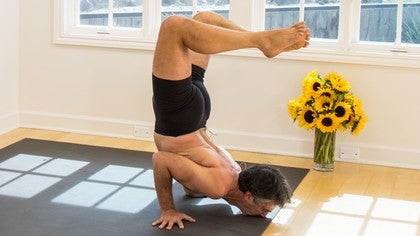
Slow your breath down. And now moving into headstand. Drop the elbows to the floor, interlock your fingers, have your palms apart. Make sure your elbows are directly under your shoulders. Pull the navel up around the spine, lower the crown of the head to the floor with your hands cupping the back of the skull.
Lift your collarbones away from the floor, don't let the shoulders drop here. So the collarbones lifting, tuck your toes forward, straighten your legs, keep lifting your collarbones, then walk the feet forward a little, keep the collarbones lifting, hips moving over the shoulders, and then roll onto the tips of your big toes. Then lift one leg, keep lifting the lifted leg, and then slowly scissor the legs together. If you need to use the wall, come down, use the wall. When your feet are up, lift your collarbones.
Pull the navel in, tailbone forward, legs move back a little. Around the grip in your hands, keep the collarbones lifting. The work in headstand is to keep the weight on your head. Keep the collarbones lifting, very little weight on your arms. If you want to do some variations, drop the legs wide apart into side splits.
Point your toes. Keep lifting your collarbones. Then right leg comes forward, left leg back into forward splits. Keep lifting your collarbones. Back to side splits, then left leg forward, right leg back.
Keep reminding yourself to lift your collarbones, it helps protect the neck. Keep the grip in your hands soft, and then scissor the legs back together. Legs vertical. Pull the navel in, tailbone forward, legs back a little. Weight on the crown of the head, soft in the hands.
If you're going for more with the arms, release your palms flat to the floor. Steady your balance. If you're going further, tripod. One arm, then the other arm. Keep lifting your collarbones.
Navel in, tailbone forward, legs back. The final pose, arms straight, back of the wrist flat. Navel in, tailbone forward, lift your collarbones. If you're coming down, keep the collarbones lifting, slowly lower the legs. Now resting in child's pose, arms forward.
Slow your breath down. Lifting the head, take your knees apart, sitting on your heels. With your elbows the same width as your knees, lift your hands up. Turn your head to the right, place your chin in the right hand. Left hand supports the side of the head.
Release the full weight of your head into the hands. Keep your belly and butt soft. Slowly press your forehead down towards the floor, and simultaneously rotate your chin up. When you reach your maximum pause there, soften the belly and butt, release the full weight of your head into the hands. With an inhale, bring your head back to the center, and then the other direction.
Turn your head to the left, place your chin in the left hand. Right hand supports the side of the head. Release the full weight of the head into your hands. Belly and butt soft. And slowly press your forehead down towards the floor, rotate your chin up.
When you reach your maximum pause there, releasing the full weight of your head into the hands. Belly and butt soft. With an inhale, slowly come back to the center. Curl the tips of your fingers into the back of the skull, right at the base of the skull. Have the face of your nails together.
And hooking the fingertips into the flesh, slowly lift your head. Slide your fingers apart, pulling the flesh away from your neck. Then drop the head again, move one vertebrae lower. Curl the tips of the fingers right into the bone. Face of the nails touching.
Hooking the flesh, slowly lift your head, pull the fingers apart. And last one, drop the head, curl the fingers into the neck, face of the nails touching. Hooking the flesh with your fingertips, lift your head, pull the flesh apart. And then last adjustment here, counter posing, place the thumbs in the curl of your forefinger with the thumbs sticking above the finger about a quarter of an inch. Separate your teeth and place the tip of your thumb right into the hinge of the jaw.
As you sink the thumb into the hinge, release the full weight of your head onto the thumbs. We get a lot of tension in the jaw and headstand, and this is always a wonderful counter pose. To take the tension out of the jaw. As you rest onto the tips of the thumbs, gently rock your lower jaws up and down. Just the jaw, not your head.
And then slide the jaws side to side. Up and down. Side to side. And release, move the thumb up into the heart of the masseter muscle, which is just above the hinge of the jaw, but still below the ear a little. Below the cheekbone.
You're going to press the tip of the thumb right into the heart of that muscle, maybe a little tender. And then try to release the full weight of your head again onto the thumbs. Teeth apart slightly. And rock your lower jaws up and down a little. Side to side.
Up and down. Side to side. Then releasing the thumbs, last one, right into that dimple, above the masseter muscle, below the bottom of the cheekbone, opposite the ear, center of the ear. Press the thumbs in and release the bottom of the cheekbone onto your thumbs. Full weight of your head resting on the thumbs.
And lower jaws up and down. Side to side. Up and down. Side to side. And release.
Bring your hands on the floor, bring your knees together, cross your one ankle over the other, push the legs through, sitting in dandasana. This completes the back bend inversion sequence. Namaste.
LEVITYoga: Deepen Your Practice
Comments
You need to be a subscriber to post a comment.
Please Log In or Create an Account to start your free trial.
