Description
Transcript
Read Full Transcript
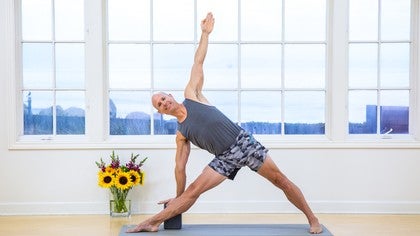
Om. Namaste. Nice to have you here. In today's session, we're going to be working on something known as the outward spiral. And this is particularly relevant to the pelvis, the legs, and it is all about really the lateral poses. Poses like triangle pose, side angle pose, parshal konasana, half moon. We want to talk about this in particular relevance to the knee joint and the hip and how this all influences together. So I want to start you out today with wide legs and experiencing what external rotation is. We'll start here taking a look at the right leg. And if you'll take a look at your own leg there, use your hands if you need to and you can start to see what, how the leg rolls in and out. Take a little practice of this for a moment and look at your own leg and see that you can turn it inward and you can turn it outward. Good. And you might notice as you turn the leg in and out that there's a reaction here in the pelvis as well. So we see that when we turn the leg in, the tailbone sticks out a little bit, the back arcs. When the leg spirals out, the tailbone goes down, the back lengthens, elongates. See if we can practice that together. Turning the leg in, the tailbone goes out a little bit. Turning the leg out, tailbone goes down, lower back gets longer. One more time, let's do it together. Tailbone comes out with internal rotation, outward spiral, tailbone goes down. That's the first step I want to work together in understanding the outward spiral. The next step is going to be how the pelvis influences our ability to turn the leg in or out. And this is critically important for the health of the hip and of course the knee joint because these are intimately connected. So we'll take a wide stance again and turn the right leg out. Take a moment to feel the bony landmarks of the pelvis. We're going to start on the front here and you can feel these two sharp bones on the front of your pelvis. Feeling layer, let's try something. You commonly hear in yoga poses, turn the pelvis straight ahead forward. Right? So we're going to have the hands on the hips and explore what happens when you turn the pelvis fully forward like I'm showing here. What happens to your leg, your bone, your knee joint? Let's do it a few times. Holding onto the tips of those bones there, turn the pelvis square forward and you might find that your leg is internally rotating. The knee is being pulled in. Why does that happen? The hip joint is actually locked. So let's relax that for a minute and turn the pelvis a little bit more forward towards this right leg. And you'll start to feel that there's that freedom that we found just a minute ago in external rotation. See if we can find it. External rotation happens. If I once again turn that pelvis square ahead with the knee and pelvis, excuse me, the thigh and knee rolling in, we try to externally rotate. It can't happen. You're locked. And so this over time, if we practice the poses like this can create trouble in the hip joint and even the knee joint right here. Let's try it one more time. Hands on the front of the pelvis. We're going to turn the pelvis just a little bit. You don't need to turn much just until you start to feel, ah, there's that rotational freedom again. This is critical for the health again of the hip and knee as we practice the poses. Turn the feet in. Let's bring the legs together, shake it out and relax just a little bit. The next step I want to talk about is the position of the pelvis. We briefly touched it a minute ago, but turning the pelvis under or tailbone out. Let's do wide stance again from here. Turn the right foot out. We'll keep working on the right leg and anchor it into the brain. Turning the leg external. Actually, let's do this. Let's start with a pelvis first. We're going to turn what we know, turn the pelvis a little bit forward towards that right leg. Practice that external rotation. Do the opposite now internal rotation, and then it becomes really obvious. We can feel there comes my tailbone sticking out from the back. Externally rotate, tailbone goes down. So we have a coupling of action. External rotation takes the sacrum and tailbone down and elongates the lower back. This is critical when we put it all together. You'll see this more, but as we come into the pose, if the leg is internally rotated, tailbone out, I come into the pose and you see that my neck will kink, my back becomes arced and we may have trouble down the line. So as we practice the lateral poses in particular, again, lateral poses like triangle pose, side angle pose, half moon pose, these are important concepts to understand. Let's do it again. Turning the pelvis a little towards the right leg. External spiral, tailbone and sacrum down. I'm going to turn around for just a minute so you can see what that looks like from a rear view. All right. Opening the legs again, and I'll turn out my left leg just so you can see a little bit clearly. If I internally rotate that leg, my tailbone comes out towards you. If I externally spiral that leg, my tailbone is free now to lengthen down. This makes space for all the organs. And again, it clears that hip joint and knee joint from any future trouble. You can help this. You can feel it with your own hands by touching with your thumbs, the sacrum and tailbone. Turn the thigh in. I feel that sacrum poke right out into my thumbs. Turn the thigh out. I feel that sacrum and tailbone going down. I feel that length in the lower back. All right. So let's try and put all of this together. We'll start from Tadasana. Step the legs out wide and go through what we know. Turning the right leg out. Let's put the fingertips on the pelvis for just a second. We're going to practice triangle pose. Do a little bit of a turn of the pelvis toward the right leg and practice that external rotation we've been working out. If you want to touch that leg, get feedback from your own hands. This is a great thing to do to connect your mind, your nervous system to the actual physical body. Turning that leg out, sacrum and tailbone down. Stretch out your arms. Your job then is to feel those actions in place as we extend into the pose. Let's just take it halfway out and then come back up. Reestablish what you know. You can keep your arms or you can touch the pelvis. Again, do a little turn.
External rotation. Sacrum and tailbone down. A breath in. Exhale your way into the pose. Then you keep the external rotation of the leg. Sacrum and tailbone down. External rotation of the leg. Sacrum and tailbone down. If you like to put your hand on a shin or a block if you have it nearby, all of those are good things to do. On an inhale, come up. Turn the feet in. Walk the legs together. Before we enter our next pose, I'd like to talk about a little trick our foot can play as we're working on the external rotation. Let's take a wide leg stance and see this in action. Turn the right leg out as we've been working on that. Let's work with the pelvis first. Touch those pelvic bones and give a little tiny turn of the pelvis toward the right leg so we have the freedom of external rotation. Let's do that external rotation and you'll take a look at your right foot. Some of you may find that the big toe mound, this point right here, tends to come up off the ground. It's quite common. Our job is to press that big toe mound down into the floor. Here's where it can get a little tricky. When we do that, we sometimes tend to roll the thigh in. We're going to work by lifting the toes as you see me doing there. Lift the toes. Press that big toe mound and practice that external rotation. You can see my leg doing it there. One more time. I'm going to lift the toes, push that big toe mound into the floor and use that contact to help me turn the leg out. Now I'm ready. We can let the toes down, stretch the arms. Why don't we go right into triangle pose here since we're anchored and ready to go. Take a breath in, keep the contact of the big toe, external rotation of the thigh, sacrum and tailbone down, and we'll go down hand on shin. Take a moment to feel those three things, big toe contact, external rotation of the thigh, sacrum and tailbone down, and now let's inhale and come up and turn the feet in and walk the legs together. Let's take a little pause, shake out the legs. We're going to work into the next pose, side angle pose, known as partial Konasana, and we're going to work on these concepts with a bent leg. This is where it gets a little bit tricky again. Just takes a little practice is all. Let's take a wide leg stance. We'll turn out the right leg.
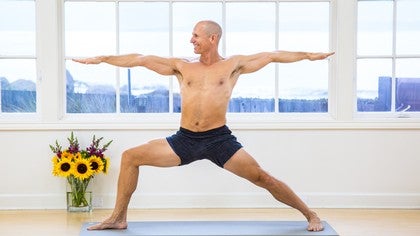
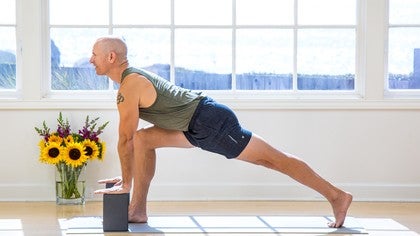
Let's do what we know. Hands, fingertips to the front of the pelvis, turn the pelvis a little bit toward the right to get that external rotation freedom. Big toe in contact with the floor. So let's start by slowly bending that right knee. Big toe mound in contact with the floor, external rotation of the right leg, and we keep that feeling, keep that feeling of turning the thigh out, turning the thigh out, turning the thigh out. In this case, it actually, because it's bending, we're now it's like turning the thigh down toward the floor. Let's come out and try it again. Little turn of the pelvis, big toe mound well into the floor, external rotation, and we'll keep that as we enter the pose. Keep that as you enter the pose. There's a feeling you keep the outer foot pressed into the floor for that rotation and then bring it up. Feet in, close the stance. Let's shake out that leg again. From Tarasana now, we're going to do the full expression of the side angle pose. For this, you might want to get a block as we're going to be going deeply to the side. So I'll grab my block here and set it up in its tallest position. Let's take a wide leg stance now to do the pose. Let's do what we know. Once again, we're anchoring all these things in with repetition. That's how we're going to learn this stuff. We'll turn the right leg out, touch those fingertips of the pelvis and get that little rotation so we get the freedom to do the external rotation of the leg. Don't forget that big toe mound. Remembering that this external rotation of the leg, sacrum and tailbone down, and I'll use a new word, in. In other words, if the sacrum and tailbone goes back, the tailbone comes out. So we want to do toe external rotation, sacrum and tailbone in. Let's do it. Arms out, take a breath in, exhale and bend that knee, keep the contact of the big toe, that external rotation as we extend over to that right side. And we won't worry about taking this arm over our head right now because we're focused on the hip. And then let's come back up. We'll keep the legs, but relax the arms. I want you to have a particular visual now of my hip doing the incorrect thing. Sometimes it's helpful to see the incorrect thing, and then we'll correct it together. So take the arms out, bend the knee as we've been doing, but I'm going to let the thigh spiral in a little bit and collapse my right arch. This sends my bottom outward. And you'll see that it begins to distort the pose. My neck is now kinked. I'm going to show you the correction in the pose so you can see how that will change. I again push the big toe mound. I have my arch. I'm going to spiral out and you'll see the whole pose begin to change. I have space in my body again. Let's do it from the top though. Stretch the arms, take a deep breath, press the big toe. We have external rotation and we're going to keep that and sacrum and tailbone down and in, down and in. And we're there together. And then inhale and come up. Turn the feet in, heel toe the legs together, relax your arms and shake out those legs. We've been using them a lot. Shake out that right leg. In the next session, we're going to tie all of this together and put it into a whole sequence so you can see how this will work throughout a number of different poses. Again we'll be working on the pelvic position, external rotation of the leg, the contact of the toe and how all of this will help all these poses blossom and keep the health of the knees and the hips in place. Om. Namaste.
Yoga Rx: Nathan Briner
Comments
You need to be a subscriber to post a comment.
Please Log In or Create an Account to start your free trial.


