Description
About This Video
Transcript
Read Full Transcript
Welcome. In this episode I'm going to share a hip opening sequence that I call Circling the Hips. It's a great sequence for beginners, intermediates, and advanced students. I'm going to start by just taking the legs straight out. You can shake out the legs. From here we're going to take the legs straight out. This asana is known as uttavishta konasana. Now make sure you're balanced. You're not rolling inwardly too much. You're not rolling externally too much. You're just nice and balanced on the leg bones. And hands can be behind. And as we warm up into this, all you're going to do is you're going to reach through your heels and then you're going to point the toes. Do this three times. Reach through the heels without overhardening the balls of the feet. And then point the toes. One more time. Reach through the heels and point the toes. This just starts to open up the tendons and the lower legs. Now take your hands out in front. Just be easy with this. Some of you may just want to come here. This might be your edge here. Some of you may want to come down to the forearms. And if your body is allowing you to go a little further forward into this, you can walk the hands out. Reach through the heels. Allow the neck and the head to relax and take three breaths here. Ground the thigh bones. Deep inhale to the lower abdomen. Exhale from the lower abdomen. Navel back. Inhale. Ground the thigh bones. Exhale. One more breath. Inhale. And completing that exhale. Slowly make your way up. And again, one more time you're going to take the hands behind. Reach through the heels. From here we're going to work with a variation of Uptavishta Konasana. We're going to be twisting from the waist. Now as you turn to your right, this is key. You're going to place your right hand to the thigh and you're going to take your left hand to the shin. What you want to avoid is this is turning and just kind of collapsing into this. You can see there's no waist work happening here. What I want to do is I want to apply just the right amount of pressure with this right hand to the thigh and this hand it's holding on to the shin and it's helping assist. What I want to do is I want to get a nice twist in the waist here. So as I turn from the waist to the right thigh bone I inhale and then as I exhale the left elbow can bend. Turning from the waist. Exhaling from the lower abdomen. Make your way in. Some of you might come in a third of the way in. You might get halfway in. You might get a little further into this. Take a breath or two here. Deep inhale. Exhale. Inhale. Exhale. Note that my head is in line with my shin. I'm not turning my head off to the side. I stay in line with this leg and this will help keep me in the waist. After about three breaths rise up and just turn from your waist to the left. Left hand to the left thigh. Fingers turn in. Right hand to the upper left shin.
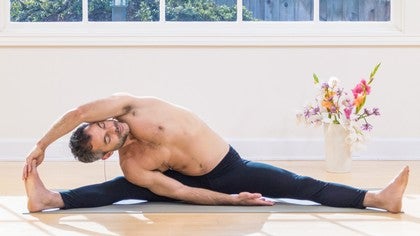
And then with the help of the hands you're not aggressive here but with the help of the hands apply a little pressure with that left palm into the thigh and turn the waist. Inhale. Receive the in-breath and as you exhale make your way in with each breath. Inhale. Exhale from the navel. A couple more breaths. Inhale. Keep the legs grounded. Thigh bones grounded. Reach through the heels. Again without over hardening the balls of the feet. Exhale from the navel. Last one. Although the arms are helping we're not aggressive with the arms. Rise up. Make your way back to the center. Center of the spine and from the twisting up to Visto Konasana we're going to go into the side bend variation. Now take your right hand and you're going to turn the palm up and you're going to reach towards your inner left thigh and as you do so as you reach towards the inner left thigh you're going to cut in right on the right ribs lower ribs and then slowly the left arm is going to arc over to the right foot. Now some of you this left arm might be up quite a bit some of you it's going to come down a little further. Over time the left hand will meet the right foot and this right arm relax that right shoulder. You can very gently again you're not aggressive with it. Gently rotate the torso up towards the ceiling towards the sky. The gaze can come under the left arm. Take a breath or two. At the end of your next exhale when you come up keep the legs grounded but allow that left arm to help lift you up. Reach up nice and easy and as you drop into the left side left palm up reach towards the inner right thigh and then the right arm is going to arc over. You get a nice opening on the right side of the body. Again some some will be up with the arm. Over time as you get more and more opening this hand will meet the left foot and then very gently revolve the torso towards the sky. Stay with the breath.
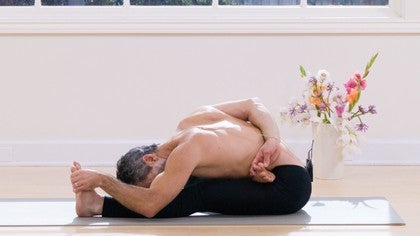
One more inhale and exhale and again keep the legs grounded and very gently reach up with that right arm and it'll help lift you up. As that right arm comes down take the arms behind and then we're going to sweep the legs in. Moving from Uptavish to Konasana we're going to move into Pigeon Pose. This is going to take us into the outer hips now. As you turn to Pigeon Pose the right leg is pretty much at a right angle. If your hips are a little stiffer this may be a little difficult. What I want you to avoid is pulling the foot too much in. This actually starts to block the circulation into the knee. So find a comfortable position. It's nearly at a right angle. Now this is key. The right hip should stay rooted to the floor. Many times Pigeon is taught where this hip comes off the ground and then we walk ourselves out. I like to avoid that. The reason being is when you start to lift the hip we're actually walking away from the hip and we're taking a lot of our body weight over the knee and then we start to walk away from the hip. We're actually walking away from the opening. So even if you can't square the hips I'm advocating keeping this hip grounded. When this hip stays grounded that's the base. That's what we're trying to get into and then as you make your way down you're not going to stress the knee. If again if you throw your upper body weight over the right knee a lot of times that'll take the stress. It's not necessarily going to strain the knee immediately but over time this is done repeated repeatedly it can actually stress the knee joint. The idea is you don't want to run away from the hip. That hip staying grounded is key. So you're keeping that hip down lower yourself down. You might find that this left leg doesn't square itself. Over time as the hips become more open you'll be able to square and I prefer to stay pretty close to this front leg. Again I'm not walking away from the hip and that's just how I like to approach it and it'll take you deep into the hip here. Now if you're not feeling it in the hip and you want to kind of emphasize getting into that hip sometimes I'll take the hand and you'll actually make a little fist and you'll actually need the plantar fascia tendon and you'll feel when you press into this tendon into the sole of the foot you'll feel it transfer back into your right hip. And so you can just kind of check in there make sure you're getting that opening and then slowly once you feel set you can start to settle more into this. Relax in the head, shoulders, and then just working with the breath slowly. Over time you know I might hold this you can hold this for two, three minutes, even longer. If you're finding that the opening kind of meets a plateau you can angle your upper body in different directions and it'll hit different sections of the hip. So if you start out like this and you're starting to have plateau and you want to get a little deeper you can angle your upper body towards the foot and you'll hit different sections of that outer hip, the right outer hip. Again watch the neck and head if you tend to tense the head allow the head to relax. And then over time the hips will start to square more and more. When you feel that you've created enough opening and it's time to switch all you do is you sweep that back leg out in front take both legs out in front you can do a little shake if you like get the circulation happening and then bending the left leg take the right leg behind make sure there's space in the knee keep that hip down even if you can't square the hips and then start to settle into this. You'll be on that inner right thigh or knee slightly and just begin to ease into your left outer hip. This is what we want to open here. Again we don't want to run away from it you can take your right hand you can make a fist and you can apply a little pressure into the plantar fascia tendon the sole of the foot and that'll heighten the opening in that hip you'll feel it transfer here and then when you feel like you've started to open up that area it's lighting up you can settle the arms however you like without reaching too far out. Neck and head relaxed. If you feel like you want to hit some different angles in the hip you can take the upper body and just from the waist you can turn yourself inward towards this foot and you'll feel different areas of the hip light up. Stay with the breath and then when you've had enough of that you're going to slowly sweep the legs out and then we're going to do an easy Paschimottanasana. It's the seated forward bend the thigh bones grounded you can take the hands out get a hold of the big toes cross the thumbs reach through the heels inhale and let the navel take you in exhale ground the thighs fold. Two to three breaths here. One more inhale exhale release. As you sweep the hands back I always like to do Purvottanasana. It's the counter pose to Paschimottanasana. You can lift and reset your heels point the toes exhale fully hands are no more than a foot behind the hips fingers point forward and on your next inhale lift the hips point the toes head back inhale exhale release all the way down and then turning turn to the front and I'm going to show you one more hip opener. This is one of my favorite hip openers it's known as Gomukhasana and it gets in both the outer hips. At the same time one side will be a little more emphasized than the other. This is called Gomukhasana and there's different ways of getting into this. I do this posture quite a bit so I can just sit here and I can take one leg over the other kind of stack the knees I'll lift the hips a little bit once I've positioned the knees and then you settle into this. If that's not happening for you and you try to cross the legs and they're not really moving in that direction then I recommend taking the hands flat get into this box position you take one knee to the center of the box and then you're just gonna lift the back and you're gonna sweep that right leg out to the left and you're gonna take the left knee behind the right knee and then you sweep the left leg out and then you'll settle back into this seat. Gomukhasana is a great seat for opening the outer hips and it basically does the same thing as pigeon does. Now when I'm in this position again I like to knead the arch of the foot and then I'll take the thumbs right to the ball of the foot. These are powerful acupressure points and then I'll actually take the palms right to the balls of the feet and then we're gonna do a little twisting here and all you're gonna do is you're gonna just take your left shoulder to the right exhale and then you come up inhale and then you're gonna go right shoulder to the left. It's a nice little twist to add into the hip opening and you just do this do three rounds. Exhale to the right inhale up exhale to the left from the navel one more time inhale up exhale to the right inhale up and last one to the left exhale and then inhale up and the last section here is you're gonna take the chin down to the inner knee if it's happening if you have the opening you just release yourself down and you lightly place just between the lower lip and the chin right on the knee and then you relax your shoulders slowly coming up hands behind you to exit out of this take the right leg out take the left leg out and then switch sides again if you have the opening you can just take the right leg in left leg over stack the knees and you're in if you have a little more difficulty getting into this position come on all fours hands and knees take the left knee to the center point between the hands and knees and then lift the back knee sweep your left foot to the right take your right knee behind the left sweep the right foot to the left and then ease your way back into this seat again you can check in with the arch and do a little acupressure and then take the palms to the balls of the feet as you settle into the seat now we're gonna do the twist you inhale and you're just gonna turn from the waist to your left exhale inhale up exhale to the right left shoulder to the right exhale from the navel inhale up feels really nice in the waist exhale and enhances the opening in the hips to inhale up exhale to the right inhale up to the left exhale inhale up and the last one exhale to the right as you rise up inhale center the spine and again we're gonna take the chin between the lower lip and the chin to the inner mound of the left knee you just settle it very gently stay with your breath and slowly rising up release the legs out I hope you enjoy the sequence call the sequence circling the hips all these postures get into the inner leg line the outer leg line the back side and the front side so you're gonna work with a whole band around the hips something that I like to point out there's a connective sheet that runs from the sole of the foot through the ankle through the Achilles up the back of the leg through the hamstring up through the sacrum up the back of the spine through the neck and it comes over and it roots to the eyes it's a long connective sheet so when we're working with the hips when we're opening up this entire junction we're not just opening up the hips we're actually opening up an entire sheath of connective tissue that runs all the way up to the lower mid back upper back neck skull so although we sometimes might think we're just working with one region we're actually working with the entire body so I hope you enjoy this thank you
Yoga Chi
Comments
You need to be a subscriber to post a comment.
Please Log In or Create an Account to start your free trial.
