Description
About This Video
Transcript
Read Full Transcript
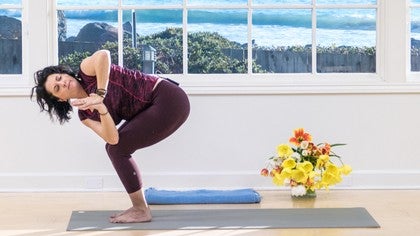
Namaste. Welcome to Unwinding the Heart. So this class is about creating space in the chest, opening the hands and the arms, shoulders, backs of the armpits. We're gonna work to create not only lengthening in the chest, which is kind of used to lengthening and opening this way, but also opening horizontally. We're gonna start with another mudra, one of my favorite mudras. Mudra, mudra, mudra's snake, right? So what you'll do is you'll cross your arms and turn the palms towards one another, interlace the hands, and then roll the hands in. You're gonna nestle your hands so that the fingers touch right into the breast plate and you're gonna slightly lift the skin. It's a very simple mudra. This is an excellent mudra to teach your kids. It's an excellent mudra to do to get your your brain back online. It's also great for the immune system. It's also great for the contact with your two hands and your heart, just like Anjali mudra that we do when we say namaste. So as you take this posture you're gonna create that lift and then relax the shoulders. Take a breath. Don't overgrip the hands. You may already be feeling some discomfort in your hands and possibly your wrist. I have a remedy for that. Just hold on for just a moment. One more breath and then let's release. Now keep hanging onto your hands. I want you to notice which arm is on top. Whatever arm is on top is going to go to the bottom. So you'll release the hands, slide that arm underneath, interlace, and roll the hands back up again. Again the fingers dig in a little bit to the sternum, right where the thymus is, and lift slightly. The shoulders relax. Feel the spine elongate. Soften your eyes and breathe and notice the contact that your hands are making. Notice where the hands are not making contact because the more you practice this mudra the more the relationship of contact with the hands will change. You'll have more and more and more connection. Take a breath. Put a little bit of a smile behind your eyes. The body loves this mudra. It's also a great mudra for kids when they're a little anxious. It's sort of a way of hugging yourself but also aligning the heart with the quality, the common quality of the mind. So this mudra mudra, we'll be using it throughout class. Go ahead and release your arms. Now if you were feeling that in your wrist, if you're feeling that in your hands, I have the remedy for you next. So what you're gonna do is take your blanket, plop it out to the side there. We're gonna lie on our backs. So come on to your back. I'd like you to keep your legs bent to start. My palms are going to be facing down. I'm gonna slide my right hand underneath my right rump, my left hand underneath my left rump. And probably when you do this too, your arms are slightly bent. Now the next option is to start to inchworm the body away from the hands. Arms will start to go straight but you don't want your hands to move. You actually want to kind of keep the hands in place. You're squishing the hands down, particularly the thumbs. And then you're going to straighten your legs which applies even more weight to the hands. And then you're gonna inch the shoulders away even a little bit more away. Now occasionally I'll have a student at the studio that says, wow this is just a lot for my back because it's an incredible extender for all the tissues that rest across the sacrum. If that's you go ahead and bend one leg just a little bit but maintain the relaxed state and pressure on the hands. We want the hands to be flattened out. Take a breath. By now you're feeling it also in the forearms. So this is an incredible way to release tension in the forearms. Most of us have a tremendous amount of tension in our forearms. And the more you do the mudra, the more that releases. So keep wiggling. So I'm kind of encouraging my arms to move a little closer to one another as I encourage them to straighten. But I don't let the hands wiggle at all. The hands just stay planted. Nice breath. This is super uncomfortable. This is a great thing to do on carpet. It's not a great thing to do if your dogs are in the room because they will come and lick you all over the face. So if you have dogs in the room you're in trouble. You probably have already figured that out. A few more breaths. By now you may be noticing tension that's occurred in the upper arms. So it's there's a uncoiling process that's taking place and unwinding. The arms are such an expression of our heart. So are our hands. So as the tension is relieved from the hands and the forearms and the upper arms, the tension is also relieved in the heart. So at about this point you're probably starting to feel some tingling in your hands. So go ahead and bend your legs. Lift the pelvis up and just slide the arms straight out. Keep them face down. Bring the pelvis back down to the floor and just rest there for a breath or two. You'll feel a cooling sensation probably roll through the arms and the hands. You can roll the hands over and just wiggle the fingers around a little bit. This practice is excellent if you have had a break in your arm. Of course it's got to be healed first. Make sure it's healed. Or breaks in the fingers or problems with the hands. It's really amazing because it's helping to open the connective tissue that has bound down around the injury in order to help it heal and to protect it. So it helps to open that as well. We're gonna roll to our side now. Just bring yourself up. One more time we're gonna take budra mudra. Can you see the two snakes?
So the two snakes are in intertwining. Right into the chest in a little lift. Soften the shoulders. Soften the eyes. Take a breath or two. Extremely helpful to do both sides. So unwind but look at the arm that's on top and switch and rolling in. Press into the chest and lift and breathe. So let's release the arms and let's get our strap. Now the strap is one of the most important things for this class. So you want to have a nice yoga strap. One that's got a nice easy to use buckle in it. Not necessarily the clip ones but those will work. But for this first thing that we're gonna do we're going to do Gomukhasana arms. Gomukhasana arms. Cow head arms. So I'm gonna take my strap and hold it in my hand just like this and lasso it back behind me just like this. This arm is going to reach back and find the end of the strap. Now if you're familiar with this posture then you're probably are walking the hands in as close as you can as close as you can. Don't walk them in actually as close as you can. Just be a shy hair from as close as possible because I want this elbow that's sticking up like this. I want it to come more toward the midline. So bring that elbow in and then instead of walking the hands towards I actually want you to hold on tight to the strap and pull on the strap like you're trying to stretch the strap. As you do that it's gonna allow this elbow to sneak back even a little bit more and this elbow to move a little bit more into a midline. Keep resisting the strap. You're stretching the strap. Remember only about 80% your effort or less is fine. What we're doing is actually I'm trying to get you to get the muscle a little bit fatigued here. I want it just to be a little bit fatigued for the next thing that we're going to do. We've opened the hands, we're opening the arms, and we're moving into the armpits. A few more breaths. Resist the strap just to a point of comfort like you're feeling the stretch but it's you're not feeling any pain anywhere. And then you're gonna relax. The bottom arm is gonna slide straight down. The top arm is gonna extend straight up and just sort of reach. Feels so good. Now second side. Again the straps held in the hands. You do a little loop-de-loop behind. This elbow is pointing up now. You like straps nice and long. All right.
Elbows pointing up. This hand goes back behind. You make contact. You wiggle the hands towards one another but not as close as you can make it. And then you create that resistance. You're gonna try to stretch the strap. This allows the top elbow to move more in line and the bottom elbow to move more in line. And then you create that resistance. Now remember the point of this is actually to sort of get your arms a little bit tired. We're working the muscle and that fluids the muscle. It brings oxygen and blood into the muscle which is nice. It gets it nice and juicy. So and it gets a little tired so that when we go into the stretch it's gonna release a little bit more. It's funny you know a tight muscle often is a and a chronically tight muscle is a muscle that it can't fully contract actually and it can't fully relax. It's stuck in this limbo of having just this consistent tension in it all the time. And this is a great way to work with that. Go ahead and fatigue that muscle a little bit. And now soften. Again we're gonna release the bottom arm. Release the top arm. Reach between the two. You can put your strap down. We're gonna really need that strap in a minute. So put it off to the side but not too far away. Let's turn to the side of the mat. And just to work out a little bit of the kinks that may you may have gotten through all that work. Let's take it downward dog. Really stretch through the arms. Center your attention more in the arms and the legs. So let's bend the legs a little bit and really reach through the sit bones. Reach through the tailbone. Relax the back of the neck. Soften the eyes. Breathe into the heart. And now down you come. Just come to hands and knees. Now we're working on opening all the backside under armpit. And that's a kind of a tricky place to try to get to in the yoga postures. So check this out. And this is if you're a swimmer you're gonna love this. So watch this. I taught this to my swimmers, my high school swimmers. Really help them. So you're gonna come down to your elbows. So you're at knees and elbows. And then let's start with the right side. You're gonna slide it to the midline. And the midline is exactly what it sounds like.
It's the point in between the knees. So if my knees separated, I've slid the arm over and I'm gonna fix the arm. Alright I'm not gonna let the elbow move. I'm not gonna let the hand move. I might spin the hand out a little bit but I'm not gonna let it move around on the mat. It's there. Back the knees up a smidge. That's usually an inch and a half to two inches in case you're wondering what a smidge is. Unless you're cooking then it's different. And then the hand goes over here. This is my steadying arm. Before I do anything more I'm gonna round my spine. I'm gonna bring my bottom ribs up into the spine. Maybe I'll walk my feet back a little bit more. What I'm doing right now is I'm starting to stretch the Terry's major and Terry's minor. And as I begin to drop my pelvis back I'm not gonna sink down again. I'm keeping this deep lift and I'm staying really conscious of that lift because it's the lift of the back up that's actually gonna create the dynamic movement that's needed to get into these muscles. I'm pushing with this hand. My right arm is fixed and I'm paying attention to what's happening with my lower ribs. I don't let them drop toward the mat. I keep pulling them up into into the body. If you follow all these steps you're feeling an incredible opening to the underside of the arms right now. It really is an amazing stretch. And it'll come out. Let's go into a little dog here. A little downward facing dog. Adhoa Mukhasvanasana. Let's come down for the second side. So that may have been your tighter side.
Let's find out. Come down to your elbows. Slide the other arm now over to the midline. Make sure it's lining up right in between where the knees are. This hand is gonna go out to the side. I'm gonna back my knees up a little bit. Before I do anything more I'm gonna draw the ribs deep. Really round the spine. If this is your tighter side you're feeling it in different areas. If it's your looser side you're feeling it in different areas. Rounding and lifting and lifting. Lifting and lifting. I'm gonna start releasing the pelvis back without dropping the ribs. Not this. This. And I'm holding that lift as I'm backing up. And I'm listening deeply to what's going on. And the minute I feel like there's some ease it's probably because my ribs have dropped. So I'll shift forward a little bit. Lift the ribs even more. Hold the lift of the ribs and then sink the pelvis back until I get that deep release through the Terry's minor and Terry's major. You might even feel it in your serratus anterior. Some people comment they feel it underneath the shoulder blade at the scapularis. You're gonna feel it where you most need it but the trick is to keep those ribs lifted. Keep that spine rounded. The head relaxed. Release that. Let's come back into downward facing dog. And let's rest for a moment in child's pose. And in this child's pose I want the elbows to really relax. So it's not this child's pose. It's this child's pose. Really let yourself relax. If your head doesn't come to the ground make sure that the back of the neck is relaxed so your your head's resting on your hands, your arms, or a prop of some sort. All right. Let's bring yourself up. We're gonna go one more time into budra mudra. So right crosses over or arm crosses over, inner lace, fingers press into the sternum, soften, soften, soften the back body. Two more breaths. Eyes open. Extend the arms again. Notice which arms on top. That's the arm that's gonna be underneath now. Inner lace. Second side. Pull the flesh up right at the sternum. Soften the back body. Soften the shoulders. Release the mudra. Now next is a sandbag. You can bring a sandbag over and just place it close to your mat here. Come into downward facing dog. And from downward dog just walk yourself towards your hands. Walk your hands towards your feet.
We're going to take uttanasana with our arms linked. You're going to take your sandbag and let it be a nice counterweight for the arms. This is going to elongate the side waist and elongate those muscles we just worked on, but in a little bit different way. So there's a deep release through the back body as well as through the underarm pits. If you don't have a sandbag maybe you can get your dog to lay over your arms. I don't know if it's small enough. So release the arms. Bend the legs a little bit and slowly roll yourself up to standing and get your strap. The magic yoga strap. So unwind your strap nice and smooth. You're going to take it behind your back just like this and over your neck. Don't be scared. This is really awesome. See if you can keep it from having a twist in it. It's not going to be too terrible if you do, but then you're going to take the end of your strap, put it through your buckle. Just like this. Now you want this end to be reachable because you're going to use it to kind of modify if you're tightening or loosening your strap. Just like that. It's over my neck. It's a little bit loose. See that? And then I'm going to take it over my shoulders. Kind of like an evening gown. Just like that. See where the buckle is? So the buckles there I could still grab it or if necessary. I can't get the tail over like that and grab it this way, right? You want to be able to make it snug and sort of like, maybe I should call it evening gown jacket strap thing, right? Now if you take it too much the arms are going to roll back and you'll be like this. You'll be like Popeye. Don't do that. That's too much. You want the arms to be able to release straight out because we're actually going to create resistance. Remember how I talked about we're going to open across the front chest? This is how we're going to do it. So periodically, believe it or not, your your body's going to open remarkably with this. Periodically you're going to have to tighten the strap up just a tiny bit. That's why you want the buckle in the tail of the belt where you can grab it, right? So here you go. So you're standing. Turn this way on your mat because we're going to do some moving practice with this. Burst. Bring the arms up. As you bring the arms up, I want you to resist the strap. So you're resisting the strap this way, right? Lengthen up into the chest. Do a little tiny back bend. Take the inner thighs back and then come back to standing. Widen the feet a little bit wider than your hips distance. And if you have a really long strap like mine, you might want to tuck it in like it's like a tail. You could step on it and it's kind of aggravating. So you could tuck in your strap. Just like this. I'm going to step my right leg forward. Remember my feet are separated more than hips distance. This gives me lots of stability. And my left leg back and I start to turn my body and prepare for Virabhadrasana too, right? Now can I extend my arms? No, I can't extend my arms. But you don't really need to, right? All you need to do is to create this resistance which is helping to open the front chest, open the pectoralis. It's also aligning the shoulder blades, right? So this resistance is important. If you're just like this, it's not gonna work very well for you. Have to have the lift and have to have the resistance in the arms. Palms facing up is helpful. I'm gonna let my leg bend and you kind of just wiggle your way into the posture. I'm gonna feel your way in there. One of the beautiful parts of this is you're creating an openness to the chest but you're you're letting the lower body relearn where the upper body is, right? Because in the in the other postures if you could be even be doing Virabhadrasana too and have your shoulders rolling forward. This doesn't allow that. So there's a lot of navigating taking place in the lower body. It may even feel different to you. A nice bend. Usually there's requires dropping the tailbone a little more than you're used to. And then straighten this leg, feet forward. Let's turn to the other side. That means this leg's got to make its way a bit over that way, right? So you still have the same stability. Here we go. Bending and resisting, resisting, resisting. The strap jacket. Dropping the tailbone a little bit. Keep firming the lower belly, drawing the hip points narrow. Resist the strap. Every time you try to extend the arms like that, it's helping to open the chest even more and it's aligning the shoulder blades even more. Straighten the leg, turn both feet forward and line them back up again. Now from here, relax the arms for a moment and just notice already there's more space. You feeling that? So if that's the case for you, grab your strap, make it a tiny bit, tiny bit more snug. Just a tiny bit. And then resist, not, you don't have to just take the arms out this time. Feel how you can just create broadness across the collarbones and create that same action we're going to fold forward. Now in Prasadapadottanasana, I'm creating that same reach and lift. My hands happen to be resting on my legs. I let the back of the neck go. This is important. Don't over lift your head or use your neck so much when we're doing this practice, particularly when you're creating the resistance.
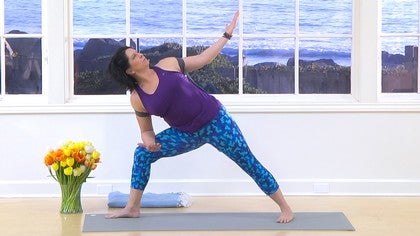
Bend the legs now, roll the spine back up. We're going to move into Trikonasana. So my arms back up, create resistance, wiggle my feet into a happy Trikonasana, which means it's a little wider than you might be used to because we don't have our arms to balance and we're really, our posture is really aligned and we may not be used to that. From here, of course, your hand may not get down to the floor, mine's not going to get down, but you're going to create a Trikonasana. So you might be able to rest your arm on your straight leg, but I'm still creating that resistance, still creating the resistance. It's a totally different Trikonasana this way. One more breath, move yourself back up, feet forward. You're going to turn this foot out. Remember, it's going to have to wiggle more toward the back of the mat to create a more stable triangle. Shifting the hips, and here we go, second side. Be able to turn your hand and touch your shin, still creating the resistance. I can already feel the straps loosen some more because the chest is aligning itself. Breathing and breathing, and back up. Align the feet. Got to tighten a little bit more, how about you? Give it a try. Create resistance, folding forward. This is the opportunity to rest the neck, to rest the upper shoulders, because they're learning at an amazingly rapid rate right now what it's like to really have the chest over the pelvis. Bend the knees, rolling up, rolling up. Keep that resistance. Now wiggle the right foot more to the right again. This time we're going to take Utthita Parsva Konasana. So the front leg is going to bend. Find that perfect spot. I can get my forearm on my leg, which is really cozy. Still creating resistance, opening the chest. You can bring this arm out because the extension of trying to straighten this arm helps with the process of opening the pectoralis muscles. Working with this side of the neck. Even the jaw is getting a new relationship to the posture. Use your way up. Feet forward, wiggle this foot more toward the back of the mat, right? Leg bends. Second side. Create that resistance. Just notice the eyes. See if you can keep the eyes soft. I know there's effort in this, but the reward is amazing. We are unwinding our heart. Straightening the leg. Turning back to the front. Really bring the back leg around because here's the Kudagra Vividrasana one. Okay, so this is the one that I just want you to be like, ready to just like totally unwind my heart. Totally let go of all those obstacles that bind it down, right? So for me, I'm going to tighten my straps just a little bit more. Here we go. Turning, bending that leg even deeper than normal.
And for your balance, you're wide. I'm going to let my back heel come off the ground because it's going to create a little more neutral pelvis. Really pulling my arms up, asking for the surrender of the heart, the unwinding of the heart. Breathing and breathing. Gratitude. Gratitude, gratitude. Wow. Straightening and turning. Now remember, this foot's going to have to go this way because I want extra space here. This leg's going to have to bend a lot because we're asking the chest to create a whole new alignment so the legs have to be as involved. Creating that opening. There's a quality of not only gratitude but surrender. You feel the grace pour in. So much information translating into the body here. Straightening the leg now. Our final fold forward. Level the feet out. Create the resistance. Ah, folding forward. Let the back of the neck go. You're still creating that resistance but see if you can rest your hands on your legs. Breathe deep into the heart space. So much more room in there now. We've unwound from the center out. Wow. Bend your knees now. Roll the spine up. Walk the feet together. Now comes the fun part. Your dog can probably not help you here, right? Now we get to loosen the strap. So the easiest way to do that for me is to bring my hands together behind me. Just give a little shake. Maybe I'll give a little pull. There we go. And it just starts to wiggle itself off. Wiggle, wiggle, wiggle. If you're like me you're a little warm so it's a little stickier. It's a magic trick. So that is the work with the strap. You can use it at any time. Its straps are great. You can take this with you anywhere you go. Roll your strap up. You know it's interesting. I don't know how you keep your yoga props but the more tidy you keep your yoga props the more organized the posture will come with your brain, right? And the more organized the practice will be. So let's come on down to the floor. Down to your knees. Sitting back on the feet. So let's take budra mudra. One more time. Top arm over. Inner lace. Create that lift of the sternum. The skin of the sternum but softness of the shoulder blades. A few breaths here. Release. Cross over. Rolling through again. Lift the skin of the chest. Release. You'll do one of two things. You either take your hands behind you to lift the chest or you can come to kneeling and take your hands to your back. Lifting and opening the chest for a moment. Get a nice breath. Go ahead and keep your head forward. And then ease your way into a child's pose. Let's stack the arms again so that the softness of the forehead can be on the softness of the arms. I'm gonna count five breaths to really let the spine relax in this forward fold neutralized from the practice.
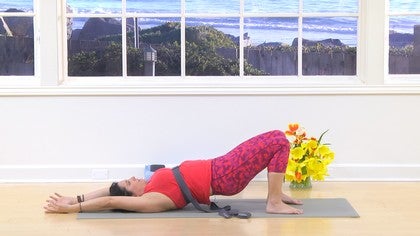
And bring yourself up. So now we're gonna move into a restorative posture but understand that when you open the body in this this much one of the fun things to do is to sort of walk around for a moment and just feel how different the relationship is and the alignment of the body. You're gonna need two blocks and two blankets. So the first block looks like this. You know there's three kind of heights to the block. There's low, medium, and high. So this one's on the medium and this one's on the low end just like that. Now when you get in this posture there's a possibility that you're gonna feel the opening a little bit more than usual. So I want you to take a blanket and lay it like this and take another blanket and lay it like this. My shoulder blades are gonna rest on this block. The lower end of the shoulder blade is on the block and the upper end of the shoulder blade is in between the blocks on both sides. If you get this correct it feels super good. If you don't it's not going to be comfortable and that's how you know you'll have to sort of figure it out for yourself kind of wiggle around. So I'm gonna lay back. My head's on the higher block. Sort of figuring out okay here we go. Half and half and then my arms come to rest on the blanket. You can keep your legs bent if you like or you can straighten them it's up to you. Now if you're in this position and it feels like your head is like this then you have to take your block even higher to take it maybe beyond the medium range into the higher range or put another little something underneath there. This is called the heart bench and it's super amazing and we have a little class on how to get into the heart bench and the different variations so you can always check that out later. This creates a shelf for the heart. Here I go I'm wiggling just a little bit looking for the sweet spot. I relax my legs, I relax my arms, I relax my eyes, allow the body to surrender into the props. Everything relaxes. As the body opens you might you might want to move your body around a little bit as it opens you might need to renegotiate you go ahead and do that. The jaw is soft, the eyes are relaxing deep into the sockets and your breathing pattern slows not because you're making it slow but because you're growing more and more still so you need less and less oxygen. Every part of the body continues to unwind itself. It's following the example of the heart, the shoulders, the lower chest, the arms, the wrists, the hands. Notice the texture, the cadence and the quality of the breath. When the heart feels supported we relax.
Now begin quietly to deepen the breath. You can bend your legs one at a time till the feet are on the floor. You're going to want to roll onto your side just know that you're kind of perched up there on your block so stay conscious as you roll coming all the way to your side and rest there for a moment. The body's just had a deep opportunity to relax so don't get too quick about coming out. Use your hands to support as you bring yourself up and then your blankets and your blocks. You're going to place those to the side and come back down to the floor. Draw your legs into your chest. Let's just take a breath or two here.
Winding our way down to Shavasana so allow the body to grow more and more peaceful. On your next inhalation the legs will go up, the arms will go over your head and as you exhale you'll hold the legs again. Inhale and exhale. Three more. Keep the eyes softly open. Lower the feet to the floor now. Again you're going to roll to your side. Use your arms to bring you up so let's take a blanket for the head. Your second blanket you'll roll into a tube. This goes under the thighs. You can take your Shavasana flat on your back. This is a really wonderful way particularly when you work with something that's really new to you. It's nice to do this for the nervous system. It's just a little more easy. So remember I'm going to park my bottom right up into the blanket and if it rolls around you can just pull it a little bit more so that when I straighten my legs it's not under my pelvis. It is under my thighs but it's really close to the pelvis. Legs are going to relax even if they kind of fall out to the side. Don't worry about that. Arms are relaxed. Press the elbows through that little thing where I flatten the shoulder blades directly down onto the floor. And then I let my body be received by the earth. I let gravity do its thing. My eyes soften. The jaw. Even the brain feels like it relaxes and rests in the cup of the skull. And your gorgeous heart it shimmers in its nest.
Continue to allow yourself to go deeper. I'm going to come up and sing you a song. You remain in Shavasana. Remain relaxed. Your breath will grow more quiet the longer you remain still. Let it. Your senses will retreat. Let them. When we unwind the heart we're telling the heart that we have compassion for it. We know it's been working for us. We know it struggles. Anytime I work with the heart I always think of Tara the mother of all compassion. So as gravity allows you to soften more and more you'll feel a lightness. You'll feel the compassion that's palpable after a heart practice. Om tade tu tade tu de so ha. Om tade tu tade tu re mamma ajo zhana puni pustin kudu yet so ha. Om tade tu tade tu re so ha. Om tade tu tade tu re so ha.
Om tade tu tade tu re mamma ajo zhana puni pustin kudu yet so ha. Om tade tu tade tu re so ha. Om tade tu tade tu re so ha. Om tade tu tade tu re so ha. Om tade tu tade tu re so ha. Om tade tu tade tu re mamma ajo zhana puni pustin kudu yet so ha. Om tade tu tade tu re so ha. Om tade tu tade tu re so ha.
From that sweet space allow the breath to deepen, allow the eyes to softly open and movement to calm to the body that feels right to you. Rolling to your side and again using your hands to help you sit up. Come all the way to sitting, sit up on a little bit of blanket. Let's wrap the arms in a final time, imbuja, mudra. Keep the eyes just barely open. Unwinding, changing the position of the hands and rewinding. Notice the quality of your mind, the quality of your heart. And the beautiful unity that's creating the grace that you're feeling. The unity of the body and mind. Releasing the mudra, palms coming to your heart, bowing to yourself, bowing to your heart.
Peace out, namaste.
Yoga Alchemy
Comments
And love!
You need to be a subscriber to post a comment.
Please Log In or Create an Account to start your free trial.




 Love
Love
