Description
About This Video
Transcript
Read Full Transcript
I'm here with my good friend Betsy, and we're going to demonstrate what I call the modern naughties. Now in the old texts, depending on which one you read, there are a number of subtle energy channels that crisscross through the body. Some texts say 72,000, some say 300,000, some say 350,000. It doesn't really matter how many there are. The numbers don't matter that much. What they're trying to express is that there's just lots of them. But of the 300, 300,000, 350,000, or whatever they are, there's only 14 usually that are important. And of those 14, there's only three that are very important. And that's the central channel, which is called Sushumna, which means the most gracious channel. And then the two side channels, the Pingala Nadi and the Ida Nadi. Pingala means tawny, it's the fiery Nadi. Ida means cooling, I think. And it's obviously the channel that carries the cooling energy in the body. Now these channels are very interesting, but they're not particularly useful in a modern day yoga practice, being very subtle as they are. So many years ago, I discovered a book by a woman by the name of Mabel Ellsworth Todd. It's a very interesting book. It's called The Thinking Body, and it deals with human posture and movement. And her premise was that you could change the way you stand and walk and sit, simply by using images in a passive position called constructive rest position. And a student of hers by the name of Lula Swigard took this a little bit farther, and actually did a test on some young women. This was back in the maybe the early 50s. I don't remember exactly when it was, but she did a test using images, certain kinds of images that these women would apply to their bodies. And then she had a way to measure their posture over time. And she discovered that the images did indeed help to improve their posture. And from this information that she developed, she extracted what are called the nine lines of movement. And the basic line is the spinal circuit, which always flows up the front of the spine and down the back. I'll make this clear as we go through the practice. And so from this work and from the work that Lula Swigard students did, I have put together this little practice, which I call the modern nadis. Nadi being a word, a Sanskrit word meaning vein or artery or river actually. And I'm gonna ask my friend Betsy to demonstrate these for you. So I'm gonna ask you to stand up first to begin. Now I'm calling these, rather than nadis, I think it's probably better to call them channels for now, so that we use a more familiar English word. And these channels usually work in pairs. And the channels then pair up into circuits. Okay Betsy, if you come forward with an exhalation of the standing forward bend. Now we'll start the foot circuit, an ankle circuit first. And what I'm gonna ask her to do is to press her thumbs against the mounds of the big toes.
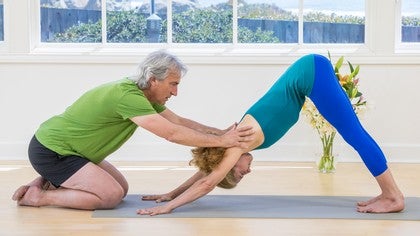
Remember not the big toes themselves, but the balls of the big toes. And these two points bear down very heavily against the floor. And then from here I'll ask you to stroke back along the inner foot to the inner ankle. We'll do this a couple of times just to get the feel for it. So this is the, this is the channel of the inner foot and it moves from the base of the big toe to the inner heel. And it never changes, it always moves back in that direction. And then conversely the outer foot moves in the opposite direction. So she brings her fingertips to the outer heel and then slides the hands forward to the little toe. And once she reaches this little toe she wants to continue to stretch it out onto the floor. So the little toes get to be the longest toes on the foot for a change, energetically speaking anyway. And then I'll have her bring her fingertips on her ankles. She can bring her thumbs to the inner ankles and her fingers on the outer ankles. And she wants to then squeeze them together, figuratively speaking of course. So you want to feel the inner ankle rolling toward the outer and the outer ankle rolling toward the inner. So that narrows the front of the ankles. But at the same time you'll feel the widening across the back. This is very similar to what the pelvis will do when we get to that you'll see. Squeeze the ankles, narrow across the front, widen across the back. Very good. And then bring your fingertips on the floor in front of your feet. I'm sorry, let's do it this way. Bring your hands back onto your inner legs again. From the inner ankles she'll stroke up along the inner legs. Now this is the channel of the inner leg. And like all the channels it always only moves in one direction, up from the inner ankles to the inner groins. And she'll do that a couple of times, get that feel. And it's as if you're drawing energy up from the earth into your legs. Very good. And when she reaches the inner groins where the inner thighs join the perineum. I'll have her bring her hands down onto the floor in front of her feet. And lift her heels about an inch away from the floor. Now in this position it's a little bit easier to get the inner ankles, or the inner groins to draw up. So from the inner ankles she'll pull up now into the pelvis. And the feeling will be that the inner legs are slightly longer than the outer legs. And then I'll have her bring her heels back down. You have to do this very slowly. Because as you bring the heels down you may lose a little bit of that lift of the inner groins. So you may have to take the heels down a bit, stop, reaffirm the lift, and then send the heels again. Very nice. Now bring your hands onto the back of your pelvis, on the sacred bone. And from here you want to spread across the back. So the sacrum widens side to side. And you come to the outer hips. And you want to just fluff them up a little bit. The outer hips want to be soft. But as you go down along the outer thighs, then you want to start to push in. So the outer thighs seem to firm inward. And you very very slowly slide down the outer leg. This is the outer leg channel. So you're spreading across the back of the pelvis and letting that energy flow across the outer hips and down along the outer legs. Try that again, okay? Very good. So the circuit of the legs is up the inner leg, through the pelvis to the sacrum, across the sacrum to either side, and then down the outer leg. So as you can see, you're you're sort of cycling energy from the legs into the earth and then pulling it back up into the groins again. And now we'll move on to the hand and arms circuit. Now if you come up with an inhalation please, and turn to your right and come into downward dog. Now the arms are very similar to the legs as far as the circuit is concerned. The bases of the index fingers are analogous to the bases of the big toes. So she wants to start by pressing down very firmly here and here. And then as you drew up from the inner, from the bases of the big toes into the inner legs, she now wants to draw up along the inner arms. Now we'll get to the back of the torso in a little while, but for right now just focus on the inner arms, pulling up into the shoulders. And then just like the outer legs, she wants to release down the outer arms this way and out through the pinkies. And again the pinkies get to be the longest fingers in the hand. So again the the the legs and the arms are very similar. Starting here at the mounds of the indexes, drawing up across the back of the torso, the back of the shoulders. So the scapulas are widening out the sides and then down the outer arms and out through the pinkies. And then again you don't want to stop at the tips of the little fingers. You want to imagine them sliding out onto the floor. Now just for future reference, when you draw up along the inner arms that continues along the back spine, we'll come back to this in a little while, and it stretches out through the tailbone. Now the coccyx, remember, curls down a little bit into the pelvis and you want to imagine the coccyx is straightening out and then stretching out along behind the pelvis parallel to the spine. So what you'll find on your back is a V shape. Here and here are the tips of the legs and the tailbone is the is the is the is the is the angle of the V. And you want to imagine that V shape getting much much longer as the tip of the V stretches back toward whatever behind you and the little fingers reach out along the floor. Now we'll move on to the torso circuit. If you come down and kneel down please. And let's start let's start by yeah let's start with this the side of the torso toward the camera. Now as you remember that when she was in the in the forward bend earlier doing the during the leg circuit she spread across the back of the of the pelvis this way. The sacrum actually wants to do three things in this exercise. Number one it wants to spread across the back so it fans out to the sides. Number two as I showed in downward dog just before it also wants to lengthen down. Now it's not a tucking action at all it's a lengthening action so don't push the tailbone forward stretch it down figuratively speaking into the floor. And the third thing the sacrum wants to do is press into the back of the pelvis as if someone were pushing against it. So as you widen across the back of the pelvis you also want to narrow across the front so find the two hip points here and here and bring these two points together in the front of the in the front of the torso. And then this widening continues on all along the back of the torso so it feels as if the spine is opening out to the sides. But what you have to remember when you do that is that there has to be a corresponding resistance inward because these lines always work by pairs of opposites. So as you widen across the back of the torso you want to feel the outer arms pressing in as if someone were hugging you across the upper body. So the heads of the humerus bones move into the shoulder sockets as the scapula is widened across the back. And then these this widening continues on along the across the front of the torso into the sternum. Now you have to be very careful at this point. Would you turn and face the camera please? Because you don't want this to happen. You want to counter this tendency that's to slum forward by lifting the top of the sternum bone right here, the manubrium, and broadening across the collar bones. The clavicles open across the upper chest. So the ribs are moving into the sternum this way but you're countering that by widening across the upper chest. Clavicles move out to the little bumps on the top of your shoulders called the uchromiums. Now we'll move on to the head and neck circuit. Would you turn sideways again please? Now since it's a circuit it can start anywhere at all but for this purpose we'll we'll start the base of the skull. So I'll just move all this beautiful hair out of the way and find the base of her skull right here. This is the occiput. Now this has to lift and it's not a physical lift. It's not something you would just want to push your chin down towards your sternum like this. It's more of an energetic feel of a release at the base of the skull. What you might feel when you when you finally find that spot if you do is that there's a lot of tension in this area right here so it's often helpful to have a partner to lift up here for you to get that feel. So the base of the skull wants to slide up toward the top of the head but at the same time the back of the neck feeds into the back of this torso and down into the floor. So the base of the skull starts by lifting up and then that line continues across the top of the head down the forehead. So the skin of the forehead always wants to release down from the line of the hair into the bridge of the nose. Over the inner corners the eyes, let me do this hand, over the corners of the mouth, across the chin, across the underside of the chin and here into the crook of the throat where the underside of the chin joins the front of the neck. And then that line continues through the head across the top of the spine to the base of the skull where it goes around and around and around this way. And the mantra for the head circuit is up the back and down the front. Now there's one more circuit and that's the spine circuit. Now when you deal with the spine circuit you have to you have to do it as it's appropriate for your audience or for yourself for that matter. For more beginning less experienced students I talk about the front of the torso but for more experienced students I talk about the front of the spine. Now there's two front spines really there's one that's physical and that follows the line of the vertebral bodies but there's also one that's energetic and that passes through the middle of the torso from the middle of the perineum to the top of the head here. The spine circuit flows in exactly the opposite direction of the head circuit. In other words the spine flows down the back always and then up the front. It's always very important when you're working with the front of the spine to remember that you want to lift the top of the sternum bone not the bottom of the bone. So for example if you lift the bottom of the sternum bone you look something like this. No other way poke your ribs. That's the bottom of the spine or bottom of the sternum. So you can see that really hardens the lower back. So send the tail bone straight down into the floor just like that very good and then lift from here to the top of the sternum bone. It's a much subtler movement you won't look like you're lifting much at all but it's the maneuvering that always goes up. So again the spine the mantra for the spine circuit is always up the front down the back. Thank you.
Homage to the Source
Comments
Thank you.
You need to be a subscriber to post a comment.
Please Log In or Create an Account to start your free trial.


