Description
About This Video
Transcript
Read Full Transcript
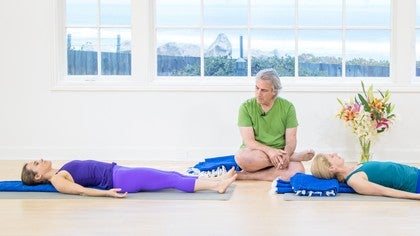
Hi, I'm here with my friends Betsy and Alana and we're going to demonstrate a beginning breathing exercise that would be appropriate for a raw beginner represented by Alana and a more experienced beginner represented by Betsy. And the first thing I'm going to do is show how to fold the blankets in order to support the torso and I'm going to show two different folds. One would be more appropriate for a raw beginner and the other one be more appropriate for a person with a little bit more experience with the practice. So for the the beginning beginner we want a blanket that provides a very firm support and makes the breather feel very very well supported, very solid. So I'll open the blanket up to this size and that's probably about three by two and if the blanket would be a little bit thicker I'd fold it in half for her but this blanket is just a little bit thinner so I'm going to fold it in thirds like this once over here and then once over from the opposite side. And notice that there is a firm end and a floppy end which is easily recognized by the fringes and whenever you use a blanket like this you want to be sure that you sit against the firm end here and lie back onto it. So if you would take your blanket onto your mat and show how to sit down on the floor in front of it and lie back. Very good. You could just keep your knees bent for just a second while I can do the second folding. Now for Betsy I'm going to do a slightly different fold which will give her a little bit better sense of her spine as she's breathing. So again I'll open the blanket up to this size two by three approximately and what I do is I hold one of the long edges in my hands and I pleat it, P-L-E-A-T it like this and what I try to do is I try to get it broader across the base and narrower across the apex so if I looked at it from the edge it would have a sort of a pyramid shape or triangle shape and if you would take this blanket in and put it on the mat please and again she's going to sit against the firm end. This way a little bit. And when you lie down if you're if you're doing it yourself or you're doing it with students you want to check the position of the head to make sure the head is in a neutral position. So just as an example I'm going to put a blanket underneath Betsy's chin. When you check the head you want to see that the underside of the chin right here is more or less perpendicular to the floor and very often what you'll see in with beginning beginners is that their heads are sort of tilted back and the chin is poked up toward the ceiling. So I'll ask Betsy to lift her head up off the blanket and I'll put this in underneath it to support the head and the neck and then if you could both stretch your legs out please with an inhalation each time making sure the heels are not wider than the hips. You want to be sure the feet are the heels within the width of the hips so that the outer hips can soften. Now the first thing that we do is we make sure the body is in a neutral position you cannot underestimate the importance of a neutral position when you started breathing practice. So the first thing you look for is the position of the heels on the floor and you want to make sure that both heels are resting evenly on the floor and it's not uncommon to see that one foot is turned out a little bit more than the other. So you might have the students or yourself rock your legs back and forth if you could do that. Call this the windshield wiper pose and that helps to soften the groins so the feet can turn out a little bit more evenly. The next thing to check going up the body is are the buttocks. You want to make sure that the buttocks are resting evenly on the floor. Then comes the shoulder blades. It'll be a little bit easier for Ilana to check her shoulder blades since they're both resting on the blanket. Betsy's shoulder blades are a little bit off the blanket and so she'll have to sort of rock back and forth a little bit and make sure she's lying right in the middle. There's also a little detail that you should be aware of and that is the backs of the hands. You want ideally the backs of the hands the rest on the on the index finger knuckles. That's difficult for some people to get that much rotation in the upper arms. So the middle finger knuckles are just fine but you want the arms to be about 45 degrees angled relative to the torso. In other words if the arms are straight out to the sides that's 90 degrees and if the arms are up against the sides of the torso that's zero degrees. So somewhere in between the middle relative to the to the torso or the spine if you want to look at it that way. Then you want to check the head. The ears should be equidistant from the from the shoulders so the head is not tilted and the eyes from the floor or from the ceiling if this is not a flat ceiling but if it were you want the eyes equidistant from the ceiling to make sure that the head isn't turned. So the outer body is in a neutral position now and now you want to go to the organs of the head the organs of reception which in yoga is called the yanandriya. And for beginners I'm just concerned with the tongue and the eyes. The tongue can rest on the floor of the mouth. The eyes are a little bit more challenging to work with you want to firstly let the eyes sink into the sockets at least imaginatively speaking. And then if at all possible you want the eyes to turn down and this would be a little bit difficult for beginners to maintain over time but you want at least give the idea that you want the eyes to be as still as possible. What you what you really want is that you want to minimize all movement because movement stimulates the brain which makes it more difficult for the brain to quiet down and of course when the eyes are moving that's that's a movement. And speaking of the brain that's the last thing you want to look at and this is purely imaginative of course but there's two things that you want to work with in regard to the brain. The first thing is you want to feel the brain shrinking. S-H-R-I-N-K shrinking getting smaller and then secondly you want the brain to sink onto the back of the head. And then when all that's in place then you can have your students or yourself if you're doing this as a practice bring the breath into the foreground of your awareness. Now at this level of practice the main thing is to just be aware of the breath and not try to do anything to fix it or change it or make it better at least the way you as you're feeling about it. So the breath comes into the foreground of the awareness and you sort of step back from it and begin to observe your breathing. If you want something a little bit more concrete to look at while you're watching the breath, Ilana can observe her sternum bone moving up and down. Inhale exhale and at first all she wants to do is observe the movement of the bone and then after a bit after she's watched it for a while then she can begin to look at the quality of the movement. In other words when she inhales does the bone move up smoothly and when she exhales similarly does it descend smoothly. But again I don't want her to do anything about that I just want her to observe it carefully. Betsy who is standing in for the little bit slightly more experienced student what I sometimes want to ask more experienced students to do is to imaginatively empty out their torso so that they have a completely empty space inside the torso. And what I ask that student to do is then to observe on the inhalations where the breath moves into that space as if she could breathe all the way down into the groins and into the back of the torso as well. And what you often find in this exercise is that the breath moves into a limited area in the torso mostly in the front and mostly between the line of the nipples and the belly button. And again not doing anything to change that just observing the restriction in the breath. And over time as you continue to observe you and at first it's necessary to encourage the students to be very persistent about bringing their attention back to the breathing if it wanders away. And what you find typically as you observe your breathing is that it begins to slow down. And this is not imaginative this is actually happening.
And when your breathing slows down again this is not imaginative when your breathing slows down it begins to smooth itself out. It's actually a scientific phrase for that it's called laminar flow. So when your breathing slows down and smooth itself out it has that same kind of effect on the brain slows the brain down and smooths it out which allows you then to observe the breath more more intensely more closely which has an effect on the breath which has an effect in the brain. And so there's a feedback loop between between your breathing and your and your consciousness. And what Betsy will feel perhaps after a while is that the breath begins to spread out into the torso a little bit more fully. So she'll start to feel the breath moving down more toward the groins and particularly more into the back of the torso. Now when you do this exercise the first thing is it's very important to stay to stay as conscious of the breathing for as much as possible during the time you're doing it. And for beginners it's probably best to do maybe 10 to 12 minutes at the most but it's also very important to do the practice regularly and that means daily if possible but certainly not less than five times a week. Pay particular attention to the inhalations. When you pull at the breath that does have a stimulating effect on the brain so when you inhale be sure that the new nostrils stay very soft. And then at some point you'll notice there's a little pause at the end of each exhalation and in yoga that's called an ashraya or rest. And it's very brief but as you go along you want to slowly begin to extend that pause and pay very close attention then to what happens to the brain during the time that you stop breathing. It's not a hold, it's not a retention, it's just a rest. And there's really not much else to do as a beginning breather. The important part is the important parts are to be very attentive to the breath, to not interfere with the breath, to let it come to you, and finally to be very regular with the breathing. Without that regularity changes won't happen as quickly. Now I hate to disturb my helpers but it's time to get up. Now the first thing that you want to do is be very sure that you don't pop out of the pose. So you start with your fingers and your toes and you just wiggle them around a little bit. You know how it is when you might go into a room or your spouse or your partner or your child or whoever is sleeping and you want to wake them up and you just sort of whisper wake up wake up wake up. So you want to do that with your fingers and toes to your brain, not to jerk it. Fingers and toes first then hands and feet and gradually work your way up along the limbs to the torso and neck. When you begin to open your eyes you want to be sure that you open them just a little bit right at first, let the room, let the vision of the room fall into your eyes. And then at some point you're ready to turn off the support. Now you want to support the head as you turn to the side, preferably to the right. So you use the right arm to support the side of the head as you roll off the blanket with an exhalation and a minimum amount of effort. And then you want to wait on your side for a bit and make your head very heavy. And then when you're ready to come up do it with an exhalation. You use the left hand to push against the floor and lift the torso first and let the head trail afterwards so the brain comes up last. And then you can sit and be happy for a few minutes, a few moments before you go off and do whatever it is you need to do.
Thank you very much.
Pranayama & Meditation: Meet Your Breath
Comments
You need to be a subscriber to post a comment.
Please Log In or Create an Account to start your free trial.
