Description
About This Video
Transcript
Read Full Transcript
Hi, welcome back. I'm here again with Chelsea, my friend and assistant, and today we're gonna really focus on the shoulders to work against the sort of inevitable posture and shape that we take, which is the rounded forward shoulder position. So if you have not done the body scan, I would actually recommend you go do that unless you're in a hurry, but otherwise this is one of the best practices to do the body scan before and after class, but don't have time for that. It doesn't matter, you'll still get great benefits and we'll just go ahead and get right into it. What you will need, however, is a strap, a bolster, a chair, and a block. So run and get those now. The chair, if it's a yoga chair or a folding chair, that'd be great, but you can make do with any sort of chair, so don't feel like you need to get anything special. Okay, so are you ready? So I'm gonna have Chelsea turn around. You can continue watching us, and I'd like you to start doing some shoulder rolls. So let's just go backwards to start. So you'll elevate your shoulders, your shoulder blades, squeeze them together, lower them down, and spread them apart. That's the movement. It seems simple, but if you really go nice and slow, you'll notice that you have some movement blind spots. You'll notice that maybe as you elevate, you tend to spread your shoulders, or as you squeeze together, you tend to lift. So I want you to separate them into four different movements. So if you can look closely, you elevate, stay elevated, stay elevated. Now squeeze together, but stay elevated. Yes, and then stay squeezing together and bring them down. So a lot of times we'll drop the shoulders and spread them, but you want to really separate them. Now stay down and spread apart. Nice, and again, stay spread and lift, stay lifted and squeeze together. Yes, stay squeezing and lower down, and then stay low, and then spread apart. Go ahead and do a couple more, and notice where your compensation is. Do you bend your elbows? Because sometimes we bend our elbows pretending that that's shoulder mobility. Do you stick your neck out? Right, do you bend your wrists? Just notice what are your fingers doing? So I like to sort of stiffen my arms just so that I can really go through the full range. Change directions now. Now that you've got this, go the other way. So stay down and squeeze together, stay squeezing together, lift up. That's hard for some people. Stay lifted and spread apart, stay spread apart, and stretch down, and just continue to move in that direction. If you're like me, you'll have like really cool crunching sounds in there. This is, in my opinion, a prerequisite to most yoga poses, especially some of the weight-bearing poses like downward dogs and planks. Most of us don't have really fine-tuned motor control of our scapula relative to our rib cage, our shoulder blades relative to our rib cage. So this is one of those exercises you can do every morning when you get out of bed or before any yoga class. Finish this one and do one more full range. So squeezing together and lifting up, and then stay lifted and spread apart. Good, and then stay spread apart and come down, and then just rest. Go ahead and turn around. How your shoulders feel. Okay, so now you're going to, it's a little bit less effort, but it's a little bit of a kind of a motor control challenge. Just do some circles backwards, just some gentle circles, smooth gentle circles, and now do some circles forward. So you've got forward and backwards. Now can you do one forward and one backward? I can't talk and do it, I have to think. One forward and one backward. And you might find that suddenly you're doing them both backward, but you're doing them just off like off timing, and so you think you're doing different directions. So Chelsea's going forward in both of them. So take one backward and one forward. Still doing both forward. It's hard, I have a lot of practice, that's why I was able to do it. But you're just reprogramming your you're basically, it's called decoupling, you're decoupling your limbs from one another. So one shoulder isn't at the mercy of what the other shoulder is doing. And then try and do it the other way, right? So now the other one's going backwards and the other one's going forward. It takes a lot of practice, and it will really start to develop your control of what your shoulders are doing. And if at home, if you're sort of doing it choppy, like I see it a lot, you'll go forward, back, up, back, forward. That's not, that doesn't count. You have to make it smooth and rhythmic. So keep practicing that. Okay, so now we'll go into uttita hastasana. So grab your belt. If you don't have a belt, you can just hold on to like a towel or you can even hold on to a block. We'll get the strap out of the way and you'll just hold the belt around your hands, stretch your arms straight out in front of you, and then start to just put a little bit of tension in the belt just to activate the upper arm muscles. Feel like you're pushing on to the belt from up here, from the arm muscles, not from the wrists, and slowly start to stretch your arms up. And what has to happen is these shoulder blades have to move. You'll notice that one shoulder blade likes to move a little bit better than the other, and one hand might kind of race its way to the top. In Chelsea's case, it's her right. And then lower the arms back down. It's nice and slow. And it's not about being able to lift your arms. It's about noticing what the scapula, how the scapula have to move relative to the thorax, which is your rib cage, as you take the arms overhead. Again, take the arms up, because this is plank to downward dog right here. And then while your arms are up, step your feet together. Utkatasana, chair pose. Good. Just sit just a little bit more, stretch the arms up. And what I would like for you to feel here is that this outer arm is stretching all the way up to the little finger. So kind of like back wall of the armpit reaches all the way up, which will help this shoulder blade with its rotation. And then stabilize by bringing the thumb side all the way down to the inner shoulder. But your shoulders do lift here. A lot of times we're taught shoulders back and down, and that limits what we should be able to do with our shoulders. They need to be able to rotate and move up. And then from here, just stand straight up, keep the arms up. Good. I'm gonna have Chelsea turn around and start to lower the arms straight down again. And as she lowers them, she's getting tired, the shoulder blades will start to come down. Don't squeeze them together. And then as she brings them up, they'll start to rotate out to the side again. They're sort of abducting and rotating. When you really take the time to work on this shoulder stuff, you'll realize that most of us who've been doing downward dog for years could still use some shoulder work. And then slowly bring the arms down. I won't make you do chair again. And rest. Good. Go ahead and make your way onto your hands and knees. So from here, go ahead and come onto your forearms. Elbows are gonna be right underneath the shoulders. This is a little stretch that I love because it actually helps you get that shoulder blade moving. As you saw, Chelsea's shoulders could use a little bit of work. Mine can too. I'm guessing yours can as well. So go ahead and let's start the left arm. Turn your left palm up and then inch your elbow about three inches forward, but keep stretching your hips back. And what you'll get is a nice stretch across the back wall of the armpit so that you get this shoulder blade moving and really abducting away from the spine, which is doing really nicely now. So this stretch can also inform the last pose that we did. Keep trying to press your thumb down into the floor and keep your pinky down at the same time. And then see if you've got a little bit more range. Can you stretch the left elbow forward a little bit more?
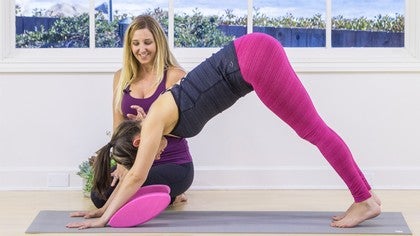
Keep the hips stretching back. Good. You're not sinking into the shoulder. So even as you stretch out, you're maintaining control and activating the muscles underneath the arm and shoulder. And then maybe you got just a little bit more range or not. Don't worry about it. You can stay here or try to go another inch or two if possible. And then slowly turn your palm face down and glide your elbow back so it's underneath the shoulder. Feel the difference between your right and left shoulder. And let's do the right side. Turn your left, turn your right palm up. Start to inch the elbow forward about three or four inches. Keep the hips stretching back. Good. So if you're having a hard time activating the muscles at the back of the arm and shoulder, it's like you're trying to drag your elbow toward you, but it's stuck on the sticky mat. It won't go anywhere. That'll help you. Keep trying to turn the thumb down. That's a lot of supination here, which also we don't have a lot of range in that position. And then stretch the elbow forward just a little bit more. Keep it down. Push your hips back. And if you have just a little bit more, you can try another inch or two. Otherwise, go ahead and turn your palm down and slowly make your way back. Nice. Come up onto your hands. Make your way slowly into downward dog. Just walk your hands forward a bit. And again, we've been taught so often that back and down but that really limits our scapula thoracic mobility. And so here, I really want you to allow that movement that we just did. And I want you to allow this lengthening here. And then the stabilization comes from the inner arm, from the thumb side. And then come forward into plank and move back into downward dog. Take your time. Just do this little sequence. It's really the same thing we did with the strap around the arm standing. Just one more after this. And then go ahead and come down onto your knees and rest in child's pose.
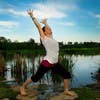
Take a few breaths. Just feel the work that you've done in your shoulders. And then go ahead and slowly make your way up to standing. We're going to move into warrior two with some interesting arm variations. So I'm going to have Chelsea turn to face the long edge but turn with your back to the camera. Step your feet wide. Turn your right leg out. Turn your left foot in and take your arms straight out to the side. So for warrior two. Just warm up the hips a little bit. So just straighten and bend that front knee a little bit. Straighten and bend. And of course, you're always moving when you take my classes with resistance. So you're not actually just flopping the knee back. You can take some of the classes I talked about with how to work the knees. But you're really, it's like you're moving through some thick viscous fluid. And then the next time you're bent, stay there. And then from there, interlace your hands on top of your head. So right on top. And then with resistance, you're creating your own internal resistance. Without moving your hands forward or back, you're going to stretch your arms straight up toward the ceiling. But like you're trying to lift a cinder block. Like there's a lot of weight on your hands and you're pushing up through space. And this will really inform the shoulders. And then start to come back down. Again, like you're trying to squish a cinder block onto your head. Don't forget about the work in the legs. And then one more time with some resistance. Stretch all the way up. Notice if your hands tend to come in front of you or behind you. So try to stay right above the crown of your head. And then with resistance, come all the way down. And then from here, stretch your arms straight out. Mm-hmm. Straighten that leg just a little bit and bend. Mm-hmm. One more time. Straighten and bend. Hang out here just a little longer and start to make some small arm circles. Because now we're moving the arm bone within the shoulder joint. So it's less of a scapula here. Change directions. I won't make you do this too long. But I just want you to use this to notice that there's two parts of the shoulder. There's actually more three. But you get the idea is the arm bone moving in the scapula and then there's a scapula moving relative to the rib cage. And then go ahead and lower your hands. Stretch your legs straight. Turn your right foot in. Turn your left leg all the way out. And warrior two on this side. Start with your arms stretched out. Do some resistance works and work in the legs. So just straighten and bend a few times. I like to do this before you do the resistance work on your head because I think it's easier to find creating your own internal resistance in the lower body. You're just mostly stronger there. Do one more. Like you're moving through a thick fluid. And then put your hands on top of your head. Interlace your hands the opposite way. And it's really like you're trying to with resistance stretch the arms up. The resistance is allowing your shoulders to lift just a little bit but with strength and control instead of just doing what they want to do. And then start to lower down. How many did we do two? But on the other side we did two right? So we'll do two here and stretch all the way up. Good. And all the way down. So you should be working at maximum effort. And then stretch your arms straight out and start to do some small circles. Notice if these circles look a little like ovals or like lines. Change directions. Arms should be getting a little tired now. And then go ahead and lower the arms and straighten the leg and step your feet together. Go ahead and grab your strap. You can go ahead and grab that. And you're going to make like depending on how long your strap is you're going to hold about twice shoulder length. So we have a nice long 10-foot belt here so Chelsea can turn around. And you'll probably fold it in half would be my guess. And maybe even in half again. Just so the buckle doesn't you know knock around and break your favorite vase. Okay so step to the front of your mat. Turn sideways. And step your right foot back into crescent. Good. From here you're going to take your arms straight up and behind you. Mm-hmm. If you if you're running out of space, as Chelsea just did, you're gonna lengthen your arms out. So you're gonna have more space. Good. Yep. And now you're gonna add the legs. So as you come forward you're gonna come up a little bit. So unbend a little. Good. And as you go back you're gonna lower down a little bit. So you're pulsing the legs and working the shoulders at the same time.
If this is even a challenge for you a TheraBand is also nice has a little bit more give. So make sure that you're making the movement smooth and that it's not like a ratchet wrench. So that you are not just kind of skipping certain joint positions. And then come all the way up. And step your right foot forward. And switch legs. Step your left foot back. Now the length should be just right. And take one time just go up and over. So now we're really moving the shoulder or the humerus, the arm bone in the shoulder joint and the scapular are moving as well. And then start adding the legs. As you go back you sit a little bit deeper. And as you go forward you come up just a little bit. So it's a small pulse and controlled movement rather than just a static pose. Nice. How the arms doing? Do one more. After this last one go ahead and bring the strap forward. Step all the way up. Good. And just take a little break. You're gonna keep the belt because you're gonna do some internal external rotation now just to challenge the shoulders. So go ahead and turn on face the camera at Chelsea. So this will do an Utkatasana. Yay. So stretch your arms overhead with the belt. You'll sit back in Utkatasana. And you'll keep one arm in external rotation. And the other one will start to internally rotate. Nice. And then you'll go the other way. So again you're you're exploring the full range in the shoulder joint. But what is really so great about this is you're really learning to get your pecs to be strong while they're being stretched. You're learning a lot of control here in a lot of joint positions. Most people bring their arms overhead and start to fall forward. Good. Can you do one more on each side? Yeah. Keep pressing through the feet and feeling the chest lift here. Great. Last one. Good. Bring the arms straight up. Bring it out in front of you. Stand all the way up. And I'll take the belt for now. You still need the belt so just set it aside. Okay go ahead and step to the top of your mat. From here stretch your arms all the way out and up. Just going to sun salutate your way to the floor. Exhale go all the way down into a forward bend. Let's you hang out in a forward bend for a minute. You totally deserve it. Start to straighten the legs again. Some resistance however. Mm-hmm there you go. Nice. And then plant your palms and step all the way back into a downward dog. Notice how your shoulders feel in this downward dog compared to the first downward dog we did. Come forward into plank. Be nice and strong. Lower all the way down to the floor. Nice and slow. Arms are tired. And rest. Make a pillow with your hands. Okay go ahead and turn your forehead down. Grab your strap if you have it handy. It's the same work we're doing so it's going to be that same length. You're going to place the strap out in front of you and go ahead and reach for the ends of the strap. You might need to hold on to the buckle Chelsea. And you'll do shalabasana sort of. It's not going to be a big back bend but it's going to really show you how much the chest relies on what the shoulders can do and how much the back relies on what the shoulders can do. So from here you'll lift your chest just a little bit. Yeah and then keep your chest lifted and take the strap all the way overhead just like we did before. It's a lot harder to do on your stomach because the floor is in the way and you can't cheat. So if you found this easy and crescent that's because you were already in a bit of a back bend and here you the floor really keeps you honest. So try and do three and if this is a challenge for you after Chelsea's done her three and everyone else has done their three I'll show you a really good modification. Great. Do just one more and come forward and rest. So if doing both arms at the same time with the tension the strap is a challenge you're welcome to do one arm at a time and you just give yourself a little obstacle. So I'm just going to roll up the strap to create a little made-up obstacle but you can use anything you have at home. A yoga block is a really good obstacle. This is just what we have right here and what you would do go ahead and stretch your left arm out Chelsea. You would set up a little obstacle and then you would try to lift your arm up and over the obstacle and bring it back towards your hips all the way back. Now that's just a little low strap but you can you can bring your arm all the way down yep and then go back up and over the obstacle but you can imagine if you had a little tower of blocks there you could challenge yourself more and more. So it's a really good place to start one shoulder at a time so just so you have some options. So if you found that challenging which many people do Chelsea just does this a lot because I make her do it all the time. We do this in teacher training a lot. I'm going to show you a modification that you can do with a single arm that really starts to get that shoulder mobility happening. So go ahead and grab your block and we'll show you from there. So you'll take your block and you'll set it up as an obstacle. So I'm going to set it out here in the way of Chelsea. She's going to stretch her left arm out and what you'll try and do just going to do one arm at a time is you'll lift the arm up and over the block and bring the hip the arm all the way down to your hip. So you're having to clear the block and then you'll go back forward again and sometimes is a really great place to start. It's only one arm and then you can actually start to challenge yourself and start stacking a couple blocks. Do one more Chelsea. So you can see that a second block would definitely increase the challenge and then you might be ready for the two arms at the same time. Great. While you have your block, I've got a egg block here. The reason I like it for what we're about to do is because this block is a little longer than most blocks. So if you have broader shoulders or less yielding shoulders sometimes this works a little bit better. You can also take two blocks and sort of put them together to make them a little bit longer if that works for you. But go ahead and bring your forehead down and stretch your hands back behind you and I'm just going to put the block into Chelsea's arms. You're gonna put it right between your palms and you're gonna stretch your arms straight.
You can start to lift your chest here. You're not gonna go very far. You really have to engage the legs. Normally we just end up clasping our hands together and rolling our shoulders forward to do that and all of the effort is lost. This is a tremendous amount of work in the back of the arm and you're all you're trying to do is straighten the arms toward the heels. You're not interested in lifting up. This is way harder than clasping. So I always recommend people start with this and while you're doing it make sure you're engaging your chest. So lift up just a little bit more and slowly come down and rest. How's that? You can also do that standing but again the floor keeps you honest. You can't cheat. Okay one more pec stretch so that you understand what I'm talking about with resistance work. This is a really popular physical therapy stretch for the pec minor or pecs. It's the door stretch where you bring your arm into sort of cactus position and you stand in a doorway and you start to stretch the pec. The issue is that many people don't use their muscles and they end up just stretching the ligaments of the shoulder which we don't really need to do. So we're going to do that same stretch here on the floor with resistance so you don't need a doorway. So go ahead and let's start right side. So Chelsea bring your right arm to cactus and you'll move your left arm wherever you need to. You'll probably put it by your side because you'll have to push and you'll bend your knees a little bit as you roll over. So you're going to end up in a little bit of a fetal position. It's not going to be far but what I want you to do is push into the floor so that you feel the chest muscles, the pecs, engaging quite a bit. If you relax them the stretch will change to the front of the shoulder and I don't want you to stretch the shoulder joint but rather the pecs. You feel that? And so your range is going to depend. I know many of you could actually roll over into bridge pose but see how far you can go without losing this muscle strength and that's going to be less range. So again it's this isometric control that you have and then slowly roll onto your stomach and rest before you do the other side. We have this, how do I say it? Like a little bit misguided that we think that all stretching requires muscle relaxation and I have a little different take. I believe that when you get a muscle in a stretched position it's more beneficial to have strength and control than it is just to have passive range. So when you're doing this door stretch or floor stretch passively we have more range but how much active range do you have? And I have a little clip on here on yoga anytime that discusses active passive range in tree pose. You might check that out. So go ahead and do your left arm. So set it up in goal pose so your elbows are in line with your shoulder. You're at 90 degrees all around. Place your right hand on the floor, bend your knees a bit as you roll over onto your left hip and again you could, I know you could go a lot further passively. You could probably just roll over onto your back and it might feel really good but in order to give more information and more strength and more control to the pec you're just going to find some contraction. You're pushing into the floor as you're resisting at the same time and trying to move away. Just a couple more breaths and then slowly roll back onto your stomach. Nice.
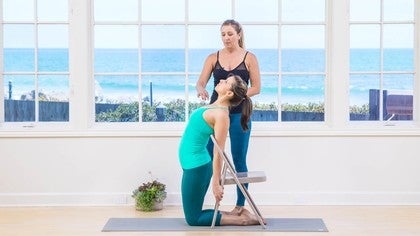
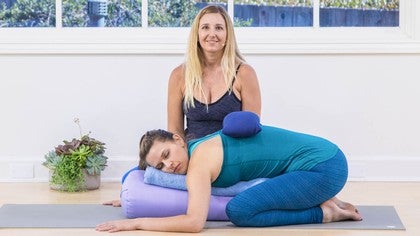
Place your hands underneath your shoulders, tuck your toes under, press yourself all the way up to plank in one straight line and downward dog if your arms have the strength and then go ahead and just walk your feet forward towards your hands and slowly come up. You can have your hands on your hips or dangling whatever you prefer. Okay so for the rest of the poses go ahead and grab your chair. So this is one of my favorite backbends. It's standing camel using a chair that really incorporates everything we've talked about. Your shoulder blades have to move, your chest has to lift, your pecs have to stretch but they're not inactive. That's the key. So you'll place the chair behind you just like this facing away from you and if you have a different chair at home the height might vary but that's okay. You can just work with it and stand on something if you need to or elevate the chair and place your hands on the back of the chair. Great. You're externally rotating so the fingertips are on the other side of the chair and you're going to push into the chair to lift your chest up. So you're going into camel. It's a big backbend and you can start to walk your hands down the chair if you have the space but the idea is that all of this is lifting and all of the pecs and the chest are stretching and contracting at the same time. Take your head back if you like as long as it's being supported by the rest of your spine. Nice. Always just make sure that your hips are neutral here and your legs are strong and then go ahead and tuck your chin and come all the way up. Nice. How's that feel? Yeah? Okay. Let's just do one more backbend but let's just switch it up with a little twist. Go ahead and turn your chair sideways and go ahead and sit in the chair in a lunge position. You can do your right leg forward and you're sitting sideways in a lunge position. Take your left arm and hold on underneath the chair back. Take your right arm and hold on top of the chair back. Go ahead and lean forward a bit because you're going to twist and what you're doing is you're pulling with your left arm and pushing with your right arm. Come forward more so you're going to twist and the left shoulder blade that you're pulling with is going to move away from the spine and the right shoulder that you're pushing with is going to move toward the spine and that will actually help you twist. It'll help your spine move and then slowly come on up and switch sides. Just turn around. So the right arm goes under now. You're twisting to the left. The right arm goes under. Lean forward more so yes and the top arm pushes so the elbow can go up. Great and the right arm that you're pulling with that you're trying to pull the shoulder blade away from the spine and the left shoulder you're pulling it in toward the spine and that action has you twist more to the left. Couple more breaths. Keep pushing, keep pulling, keep turning and then slowly and twist. Great. Come all the way up to standing. Now you'll kneel with the chair in the same position. Instead of standing in front of it you'll kneel in front of it. So tuck your feet underneath the chair. This chair back is going to help give some feedback to what the chest has to do to get the shoulders to move back. So what you do now is you loop your hands through the inside of the chair and start walking your hands down the chair legs as you come up into camel. This is my favorite camel variation. The back of the chair is pushing the chest up. The pecs here are stretching. The shoulders are moving but everything is strong. The more you push into the chair the more isometric contraction you can create. And you can take the head back only if that's comfortable and if it's well supportive the neck is well supported by the rest of the spine. And then go ahead and tuck your chin and slowly come all the way up and you can move the chair and just sit back on your heels for a moment and rest. Before we move into the restorative part to wind down just sort of feel your shoulders, feel your chest, feel how you're standing. A lot of the forward shoulder posture is less about muscle length, less about short and long muscles, and it's more just about your nervous system understanding that joint position. So this work is actually it's really changing your brain. It's not really your body. It's kind of a secret. Okay so go ahead and get your bolster and we'll go from there. Okay so we'll just unwind from all that backbend practice with just a gentle face down twist and a forward bend and then set you up for Shavasana. So you'll take your bolster the long way. Chelsea want to move back a little bit? And you will sit with your pelvis on the right side of your pelvis at the short edge of the bolster. Let's move you back just a little bit more. Good. And you can just sort of pinwheel your legs or stack them. You can put a blanket between them, whatever is comfortable, and then place your hands on either side of the bolster and start to turn your chest so that your left chest comes down first. That's the work. The left chest tries to come down first and then you can turn your head either way you want. To the knees is easier on the neck. Away from the knees is a little bit more. And again the options with the legs vary. You're welcome to put blanket in between the legs but I think Chelsea's good here and she's just gonna go. It's like a child's pose but there's a little element of a twist into it and the idea here is that the shoulders completely relax because they just did a lot of work. So we want to leave them feeling good. If you have a sandbag or somebody nearby that can put a sandbag on your back then that's always a nice treat.
You can turn your head away from the knees. If that's too much then you can always turn back and just scan a little bit. Are you holding anywhere? Can you relax the shoulders more? If they're not relaxed maybe putting a blanket underneath one of the arms could help. And because this is more of an active class I'm just unwinding you. We won't stay here very long so go ahead and turn your face back to look at the knees. And then slowly press your hands into the floor and come all the way up and then turn around and do the other side. So hand on either side of the bolster, turn your chest down, come all the way forward. Right chest goes down first, head can face either way. You can do anything you want with the legs. You can just stack them or pinwheel them and just completely relax. The face down position has a very relaxing effect on the body and the nervous system and a lot of the backbends and chest and shoulder work tends to stimulate us. So if it's an evening class you really want to relish in these restorative poses. If you want to turn your head away from the knees you can. You can just notice where you're holding any tension. If you just can't get comfortable here move the bolster aside, lay on your back and just do a supine twist. And after a couple more breaths you'll slowly turn your head back to your knees. Rest there for a moment. It's a little easier on the neck so you want to ease your way out and then slowly press into the mat and come all the way up. And I never like to end on a twisted position because then you feel crooked, right? So we're just gonna end with a gentle forward bend. I'm gonna let you choose legs together or legs apart. What do you prefer? Legs together. So legs wide, upavishta konasana or legs together, pashimo tenasana. And you can let it be very passive. I don't know how you like your bolster. Find any bolster setup that works for you. Nice. I'm gonna give just a little bit extra height. So the head is fully supported. And again don't need to be here long. You can save the longer holds for a restorative class. It's just to unwind from all the active poses and all the energizing poses. Just to calm us down so that your heart's not racing in shavasana. You might notice after a couple breaths that you have to adjust the props just a little bit so you can relax more. That's fine. Just try not to fidget. Just try to find a position where you can be as relaxed as possible and feel as supported as possible. And then slowly make your way back up. Set your props aside and turn around. And just make your way down into shavasana as comfortably as you can. I'm gonna give you a bolster under your knees just because it's here and you have one. And after the back bends it might feel nice on the lower back. You can even take the blanket if you have one. You don't need to but just add a little bit of weight across the belly. Has that for your lower back. Just so that the low back gets a sense of support and relaxation. Take a couple deep breaths. And if you want to do the body scan that I mentioned before class you can do that because you are going to have a whole different relationship to your shoulders and your rib cage and how they connect to the floor after doing this class. And it's the acknowledgement and the taking the time to pay attention to the changes that actually make them longer lasting. So we have if we just do the work and then jump up and go the work doesn't stay with us in the same way. Nervous system almost needs a snapshot of it.
And you're also welcome to stay here just like this. Propped and supported for good five to seven minutes. It's usually what I recommend for a short class. 10 and 15 is also good. And if you're ready to come up and join us you'll slowly start to deepen your inhalations and lengthen your exhalations. Make some small familiar movements. If the blanket is resting on you you'll just move it to the side. And then bend your knees place your feet either on the floor on the bolster whatever you have underneath you. And stretch your arms overhead and roll over onto your side. From there use your top hand press into the floor and come all the way up to seated. Cross your legs comfortably. Bring your hands together at your chest and close your eyes. With your hands at your chest palms together can you just press just a little bit you're not pressing hard but you're pressing just ever so slightly almost like you're pressing the outer palms into the inner palms but the inner palms are pulling away so you're kind of doing opposite action. And when you do that what do you notice in the shoulders and the chest? Can you just notice it shouldn't be effort but can you notice a sense of aliveness sense of lift? And can you keep that lift as you gently bow your head down so it's not a sense of sinking it's a sense of lightness. And then you can lift your chin you can release your hands without losing that feeling and slowly open your eyes. Thanks for joining us today. Thank you Chelsea for all that work. Namaste.
Anatomy for Yogis: Jules Mitchell
Comments
You need to be a subscriber to post a comment.
Please Log In or Create an Account to start your free trial.
