Description
About This Video
Transcript
Read Full Transcript
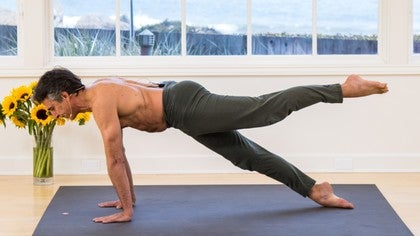
Welcome back. This next specialty practice is to develop more strength in the shoulders and you want to have access to a wall. We'll be doing our handstands next to the wall. The practice will begin in plank pose. Have your hands shoulder-width apart. Tuck your toes forward and straighten your legs. Make sure your shoulders are directly over the hands. Hips in line with your shoulders and heels. Pull the navel up a little, tailbone down a little. Breathe slowly, following the breath through the back into the pelvic floor. On the exhale, softening through the belly, pull the navel up a little, tailbone down, press through the heels. Keeping your hands where they are, slowly lean the shoulders forward, roll over the toes onto the tops of the feet, not the toe knuckles. So the tops of the feet are flat, your hips are still in line with the heels and shoulders. Keep your breathing slow. If you want to go a little deeper here, lift your left leg horizontal to the floor, right leg working strongly, and then change legs. Don't let your hips drop, keep your hips up, and then feet flat. And now slowly bend your legs, drop your knees to the floor, take your hands four to six inches wider, turn the fingers out 90 degrees, bring your pelvis forward, inhale slowly, exhale down, inhale up, exhale down, inhale up, exhale down, inhale up, two more, exhale down, inhale up, exhale down, inhale up. Take your hands two to three inches wider, keep your knees down, exhale down, inhale up, exhale down, inhale up, down, up, two more, down, up, last one, down, up. Inhale to the right, keep your left arm straight, only going as low as you can keep the opposite arm straight. Inhale middle, exhale left, right arm straight, inhale middle, exhale right, inhale up, exhale left, inhale up, exhale right, inhale up, exhale left, inhale up, two more, right inhale up, left inhale up, Last set. Exhale right. Inhale up. Exhale left. Inhale up. Now this last set you can stay on your knees but if you want to challenge, straighten your legs. Exhale middle. Inhale up. Exhale down. Inhale up. Down. Up. Down. Up. Down. Up. Last one. Down. Up. Exhale right. Up. Exhale left. Up. Only go as low as you can keep the opposite arm straight. Right. Inhale up. Left. Inhale up. Right. Inhale up. Left. Inhale up. Two more. Right. Inhale up. Left. Inhale up. Right. Inhale up. Left. Inhale up. Drop the knees to the floor.
Bring your hands in shoulder-width apart. Take your knees a little wider. Drop your pelvis forward, head upright. Turn the right wrist over. Take weight on the wrist, arms straight.
If this is too intense, move the hand closer to your knee. And then clench the fist. Hip-syncing, spine-lifting. Change hands. Turn the left wrist over.
Take weight on the wrist, arms straight, hips sinking, head upright. Shoulder slightly forward, chest dropping. Clench your right fist. Now you can repeat first side, then second side. If you can, both wrists.
Both wrists, clench both fists. Three push-ups here. Exhale down. Inhale up. Down.
Up. Down. And up. With your toes pointing back, slowly straighten your legs. Press back into dog pose on your toe knuckles.
Slow your breath down. Each inhale, breathe through the back body, spine rounding up a little. Each exhale, hips and shoulders soften, arms and legs lengthen. Then turn your right foot in 90 degrees. Stand on the outer arch of the foot.
Place your left foot on top of the right. Press the sole of the right foot flat. Lift your head, look forward. Move your right hand to the midline of your mat. Keeping your feet together, looking down, take your left arm up.
Keep the hips up. Navel in, tailbone forward. If you wanna go deeper, bend your left leg. Left hand grabs the big toe. And if you can, straighten your leg vertically upward.
Then drop the left foot to the right. Then drop the left foot to the floor behind you. Left hand to the floor behind you, fingers forward. Lift your hips up, shoulders forward, head back. Neck resting in the trapezius.
Shoulders forward, hips up. And now exhaling, straightening the legs. Drop the hips between your arms, butt off the floor. Press down into your hands, bend forward. Inhale, coming up, hips up, shoulders forward, head back.
Exhaling, straightening the legs, hips through the arms. Press down into the hand, bend forward. One more, inhale up. Exhale down. And hold here.
Inhale slowly. Exhale, walk the heels back. Lift your butt higher behind you. One more, inhale. And on the exhale, when you're empty, lift your feet off the floor.
Try it again. Good, and now spinning to the left, stand on the outer arch of your left foot. Place the right foot on top of the left. Press the sole of the left foot flat. Lift your head, look forward.
Place your left hand on the midline of the mat. Take your right arm vertical. Keep your hips up, navel in towards the spine, tailbone forward. If you're going further, bend the right leg. Right hand grabs the big toe, and slowly straighten the right leg up.
And then dropping the foot back into dog pose. Release your head. Slow your breath down. Each inhale, let the fullness of your breath move through the back body, spine rounding. Each exhale, hips and shoulders soften, they sink a little.
Simultaneous length in the arms and legs. Release your head. And inhale coming out, coming down onto your knees. And now we'll move towards the wall for the remainder of the handstand practice. We'll complete the shoulder work with handstands at the wall.
If handstands isn't a regular part of your practice, you might want to leave this part out or attempt what you can and then keep practicing until you can actually kick up to the wall. We'll start in dog pose with your hands four to six inches away from the wall. Have your hands shoulder width apart. Have your feet hip width apart. And spend a moment here, three to four cycles of breath in dog pose, releasing your head, softening into your shoulders, working the arms, softening into the hips, working your legs.
You can use this time in dog pose to see yourself kicking up, coming up to the wall, maybe for the first time. When you're ready, lift your head, look forward near the wall. Walk your feet forward until your arms are almost vertical. Feeling the full weight of your upper body onto your hands, feel the texture of your mat with the hand. You're gonna lift one leg, point the toe and keep that lifted leg straight.
Try not to bend the knee. When you're ready, keep that lifted leg straight, drop the foot, swing the leg up. And as you swing that lifted leg up, the other leg just follows it. It's quite effortless with the opposite leg. If you don't get up on the first attempt, keep trying, keep swinging the leg up till you're up.
Once you're up, press down into your hands, pull your navel in towards the spine slightly, tailbone forward, and your heels will lightly rest on the wall. Keep your breathing slow. As you pull the navel in towards the spine, tailbone forward, you might feel the heels come off the wall. And then when you're ready to come down, coming down with one foot, stand with your feet hip width apart, and to counter pose on the wrist, step on your palms, tips of the toes at the wrist, and then releasing the head and shoulders, slowly lean your hips forward. Let your head hang.
And then lean your hips back, turn your fingers out to the side 90 degrees, take your hands a little further apart, and extend your thumbs towards your heels, and then lean your hips forward, stepping firmly onto the thumbs, curl your fingers over your toes. And then lean your hips back, come off. The second variation for this shoulder stand work is to turn your fingers out 90 degrees to the sides, take your hands a little wider than shoulder width, start in dog pose again, release your head, release your collarbones, press the arms straighter. When you're ready to kick up, lift your head, look forward towards the wall, walk the feet forward till the arms are almost vertical, not vertical, keep looking down at the floor, lift one leg, point the toes, so that lifted leg is firm pointing. When you're ready to kick, drop the foot, swing the leg up.
If you don't make it up, come down, swing it up again, and the other leg follows. Once you're up, press down into the hands, pull the navel in towards the spine, pull the tailbone forward, and the heels just lightly rest on the wall. Eventually, with the navel in tailbone forward, the heels come off the wall. Try not to pull them off the wall, they just float off the wall. Coming down, one foot at a time, feet hip width apart, again, release your head, step on your palms, release your head and shoulders, lean your hips slowly forward.
Then lean your hips back, turn the fingers out, take your hands a little wider, step on your thumbs, lean your hips forward, curl the fingers over your toes, release your head and shoulders, and release. Another variation, third variation, this one takes a little bit of mental preparation. You're gonna turn your fingers pointing 180 degrees away from the wall. And for some, the mental challenge of this, this may be opposed for you just here for a while until you feel into the wrist so the wrists are spacious and you feel firmly supported. The hands here are six to eight inches away from the wall to make a little bit of room for your head.
When you're ready, with the arms vertical here, lift one leg, point the toe, you have to coordinate the lifting, the swinging of the leg up with the dropping of your head looking forward away from the wall. It's mentally prepared when you're ready, drop the foot, swing the leg up, drop the head, and once you're up, pull the navel in towards the wall, release your head. Your shoulders may or may not be on the wall. Slow, even breathing. When you're ready to come down, one leg first, release.
Stepping on your palms, tips of the toes at the wrist. Slide your heels a little wider, lean forward, weight on the instep side of the foot, release your head and shoulders. Then lean your hips back, turn the fingers out to the side, take your hands a little wider, extend your thumbs towards your heels, step on your thumbs, lean your hips forward, curl the fingers over your toes. And coming off, and this last one, it's actually, for me, it's the most difficult one. Your hands go right at the baseboard.
So the longest finger of your hand is gently touching the baseboard. Start in dog pose. Slow your breath down. When you're ready, lift your head, walk the feet forward till the arms are almost vertical. Like the last pose, when you swing the leg up, you have to drop your head and look forward.
Lift one leg, point the toe. When you're ready, drop the foot, swing the leg up. And when you're up, pull the navel in, flatten your back to the wall, press down into your hands. So this isn't a free balance pose, this is a completely wall supported pose. Release your head, work your arms, pull the navel in, back flat on the wall.
Coming down, one foot, feet hip width apart, and stepping on the palms. Heels wide. Lean forward, weight on the instep side of the foot, release your head and shoulders. Then lean your hips back, turn the fingers out. Take your hands a little wider, step on your thumbs, lean your hips forward, curl.
And coming off, slowly stand, curling the spine up, head last. So this shoulder sequence, you can gradually build up your stamina, staying longer and longer. Count the cycles of your breath. We were doing three to four cycles of breathing here in each of these variations. As you get more accomplished, you can hold it up to a minute in each variation.
This completes the shoulder sequence. Thank you very much.
LEVITYoga: Deepen Your Practice
Comments
You need to be a subscriber to post a comment.
Please Log In or Create an Account to start your free trial.


